The Windows 10 on-screen keyboard works. How to remove the on-screen keyboard from Windows startup
There are several types of keyboards: physical and on-screen. The latter is not necessarily sensory. It is designed to navigate between computer components and enter text. You can select the keys of such a virtual keyboard using either a mouse or another input device.
Enable the on-screen keyboard in the Windows 10 operating system
To turn on on-screen keyboard in Windows 10, you can use several simple methods.
Method No. 1
- Click right click mouse on an empty space on the taskbar and select “Show button touch keyboard».
- A small keyboard will appear on the taskbar with one letter or number highlighted. Click on it with the mouse to activate the virtual keyboard.
![]()
If this method does not work, move on to the second.
Method No. 2
- Click “Start”, select “All applications”, then expand the “Accessibility” branch. Find “On-screen keyboard” and right-click on the element. Select “Pin to Start Screen.”

Method No. 3
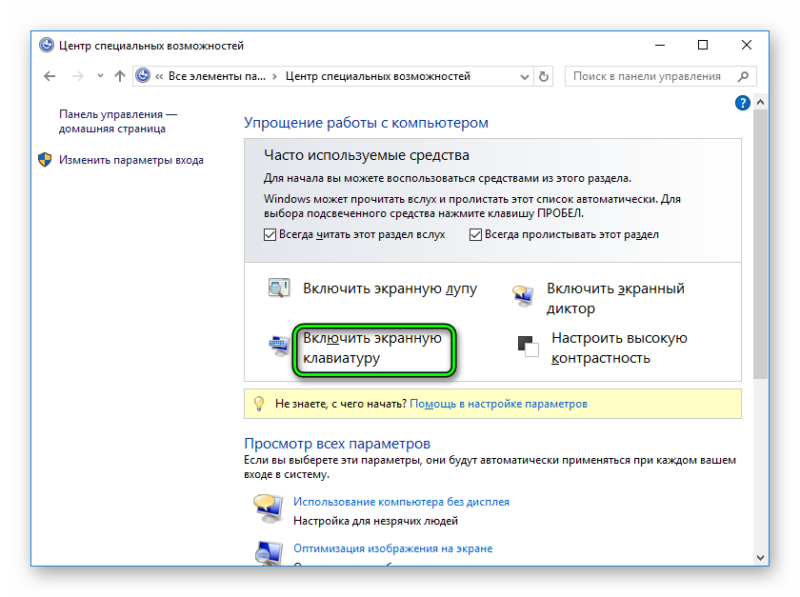
- Click “Start”, “Control Panel”. Select the “Special Features” section. If the viewing mode is set to “Small icons”, then you can immediately select “Center” special features».
- A new window will open. Click "Enable on-screen keyboard". Also in this section you can disable or configure the use of information input means (keyboard and mouse).

Method No. 4
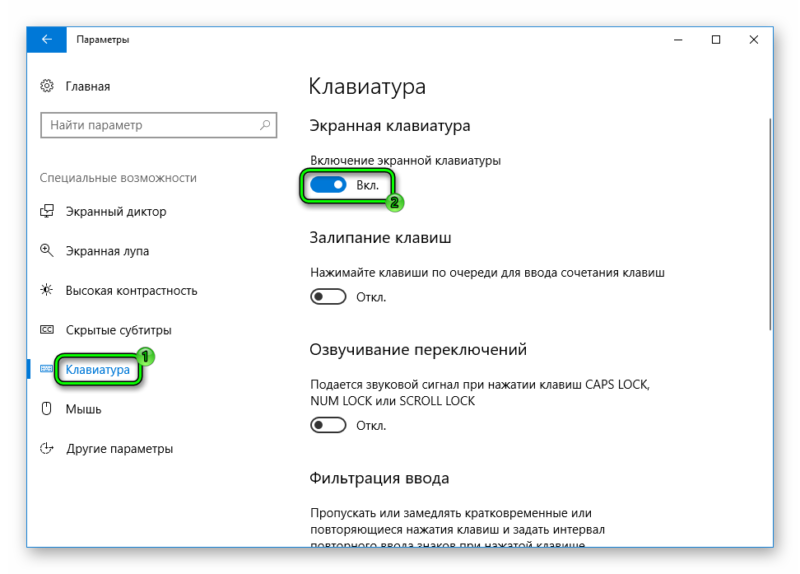
- Click “Start”, “Settings” and select “Accessibility”.
- A new window will open. In the left menu, select the “Keyboard” section. Drag the slider to the “On” position to activate the on-screen keyboard.
To enable the touch keyboard in tablet mode, the following methods will work.
Method No. 5
- Click “Start”, select “Settings” and “Devices”.
- In the left menu, select “Input” and drag the slider to the “On” position in the “Automatically display the touch keyboard...” item.
- Whenever the keyboard is disconnected from your Windows 10 PC, a touch keyboard will appear on your monitor screen.
What to do if the on-screen keyboard does not work?
- If your on-screen keyboard doesn't work, it may be set to the wrong mode. The fact is that virtual keyboard works separately in normal mode and tablet mode.
- Possibly not included required service. To activate it, you need to do the following actions. Press “Win+R” and enter “msc”.

- Select “Touch Keyboard and Handwriting Panel Service” from the list.

Double-click the service settings, set the value to “Enabled” and restart the computer.
The on-screen keyboard is a special Windows capabilities 10. It is designed to help people with special needs when working on a computer. But this function will be useful for any user when their physical keyboard fails. Virtual input will help replace it, since the panel contains all the keys necessary for comfortable operation PC.
Using the Windows 10 virtual keyboard may also be necessary to increase the security of personal data. The essence of this option is that the computer may be infected with a keylogger. This is a special type of virus that reads keyboard strokes. Accordingly, your password may end up in the hands of attackers. And it is believed that screen input will avoid this situation.
Launching the on-screen keyboard
Now let's look at options for enabling the virtual keyboard both from the system and when logging into it. Moreover, the methods differ slightly.
Option 1: Login Screen
It is quite possible that the physical keyboard is broken, but you urgently need access to user files on the computer. Account is under a password, the input of which in a standard way impossible. The Win 10 on-screen keyboard will definitely come in handy here. It is launched in the following way:
- Select a user on the login screen.
- There is an icon in the lower right corner "Special abilities".
- Slider "Screen keyboard" put it in the activation position.
- Click on any free place to stop the announcer sound.
- Move the cursor to the password entry field.
- Enter secret combination and confirm your login.
Option 2: System tray icon
The taskbar is the area at the bottom of the screen that consists of menus. "Start", notification area and pinned and current programs. One of the tray elements can be the call icon needed in in this case functions.
Right-click on the taskbar and activate the item “Show touch button...”.
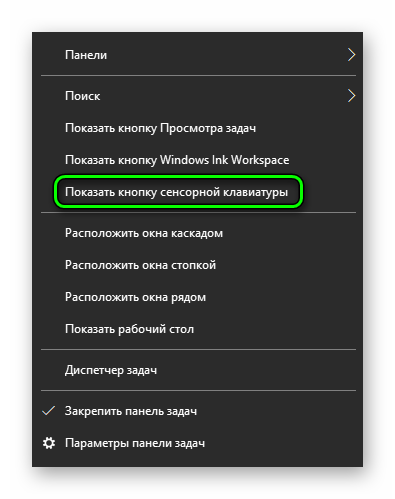
Click on the new icon and the corresponding element will open.
Option 3: Accessibility
Open menu "Start". At the bottom left is a gear-shaped icon. If you hover over it with the mouse, a signature will appear "Options". Click on it and open "Special abilities". The touch input activation point is located in the window "Keyboard".
You can still do everything through "Control Panel". The easiest way to open it is through a search in Start. Switch the view of elements to icons. Towards the end of the list there is an item "Ease of Access Center". There is a point "Enable on-screen keyboard".
There are more keys quick access To this section- Win + U.
Option 4: Search
Search is a universal option for accessing any system and installed components. It is called by simultaneously pressing Win + S. Enter in the line "screen" and select the second item from the list.
You can right-click on to the desired point and place it on the taskbar or in the list of Metro tiles located in the menu "Start".
Option 5: Run
Go to "Service -Windows" in Pusk. From there call the element "Run". Enter the command osk and press "OK".
What to do if several keys on your computer keyboard are covered or stuck, and you urgently need to type text. And if it breaks down at all and at this time it is necessary to urgently send email?! The on-screen keyboard will come to the rescue. In Windows 10, it was inherited from previous version— Windows 8. This convenient tool can become indispensable for people with disabilities. And also on-screen Windows keyboard will help you if you suspect that a spyware program, keylogger, is installed on your computer, intercepting keystrokes. Well, if you have a tablet on an operating system from Microsoft, then without it you will not be able to operate the device normally.
She looks like this:

There are no differences from the real one in the number of keys and their location. There are cursor arrows, language switching, page scrolling, etc. If necessary, you can activate function keys F1…F12. This is done by pressing the "Fn" button.

You can also enable the block on the Windows 10 on-screen keyboard number keys, which is located on the right:

To do this, you need to click the “Options” button. The following window will open:

In it you need to check the box “Enable numeric keypad" As you can see, there are a lot of options here - there is a sound confirmation of keystrokes, customization of mouse controls, and even an analogue of the telephone T9 - “Text Prediction” prompts.
As you can see, the on-screen keyboard in Windows is located above all windows and can be moved across the entire window in any direction - left, right, up or down. It is also possible to place it across the entire width of the screen directly on the desktop under the taskbar. This is done by clicking the “Pin” button.
You can also make it transparent when not in use by turning on the “Disappear” option.
How to enable the on-screen keyboard
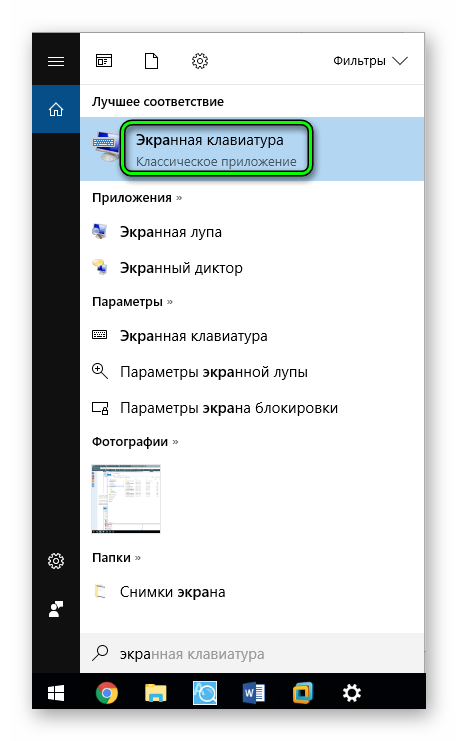
There are two ways to launch the keyboard on Windows screen 10. The first and easiest is to click the Start button and find it in the “Special” section. capabilities" list of all programs.

Or simply by typing the word “Screen” - as a result of the search you will see its shortcut in the list of found ones. This is a one-time launch of the virtual keyboard. After reboot operating system everything will have to be done again.
The second way to enable the on-screen keyboard in Windows is as follows. You need to go to the “Toolbox”, find the “Ease of Access Center” there and open the “Use your computer without a mouse or keyboard” section:

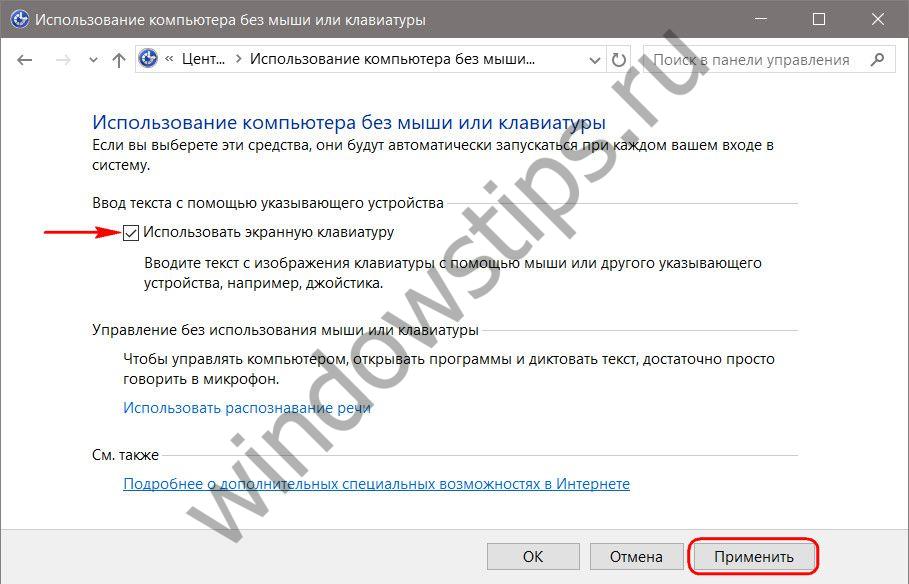
Check the box “Use on-screen keyboard” and click on the “Apply” button. After that, it will launch every time on the computer screen when the OS boots.
How to make sure that the on-screen keyboard does not start along with Windows, if such a nuance occurs? The on-screen keyboard usually starts up along with the system due to the fact that it was used at the stage Windows installations. In this case, the on-screen keyboard is automatically added to startup. Auto-start of the on-screen keyboard can also be the result of unconscious experiments with system settings by children or beginners. The on-screen keyboard cannot be removed from startup in the usual way, going to the “Startup” section as part of the standard task manager or an analogue implemented by third party programs. It is removed from startup (exactly as it is placed there) in the section system settings special features.
We go to the control panel and using its search engine we get to the Ease of Access Center. Using the Win+U hotkeys will make it easier and faster to get to this Center, but these hotkeys only work for Windows 7 and 8.1.
1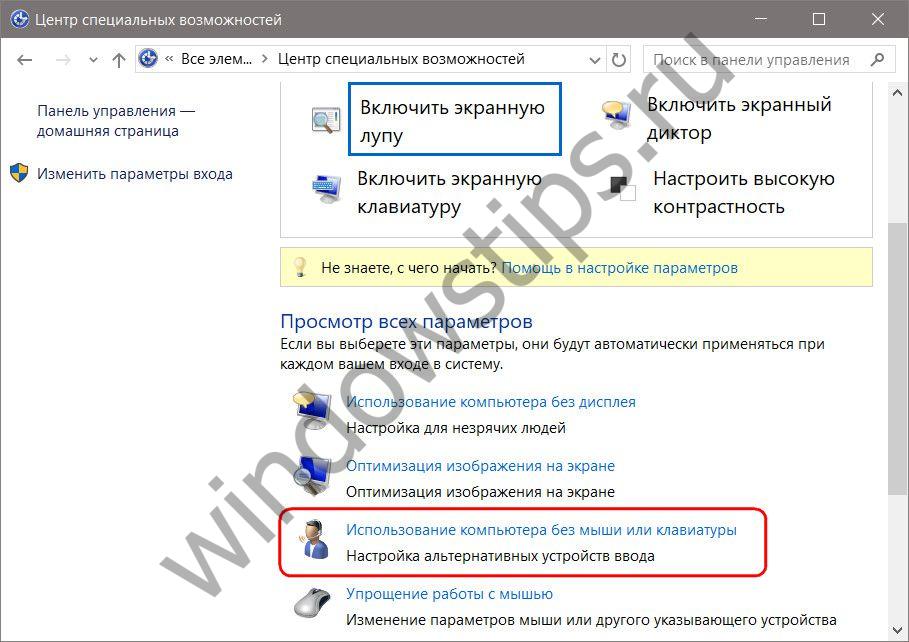 2
2 The first option in this section is the download option you are looking for along with Windows screen keyboards. To prevent the latter from starting along with the system, the “Use on-screen keyboard” option must be inactive. Uncheck the activity checkbox and apply the changes at the bottom of the window.
 3
3 The reverse process - checking this box if it is inactive - must be done by those who, on the contrary, are looking for a way to add an on-screen keyboard to the system startup.
Today I decided to write a post about how to remove the on-screen keyboard from Windows autorun 10. I probably wouldn’t do this, but Lately I decided to get rid of everything unnecessary, and not only on the computer. And to be honest, I’m tired of constantly virtual keyboard starts with Windows. It would be a different matter if I needed it, but it’s simply annoying.
One of the reasons why it began to appear is that I used it at the stage of installing the operating system, and after which it registered itself in startup. In another case - as a consequence of a system failure or incorrect setting The OS is undergoing some changes.
How to remove the on-screen keyboard
While reading the article, the thought probably crossed your mind: What’s the problem? Remove it from startup through some task manager, and that’s the end of it!
But it's not that simple. This method is not suitable; moreover, you can disable it only through the Ease of Access Center. Actually, that’s where it’s activated..
Well, let's take things in order...
So, using the Win+U hotkeys (for 7 and 8.1), we get to the “Ease of Access Center” faster than following it step by step, through the “Control Panel”, etc.
