First steps in Word. Video lessons Microsoft Word for Beginners from Andrey Sukhovoy
With this article I plan to open a series of lessons on a text editor Microsoft Word. Previously, I often had to do tutoring, that is, learning how to use a computer and application programs. People have different levels of training, so there were often cases when it was necessary to train a person from scratch, including various programs from Microsoft package Office, which also includes Word.
And I think that I did it quite successfully, judging by the reviews. By at least, my clients continued to quite successfully keep in touch with me and consulted me on various issues. When teaching any program, I tried first of all to imagine myself in the user’s place and explain it taking into account all those nuances that may be incomprehensible. In the case of the Word program, you must also take into account and know what keys are on the keyboard for and what they are for. Therefore, I will also take this point into account, and this lesson will even cover such an aspect as training in working with the keyboard. There is no way without this, since these are the very basics that you need to know.
And I think it’s normal when a person doesn’t understand something. The reasons may be different. Some didn’t have computer science at school, others did, but they didn’t explain exactly what was needed. So, for example, I studied computer science at school, but we mostly did what we drew in Paint program. That is, not even in Photoshop, which could really be useful in life. However, this topic can be discussed for a very long time.
All examples will be considered using the example package Microsoft Office 2010. But all of the above is also true for Office 2007 and newer packages. Since version 2007, which was different compared to previous versions redesigned interface, henceforth from the release software products this family, the interface remained essentially the same.
Getting started.
Actually after launch Microsoft programs Word, you can already start typing text. What might be incomprehensible to a novice and inexperienced user who is new to computers? Here are some nuances:
To capitalize a letter, hold down Shift key, press the letter you want to make capital.
To switch the language from Russian to English and vice versa, the combination is usually used Alt keys+ Shift. What does this designation mean? While holding down one of these 2 keys, press the other.
If you want to end a paragraph, use the Enter key to do this. When typing text, you don’t need to press anything specifically to move a line. Because the transition is carried out independently.
If you need to make a red line in the text (paragraph indent), then use the Tab key for this.
At the very top of the main program window is the main menu. There are tabs File, Home, Insert, Page Layout, Links, Mailings, Review, View, Settings. Depending on the version of the package you are using, your tabs may be arranged differently. But the essence does not change in any case.
We are now on the Home tab.

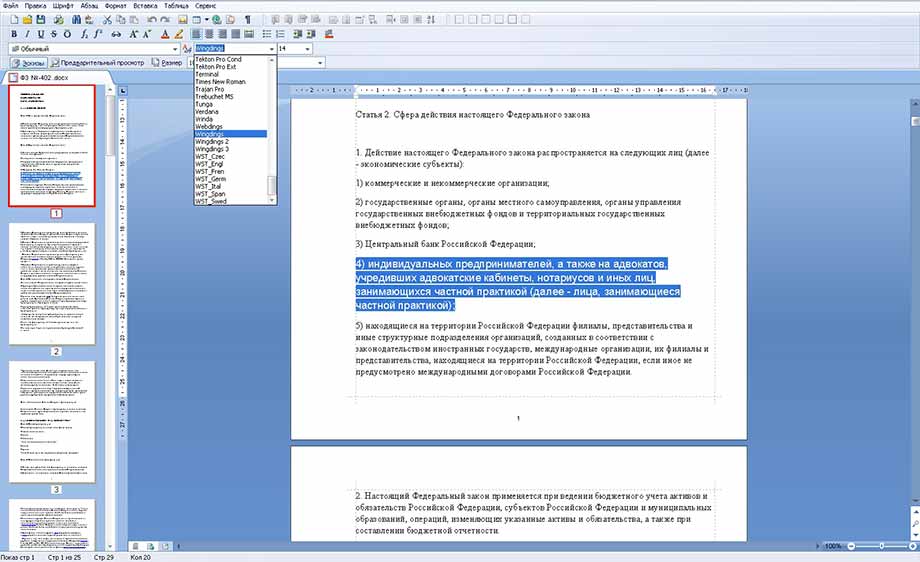
If we want to change the font typeface and font size, then we indicate the corresponding values (in the figure they are highlighted with a red frame). After this, if you suddenly want to cancel the selected style, you just need to press the combination Ctrl keys+ Space.
If, when choosing a font, you get a crappy text while typing, keep in mind that this only means that the font you have chosen does not contain Russian letters.

To make the typed text bold, you need to select the Zh, K button on the toolbar - the text will be printed in italics, H - underlined.
You started typing text, but then decided to return to the normal style, press Ctrl + Space. I recommend that you remember this combination in the future. Saves time, reduces unnecessary movements and generally makes life easier.
What else might be useful in the future? Well, these are first ways to select text. And it is selected either by moving the mouse over the selection area with the left mouse button pressed. Or using the Shift key and arrow keys. Well, or very different universal method. Hold down the Shift key and click the area where the selection begins, and then do the same by left-clicking where the selection area should end.
A user who wants to learn something new, in particular Word, first of all wants to learn how to work in Word. It’s good if there is a teacher who can and has the desire to give advice and give lessons computer literacy. What if he is not there? You can also rely on tutorials, of which there are many today, and learn lessons from them. However best choice is the study Word programs on one's own.
How they work in Word
So, when working with the Word program, an ordinary user without special skills performs the following operations:
- creates a document;
- prints letters and numbers;
- deals with its editing or formatting depending on the need;
- saves the document;
- prints it out.
Development office application begins with the creation of a document. Every inexperienced user wants to know how to create a document in a program. There is nothing complicated. To do this, click on the corresponding icon in the desktop panel. Typically, it looks like the letter W on a white background. We can assume that the document has been created. Now you need to start filling it.
Typing takes the most time. An inexperienced user, or user, immediately wonders how to print. There are a lot of techniques, as well as lessons that are ready to help you master the basics of typing letters. Again, the tutorial is ready to help. But the best method yet recognized as practical. That is, you need to open new document Word using the appropriate icon on the toolbar and start typing. It's not easy at first if you've never done typing before. However, over time it will become easier, typing speed will increase, and your fingers will remember the location of the keys on the keyboard. And you won’t have to wonder how to do this or that operation faster. Just don’t stop training, since a systematic approach is important in mastering any application.
Have you learned to type? It's time to start formatting the document. True, this can be done during the printing process, but it’s better after. All kinds of program tools help the user: increasing or decreasing the size of letters, color scheme, centering the typed text. If desired, you can add a table, a picture and any figure to the text of the user’s choice, who strives day by day to become a confident user of a personal computer.
The result can be saved to any location on your computer or external media. To do this, open “File”, then “Save As”, and then select a location for your first Word document. For example, this could be “Desktop”. If there is a need for a printer, then finished document can be printed using the “File” command, then “Print”. This is what the tutorial recommends.
Here are the basics of working with a Word text document. Thus, in order to learn something, including mastering a text application, you need to practice, you can read a tutorial.
How to quickly learn to work in Word? This is the main tool for a copywriter’s work, where he writes and edits articles according to his own style. This program also makes it easy to format articles so that the reader can read them easily and clearly. From this short article you will learn some points and ways on how to learn to work with Word.
Word is one of major programs which helps to work with texts is text editor It greatly simplifies the writing of articles and text processing; with it, you can easily create business or official correspondence. Write selling texts. This program is quite simple, and how can you quickly learn to work in Word? Read on and you will understand that even beginners can handle it. copywriters.
You need to know the simplest functions of this program and learn how to use them. How to select text and copy, then paste, and format articles. Here you can create tables, insert pictures, and customize fonts.
At the top of Word there are different buttons that will help you understand all the nuances of working with this program. Watch this video and you will understand how quickly you can learn to work in Word and how easy it is to learn how to create texts.
In Word there is such an opportunity to find out how many characters are in the text, it is located at the bottom left; by clicking on the number of words, which is located at the bottom of the program at the bottom left, you will see the number of characters in the text. Then click on this icon, and a window will appear where it will be written how many characters are in the article you wrote.
Or subscribe to my blog and you will receive lessons regularly to your email address.
About the author Tatyana Barkhatova
About the author: I was born and live in St. Petersburg (Leningrad). Received secondary specialized education: Trade school by profession as a salesperson - cashier and PC. Studied copywriting courses by Natalia Karya and Sergei Troubadour. Since 2009, I have been working remotely on exchanges: Techsale, Freelancers, FL.ru, Neotext, krasnoslov.ru and many others. etc. I have regular customers. I write selling articles, rewriting, copywriting, web writing, SEO, with keywords. I take orders for writing articles. I have written more than 500 articles on various topics. Uniqueness of articles 100% Created your own blog: All about copywriting and more. I participate in many information business affiliate programs. Prices for copywriting - 1000 cm. bsp. - 200 rub. Rewriting - 150 rub. I write on almost all topics except Law, Med, IT.The computer has many of the most different files a variety of formats. We use some files from these formats often, while we work with others extremely rarely or never at all. But there are also those in the computer that you simply need to know and be able to use. And one of them is doc files. These are the most various documents, with which all users who decide to master a computer begin their work. Of course, if you use your computer only for games and communicating on the Internet, then you can easily do without Word. But in this case, you can hardly be called a confident user. After all confident user- this is someone who knows how to perform basic operations on a computer (create a folder, copy, delete) and work with popular programs, including Word and Excel. In this review I will tell you how to use free program WindowsWord for viewing and editing Doc files.
Open the program. We need to open a new text document. To do this, click on the file, as shown in the picture

then click open button as shown below

We get this usual file as a result:

Saving the file is also very easy. You need to press the button with the floppy disk and the file will be saved

Now let's look at the document search function. After all, if a document is more than a dozen pages long, a search is often required. To do this on top panel tools, find the edit tab and search in it, as shown in the figure or simply by pressing Ctrl+F


There you can enter the words you are looking for.
But let's not forget that we are editing the text. Therefore, it is very important for us to work with the font. The WindowsWord program has a special Font window, which can be opened by clicking on the button in the top Font toolbar. Here you can easily change the font, font size, writing style (bold, bold, italic, strikethrough), as well as the font color and font background color. This is what the window looks like


Now let's look at working with tables. Everything is very simple here, to create a table, click on the table tab, create a table as shown below
In the window that opens, select the number of rows and columns, as well as the table scale

If you click on a table field right click mouse, in the menu that opens you can choose: cut, copy, paste, change font, paragraph, list parameters, you can add a line above or below, and also add a column to the left or right, split a cell and view the properties of the entire table


You can also easily change the document size from A4 to A5, A6, or even set your own page size. The size button is at the bottom of the toolbar
With this I will finish my review of the main functions of the new free editor WindowsWord. As a result, I can say that it is very easy to use, easier than Microsoft Office in my opinion. And it’s more suitable for beginners, because... No huge number buttons that are so easy for a beginner to get confused. Great for general editing. Main advantages: ease of use and freeness of this text editor.
Just recently released new program, which performs all office functions, but does not require additional activation and is quite easy to use in practice. We will talk about the basics of working with it below.
First steps
So, you have installed the program, it step by step installation described in the previous article. What's next? Click double click to a desktop icon that looks like this
A program window opens in front of us. It is quite unremarkable, no different from those that you may have seen before, but its interface is convenient and everything you need and often use is located in front of your eyes, which makes it easy to navigate.
At the top in front of us there is a toolbar, just below there is a white field, which is analogous clean slate paper and on which you actually need to type and edit the text, and on the left you can view the number of pages and their miniature image.
Toolbar
This is what the entire toolbar looks like:
As we see, her most upper part has the following tabs:
When you click on any of them, it pops up context menu, consisting of various tools that help when working with text. This way you can click on each tab to visually familiarize yourself with the interface.

Below are icons for the most frequently used functions that are used when working with text documents. They are organically sorted into sections, which makes it easy for even an inexperienced user to navigate.
We will not list them all, since there are quite a lot of them, but we will deal with the main tasks.
Saving
The first thing you need to constantly remember when working with documents is saving; without this function, all your work will be done in vain. It looks like this on the toolbar. And then select the location to save the document according to the standard procedure.

Settings
After becoming more familiar with all the functions, the toolbar (or panel quick access) can be adjusted based on frequency of use necessary functions, which you need are always at hand. This will organize your work and make it even more efficient.
Editing documents
The program contains everything standard features edits:
Many more useful things can be found in the WindowsWord program, but its main feature is its ease of use and clear interface. Inspiration to you!
IN Windows editor word contains a set of all the necessary functions for creating/editing text.
To quickly edit a document, it is useful to use the Quick Access Toolbar at the top right of the screen. All important actions: “Create”, “Open”, “Save”, “Print”, “Paste”, “Undo/Redo”, “Bullets”, “Numbering”, “Indents”, editing text in a document, as well as styles fonts, style options and scaling are always at hand.
To create a new document, you need to click the “Create” button in the upper right corner of the quick access panel, or perform the action: “File” -> “Create”. To edit an existing document, you must click on the “Open” button, or the action “File -> “Open”, and then select required file and confirm your choice.


You can save the document by clicking on the floppy disk icon on the quick access panel, or by using the action: “File” -> “Save”. To save a document to different formats, you need to go: “File” -> “Save as...” and select the desired format.


You can print the entire document, or specific page by clicking the "Print" button in the form of a printer icon on the panel, or through "File" -> "Print...". You will be prompted to select a printer, print range, and number of copies.

If you need to find a specific word or sentence in the text, you can use the "Find..." button on the quick access panel, or go to: "Edit" - Find.
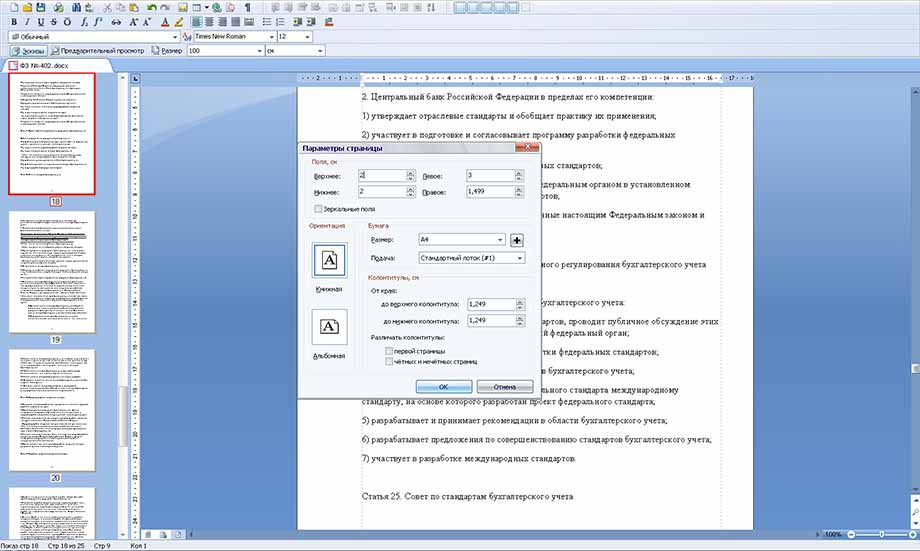
Settings for page settings, margins, headers and footers and paper settings can be found by following the action: “File” -> “Page Settings”, and in the window that appears, set desired value. Then confirm by clicking “Ok”.

Often when editing there is a need to cancel a completed action or return it. For this case, there are “Undo” and “Redo” buttons on the panel and in the “Edit” tab.
Changing the font style, style, size, color and background of the text is possible in the "Font" and "Format" tabs. For quick changes, there are columns of styles and text size on the quick access panel.

When working with paragraphs, you can edit text along the edges, width, center, and distribute it along the length if you use the “Paragraph” tab

If you need to create a bulleted/numbered list, you can use the "Paragraph" -> "List" tab.

The "Insert" tab will allow you to insert into the document: a file, a drawing, horizontal lines, hyperlink, page number, text field, number of pages and different types footnotes

When working with tables, you must use the "Table" tab, or the table icon on the panel for quick placement with the selected number of cells. Even after placing the table, you can add columns and rows to it from any side, as well as delete, merge and split cells. To do this, you need to select the table and right-click, and in the window that appears, select the desired action.
When working with large amounts of text, you can use the Thumbnails on the left side of the screen to quickly navigate through pages. Highlighted with a red frame current page and her number.

How to use the WindowsWord editor
WindowsWord text editor – indispensable program in the office and at home. It is easy to use and provides a full range of necessary functions for creating and editing text files.
The main program window consists of several parts:
Control panel at the top of the window,
Navigation bar on the left,
The text field itself is in the form white sheet,
At the bottom there is a panel with document statistics and a choice of display scale.
Home screen

File menu

At the top of the control panel there are drop-down menus with a variety of functions.
Create

After starting the program, you will see blank sheet, which can be edited, is a new document. To create another new document, in the “File” menu, click on the “Create” item - a new empty file will open.
To open an existing document, select the first "Open" item in the "File" menu, after which a dialog box will open prompting you to go to a specific directory (folder) and select required document. In addition, you can select in the same window the type of documents that will be displayed: doc, docx, rtf, etc.
Open file

After finishing editing the document, save it using the “Save As” item in the “File” menu or press the key combination Ctrl+s. In the window that appears, select a folder, a name for the file and its format.
Save as

Page Options

If you need to create your file on a sheet other than the default A4, go to File menu, Page Settings item. There you can change the size, orientation, margins and footers of the sheet.
Seal

The “Print” item in the “File” menu provides the ability to print the finished document by selecting a printer, required pages document (print range) and number of copies.
The next drop-down menu in the program is “Edit”. The items in this menu are provided with icons to help you understand the menu functions.
The first part contains “Undo” and “Redo” - that is, each of your actions in the current document can be canceled or, if it is still necessary, returned as it was. It is convenient to use the hotkeys Ctrl+z and Ctrl+y, respectively.
The second part contains the functions “Cut”, “Copy”, “Paste” - these are actions with text and images that are done on selected elements. This helps you work not only with text and images from one document, but also copy, cut and paste from another file or browser
Edit menu

Find

You can find and replace a phrase or word in the text using the corresponding item in the “Edit” menu.
Replace

Menu Format

Background (window)

(effect)

Line numbers

Adding elements is done through the “Insert” menu. A picture can be added through the “Picture” item dialog box.
Insert menu

Hyperlink

Symbol

Symbols mathematical formulas and other symbols that are not on the keyboard, add them using the “Symbols” item.
You can add a table and change its parameters through the “Table” menu, where all the necessary functions are present
Menu Table

Insert table

Menu Service

In the “Service” drop-down menu there are only two items “Spell Check” and “Settings”.
Spell checking

The “Spell Check” item helps to avoid spelling, punctuation and other errors in the text of a document by simply pointing out them or suggesting correction options.
Settings

The “Settings” item will help you configure the program, change the design, select the language and spelling nuances. For example, by selecting " Appearance- Skins”, the user can choose the design theme of the program itself to suit his taste. The default is Windows.
After saving all changes, you can close the program in three ways:
Selecting "Exit" from the "File" menu,
By clicking on the cross icon in the upper right corner of the window,
Using the key combination Alt+F4.
Scaling

To see the entire document or zoom in on a fragment of it, use right side bottom panel of the reactor window. To change the document display scale, move the slider or click on “+” or “-”.
Windows Word is a new convenient text file editor available for free download. The program is suitable for creating and editing files with text information, reading books and the like. The editor looks like this:

Once you launch the application, you can start creating a new document, and then use the function to save it. It is extremely simple and similar to the same function in any other Windows applications: File -> Save, or File -> Save As...

Or you can open an existing file in order to familiarize yourself with its contents and/or edit the information contained in it. This is also carried out in a standard way: File -> Open -> Name of the file you are looking for.


Like any reputable editor, Windows Word, among other things, has the function quick search words or text fragments open file. To open the search window, you can press the key combination Ctrl + F, or the button with the image of binoculars. In the window that opens, you must enter the word or phrase that you want to find in the text. You can also select search functions: case-sensitive or case-insensitive, search only for matches of the entire word, search below current situation cursor or above it. After this, you need to click on the “Find Next” button, and matches in the text will be highlighted in blue.

Editing text information in Windows Word is subject to the same rules as working with texts in any other editor. In addition to directly editing texts, using this editor you can add hyperlinks, pictures, tables to the file. This can be done either through the “Insert” and “Table” menus, or using the corresponding buttons on the panel. Using the sequence of actions Insert -> Symbol, you can insert symbols into a document Greek alphabet, mathematical formulas and many others.

Of course, Windows Word also provides large number options to change the text style. You can choose the font, text and background color, make the font bold, italic, underlined or strikethrough, subscript or superscript. All this can be done both through the “Font” menu (“Type”, “Size”, “Text Color”, “Text Background Color”), and using the corresponding buttons.

The Windows Word editor also has a convenient “Paragraph” menu item, with which you can format the text: select the distribution of lines to the left, right, justified or centered. Also through this menu item you can add numbering, bullets, change indents and spacing. The same can be done using the buttons on the panel, as well as by dragging the corresponding sliders on the main work field.
A document opened in Windows Word can also be sent for printing. This can be done either through the File -> Print menu, or using the button with the image of a printer. It is also possible to preview open document before printing to get a better idea of how it will look on paper.
This article introduces the basic concepts used in Microsoft Word to help new users get started creating complex, professional-looking documents.

Heading 1
On the Quick Access Toolbar 2 Saving, Cancel, And Return
File tab 3 New, Open, Saving, Seal And Close.
Ribbon 4
Edit window 5
Scroll bar 6
Status bar 7
8
In Word, you need to save the document in order to exit the program without losing data. When you save a document, it is stored as a file on local computer or in network folder. With a later version, you can open the file, edit it, and print it.
Open File Explorer and select documents. A list of documents will appear.
If the document you want to work on is in the list, click the file name to open the document. If the document is not listed, navigate to the location where the file is stored and double-click the file. The Word splash screen appears, and then the document displays.
Advice: file and selecting the command Open. To open a recently saved document, click latest.
Most text formatting tools can be found by clicking on the tab Home, and then selecting in the group “ Font ».

1 this is on the tab Home.
2 this is a group" Font"on tab" Home ".
3 Font ».
|
Changing the font. |
||
|
Font size |
Change text size. |
|
|
Font enlargement |
Increase text size. |
|
|
Reducing the font |
Reduce text size. |
|
|
Change case |
Change selected text to uppercase, lowercase, or other common word styles. |
|
|
Removes all formatting from selected text, leaving only plain text. |
||
|
Bold |
Changes the selected text to bold. |
|
|
Italicizes the selected text. |
||
|
Stressed |
Draws a line under the selected text. Click the drop-down arrow to select an underline type. |
|
|
Crossed out |
Draws a centered line over the selected text. |
|
|
Interlinear |
Creates subscript characters. |
|
|
Superscript |
Creates superscript characters. |
|
|
Text effects |
Apply visual effects such as shadows, glows, and reflections to selected text. |
|
|
Text highlight color |
Turning text marked with a marker into an attractive one. |
|
|
Font color |
Change text color. |
Using Styles
Styles let you quickly format key elements in your document, such as headings, headings, and subheadings. Follow these steps to apply styles to text in your document.
Select the text you want to change.
On the tab Home in the group Styles Hover over any style to view dynamically directly in the document. To view full list styles, click the arrow Additionally to open the area styles.
To apply the style that best suits the text, click it.
When everything is ready, apply styles to individual elements Word allows you to use a set of styles to simultaneously change the appearance of your entire document.
On the "tab" Constructor"in the group Formatting a Document select one of the predefined style sets, for example Regular authentication or ordinary. Hover over any style assigned to view it dynamically directly in the document. To view ready style sets, click the down arrow to the right of the group Formatting a Document.
To apply a style set that best suits the text, click it.
Change line spacing in the document
WITH using Word You can easily change the spacing between lines and paragraphs in your document.
On the "tab" Constructor" select Paragraph spacing to view a drop-down list of paragraph spacing options. Hover over any paragraph spacing style to view dynamically directly in the document.
When you find the right type, click it.
Advice: To set your own paragraph spacing, select Custom spacing between paragraphs.
Preview and printing
Brief overview user interface Word

Heading 1 : Displays the file name of the document being edited and the name of the program you are using. It also includes the standard minimize, restore, and close buttons.
On the Quick Access Toolbar 2 : commands that are often used, e.g. Saving, Cancel, And Return They are here. At the end of the Quick Access Toolbar is a drop-down menu where you can add other commonly used or commonly used commands.
File tab 3 : Click this button to find commands that are executed by the document itself instead of the document content, such as New, Open, Saving, Seal And Close.
Ribbon 4 : The commands that are needed to work are located here. The appearance on the tape will vary depending on the size on your monitor. Word will compress the ribbons by rearranging their control order to fit smaller monitors.
Edit window 5 : Shows the contents of the document you are changing.
Scroll bar 6 : Allows you to change the position of the screen you are editing a document.
Status bar 7 : You change the display of document information.
View buttons 8 : Allows you to change the display mode you edit the document according to your needs.
Slide zoom control 9 : Allows you to change the zoom settings of the document you are resizing.
Saving and opening a document
Specify a location to save the document in the field Save to. When you save a document for the first time, it is pre-filled as the file name in the field file name Enter the first line of text in the document. To change the file name, enter a new file name.
The document is saved in . Change the file name in the title bar to match the name of the saved file.
Can be opened Word document to continue working. To open a document, do the following:
Click the Start button and select documents.
Browse to the location where the file is stored and double-click the file. The Word splash screen appears, and then the document displays.
Advice: You can also open the document in Word by going to the tab file and selecting the command Open. To open a recently saved document, select Recent
Editing and formatting text
Before you can edit or format text, you must first select the text. Follow the steps below to select text.
Place your cursor at the beginning of the text you want to edit or format and click left button mice.
While holding down the left mouse button, move it to the right (called "dragging") to select text. A background color will be added at the location to indicate the selection range of the selected text.
Most text formatting tools are found by clicking on the tab Home, and then selecting in the group “ Font ».
1 this is on the tab Home.
2 this is a group" Font"on tab" Home ".
3 This is the Bold button. In the table below for the names and functions of the buttons "" in the "" group Font ».
|
Changing the font. |
||
|
Font size |
Change text size. |
|