Creating a bootable USB flash drive on Android. How to install Android on a Windows computer or laptop as a separate system
Sometimes there is a need to work with the Android mobile operating system on a personal computer. This idea can be implemented using the VirtualBox program. This program is designed to run virtual machines running operating systems such as Windows, Linux, etc. The Android operating system is no exception.
What do you need to install Android on your computer?
To install Android on your computer you need to download 2 files:
- VirtualBox. The latest version can be downloaded.
- Disk image Android x86 4.2 or another version. You can download.
After this, you need to install VirtualBox on your computer.
Creating a virtual machine and installing Android
Open VirtualBox and click the button in the menu Create. As a result, the virtual machine creation wizard will start. Enter the name of the virtual machine, type – Linux and version - Other Linux.

- RAM capacity – minimum 512 MB
- Hard drive – minimum 1 GB

On the next screen select Create/Modify Partition

Then we create the master boot partition. To do this, select the item New, after him Primary, Bootable And Write. After creating the section, select the item Quit.

Now we see that the section you created has appeared at the top of the list. You need to select it and click OK.

After this, you will be asked to select a file system to format the partition. Choose ext3 . At the end of the formatting process, a window will appear asking you to install the GRUB bootloader. Choose Yes. We also agree to the proposal to install the system directory in read/write mode.
After completing the above steps, the process of installing Android on your virtual machine will begin. After it is completed, you can extract the installation disk image and reboot the virtual machine. Now you can download Android 4.2.2.
First launch after installation
After loading Android, you need to select the default language.

Menu items are controlled using the mouse. If the mouse cursor is not visible, you need to go to VirtualBox in the menu item Car choose Turn off mouse integration. After this, the cursor should appear, but to release the cursor from the virtual machine window you need to press the host key (right Ctrl by default).

That's all. Now you can work with Android on your computer.
Thanks to the rapid development of software for the Android OS, many desktop PC users are turning their attention to this platform, and therefore ask the logical question: “How to install Android on a computer”?
Initially, Android was not created for use on PCs with x86 architecture, and versions of this OS up to 3.0 were intended exclusively for phones.
Despite this, a group of enthusiasts has created and regularly creates updated Android distributions for installation on a personal computer.
How to install this “mobile” operating system on your PC will be discussed in this publication.
Steps to install Android OS on PC
All work on installing Android OS on a PC can be divided into several stages:
- Downloading the distribution kit to your computer.
- Creating bootable media.
- Preparing the HDD for Android installation.
- Installation of a new operating system and its configuration.
Now about each stage in more detail.
In order to make your computer a full-fledged Android device, you should select and download the OS distribution. It is better to do this from the developers’ website by going to: http://www.android-x86.org/download.
At the time of writing, the Android x86 OS distribution kit version 5.1 is available to everyone, but you can use another, more “tested” version of the program.
Screenshot of the page with the distribution kit Android-x86-5.1-rc1.iso
This ISO image must be downloaded to your PC and created bootable media.
Create bootable media
You can install Android OS on your computer using optical media or a bootable flash drive. Since most laptop PCs are not equipped with a DVD drive, we will use a regular 2 GB flash drive as a boot disk.
In order to write the distribution image to a USB flash drive, you must use third-party software. The developers recommend the UNetbootin or UltraISO utilities.
Let's look at the process of writing a distribution to a flash card using the UNetbootin program:
- Insert the formatted USB flash drive into the PC.
- Download and run the UNetbootin program.
- In the utility window, click “Disk Image”, click on the button with the ellipsis and select the downloaded distribution, by clicking the “Media” button, select your flesh card, then click “OK”.
- When the bootable media creation procedure is complete, click “Exit”
Bootable media has been created. If you expect to have only Android OS on your PC, then in the BIOS you just need to make your USB flash drive a priority at startup and you can begin the installation process.
If Android is the second operating system on your computer, you should prepare an additional partition on the HDD for its installation.
Creating a partition on a hard drive for Android OS
You can create a partition on the HDD using Windows 7. To do this:
- Press win+R.
- Enter diskmgmt.msc into the dialog box and then press Enter.
- In the utility window, find the unallocated space, select “Create a simple volume” from the drop-down list.
- In the Partition Wizard, click Next.
- Enter the partition size. To install Android on your computer, you need to allocate at least 10 GB of your HDD for this partition. Click Next.
- Set a letter for the new disk partition and click “Next”.
- In the formatting options window, you can leave everything as default. "Further".
- In the window for completing the partition creation procedure, click “Finish”.
BIOS setup
In order to install a “mobile” OS, you need to start the PC from a bootable USB Flash card. To do this, immediately before turning on the computer, you need to install a USB flash card into the PC connector and enter the BIOS by pressing the F12 or DEL key immediately after starting the PC.
In some laptop models, you need to press the F2 or Esc key to enter the BIOS.
Important! The BIOS entry key may vary depending on the motherboard manufacturer and theBIOS. You can find out exactly the login button from the documentation for your computer.
After entering the BIOS, enter the Boot section where you can use the arrows to set the boot priority from a USB device, then confirm the settings by pressing F10 and exit the BIOS by pressing Esc.
Installing Android OS on PC
After starting the computer from the bootable USB flash drive, a window will open where you will need to select the last line from the entire list.
To install Android on your computer, you need to select the desired HDD partition to install the distribution. In the next window, the available partitions are identified as sda1, sda2, sda3. Select the one you want and click OK.
Android setup
Almost any user can handle setting up Android OS. The first thing that appears on the PC screen after installing the system is the language setting screen. Choose the one that interests you.
Next, the system will prompt you to select a Wi-Fi network, account, and geopositioning. In principle, these settings can be skipped initially. Next, you should set the time and date on your Android computer, enter the owner’s name and give permission for software updates.
This completes the initial system setup process. In the window that opens, click OK. Next, everything is the same as in a regular smartphone: go to the settings, where in the “language and input” menu item you need to configure the keyboard layout, etc.
Advice! If you don’t know how the “mobile system” will behave on your PC, then after starting the computer from the flash drive, in the window that opens, select the first menu item Live CD – Run Android without installation. The system will not be installed on the computer, but will be launched from the media. In this mode, you can always test the selected version of Android before installing it completely.
As you know, the Android operating system is usually installed on smartphones and tablets. You can also find it on television set-top boxes. But what if you want to try out a program designed for Android, but don’t have a portable device at hand? In this case, you can install an emulator - for this you will need a laptop or desktop computer with Windows or Mac OS X on board.
Some people don't understand why Android can't be installed on a computer like Microsoft's operating system. They think that this restriction was introduced due to computer hardware that is not supported by the mobile operating system. This is partly true. Manufacturers of video cards and many other components do not write their own drivers for Android. But the most important reason is different.
The fact is that each operating system is tailored strictly to a specific processor architecture. Products are installed on computers Intel And AMD. It is created by architecture x86, and x64(actually the same x86 architecture, but 64-bit). Such chipsets simply will not understand the code used in Android. The mobile operating system requires a completely different processor - one that has the architecture ARM. Such a chipset is smaller in size and has minimal power consumption, and its operating principles are completely different. This is why installing Android on PC is impossible. But no one forbids using an emulator, as happens when running games on a computer from very old consoles.
But in this case we are talking about the so-called real Android. However, enthusiasts, along with the mobile version, are also developing a stationary version of this operating system. This is what it's called: Android x86. It can already be used as the main operating system. At the time of writing (November 2016), there was a build based on version 6.0 of Marshmallow.
Don't forget that computer hardware manufacturers don't support Android at all. In this regard, do not expect stable operation of this operating system on your PC. You will regularly encounter freezes and other troubles. Installing applications will also be more complicated, since you will not be given full access to Google Play content.
Installing Android x86
In this material we will not talk in detail about installing a mobile operating system on a PC. There are two reasons for this. Firstly, this process is quite lengthy and labor-intensive, and therefore its description deserves a separate material. Secondly, from time to time new versions of Android x86 appear, the installation of which is slightly and sometimes quite different. And writing about the installation of each version is pointless. And you can easily familiarize yourself with the installation methods on the site from which the operating system image is downloaded. Therefore, we will note only the most important aspects of this process:
- The operating system is distributed as an image in the format .iso or .img. You can view its contents using Ultra ISO, Alcohol 120% and other similar programs.
- To install the operating system, you first need to write it to a disk or USB flash drive. In the second case, first make sure that your motherboard supports installing the OS from an external drive.
- Installing Android x86 is possible on any computer, including those manufactured by Apple.
- It is possible to install Android x86 as an additional OS. In this case, Windows will remain unharmed.
- During installation, the operating system will require you to format the partition intended for it. Select NTFS and FAT32 as the format system.
- The Android x86 operating system does not require much space. Theoretically, 8 GB may be enough. But it is better to allocate at least 16 GB. However, it all depends on your methods of using this OS.
- Upon completion of the installation, you will need to set the time, connect to the global web, and perform other similar actions. In this regard, the process is almost no different from what you do after purchasing a new smartphone.
Note: Installing a full-fledged Android x86 OS is only required if you intend to use it on an ongoing basis. This is particularly useful for application developers. In other cases, it is better to use an emulator.
Using the emulator
You can easily install an Android emulator on your PC - no special knowledge is required. But you will definitely be surprised at how many different emulators there are. They differ from each other not only in the OS version, but also in all sorts of additional features. This is confirmed by our material entitled "Best Android Emulators on PC". Some creations of developers are designed to simplify testing of simple applications, others are used to run heavy games, while others completely meet some specific requirements.
In order to install Android on your computer this way, you first need to download the emulator itself. It should be selected based on the tasks assigned, as well as the power of the available computer components. Technical requirements should be found on the official website of the developers of the selected Android emulator. Although now it is difficult not to meet the necessary requirements - usually such a program requires several gigabytes of hard disk space, a quad-core processor and approximately 8 GB of RAM. Rarely does an emulator require more.
You can find out the characteristics of your computer using the “System Properties” button, located in the “Computer” section, which can be accessed by opening the “Start” menu.
Let's install the emulator using an example Genymotion. This program supports many pre-configured Android images. It can emulate an Internet connection using a variety of wireless modules. The emulator can work not only on Windows And Mac OS X, but also on Linux, which will be appreciated by application developers working in large companies.
Step 1. First you need to create an account on the site http://www.genymotion.com. Enter your desired login, your email address, and create a password. In line Company Type select " Personal use" or " N/A" In line Usage Type You can select any value; this will not affect the functionality of the emulator in any way. Also indicate your country, after which you can check the box next to the link to the license agreement and click on the “ Create an account».
Step 2. If the login is busy, you will be asked to enter a different name. Next, you will receive an email containing a link to activate your account. Follow it.

Step 3. Click on the red button " Continue».

Step 4. Now click on the button Download", located in the top menu of the site.
Step 5. Here you need to click on one of the two red buttons, depending on whether you have installed VirtualBox. If you don't have Windows, then look for links to download special versions of the emulator below.

Step 6. If necessary, click on the " Save».
Step 7 Run the downloaded EXE file. If necessary, click the appropriate button.

Step 8 Select your installation language. Click the button OK».

Step 9 Let the settings be left as default. Click the button Next».

Step 10 The name of the program in the Start menu can also be left as default. Click on the button Next».

Step 11 Leave a checkmark if you want the emulator icon to appear on your desktop. Click the button Next».

Step 12 Click on the button Install».

Note: Many Android emulators require VirtualBox. Genymotion is no exception to the rule.

Step 14 In the window that opens, don’t touch anything - just click on the “ Next».

Step 15 Uncheck the box next to " Create a shortcut in the Quick Launch Bar" You can leave the checkboxes next to the remaining two items. As a last resort, you can always remove the VirtualBox icon from your desktop if you find it unnecessary. Click on the button Next».

Step 16 Click the button Yes».

Step 17 Click the button Install».

Step 18 Click the button Install" These are virtual USB ports. Then the virtual network adapters and network service will be installed in the same way. Press the button each time Install».

Step 19 Leave the checkbox and click " Finish».

Step 20. Do the same here.


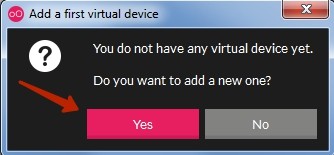
Step 22 Click the button Yes» to add the first virtual device.
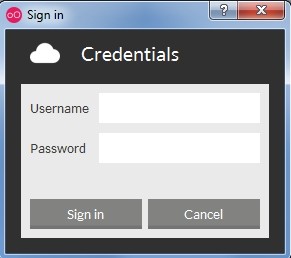
Step 23 Click on the button Sign in" to log into your account.

Step 24 Enter your username and password.
Step 25 You should now have a list of virtual devices with different screen resolutions and different versions of the operating system. You can filter the list using the corresponding items at the top of the window. Decide on the device and click the " Next».

Step 26 Give the virtual device a name. You can leave the one specified by default. Click the button Next».

Step 27 Wait until the files are downloaded and installed and click the " Finish».

Step 28 Now all you have to do is select the virtual device that appears and click the “ Start" In the future, to add other devices, click on the " Add».

Note: If VirtualBox gives an error, this may indicate that virtualization is disabled in the BIOS. You'll have to go to the BIOS and enable this technology.

If everything goes well, you will soon see a desktop in front of you, familiar from various tablets and smartphones. With the only exception that adjusting the volume and selecting other parameters will be done using virtual icons.

That's all, you managed to install Android on your computer!
The popularity of the Android operating system is growing every day, which is explained by the availability of access to unique content from Google Play, a large number of interesting applications, games, high system performance and a minimum number of malicious objects that are written specifically for this OS. Therefore, users often ask the question: how to install Android on a PC without losing the data of the second system?
Preparing your computer for installing Android OS
Before you install Android on your computer, you need to create a boot disk. To do this, download any suitable software from this section, for example Alcohol 120%, DAEMON Tools or UltraISO and install it on your PC.
Now download any version of Android OS that you want to install.
After downloading the installation file, run the software to create a boot disk. In this example, UltraISO will be used. Launch the program, click “File”, “New”, “CD/DVD image with data”. Add the file and click Write.
If your PC has one hard drive, you need to create a separate partition on the HDD. To do this, you can use Acronis Disc Director Suite or download MiniTool Partition Wizard.
Launch Acronis Disc Director Suite, select the disk on which the new OS will be installed and click “Create partition”.

A new window will open. Enter the name of the partition, then select “File system”, click “Create as” logical disk, indicate the disk size and click “OK”.

The section has been created.
Installing Android OS on a computer
Reboot the PC and go into the BIOS by clicking F2 or Del a couple of times. Go to the Boot section and select Boot Device Priority. A list will appear with options for selecting boot devices. Select your drive.

In the next dialog box, the system will prompt you to select a partition to boot. Typically this will be sda1 and sda2. Select the first one if you made a partition on drive C.
Now you need to select the file system type. For Android, ext2 and ext3 are acceptable. A type such as NTFS is not supported by the OS, and FAT32 is not recommended.

After selecting the file system type, you must accept a special bootloader. Without which Android will not boot. Click “Yes” and click “Enter”.

After the OS, determine the installed version of the system, and will also offer to integrate a universal bootloader for both OSes. Click “Yes”, since this operation is very important. With its help, you can select the desired system at the start of your computer.

The system installation process will begin.

Upon completion, the system will offer to launch Android on your PC.

If all actions are performed correctly, problems with system performance should not arise.
We continue to introduce the reader to the installation of the Android mobile operating system on computers and laptops running Windows and OS X. In the first part of the instructions, we showed how to install using the BlueStacks emulator. This material provides for a more complex installation of Android on a computer as a separate operating system without the use of virtual machines.
By installing Android as a second operating system, we can achieve a significant increase in the performance of the mobile OS without loading the RAM and processor with third-party applications or emulators.
Preparation
To install, we will need a USB drive of at least 1 GB in size and a separate disk partition of at least 8 GB in size. A disk partition for installing Android can be created using standard operating system tools (context menu of the Start button - Disk Management for Windows), but to save time, you can use a second USB drive on which the operating system will be installed.
Installation
Before starting the installation, download the ported image of the Android operating system from the Android-x86 website. In the Downloads section, find the OS version you are interested in (it is recommended to install the latest current version “android-x86-5.1-rc1.iso” or “android-x86_64-5.1-rc1.img”, depending on the bit depth).

2. To write the downloaded Android image to a flash drive, you will need the UltraISO utility. The trial version of the program can be downloaded from here. Install UltraISO and wait for the Android installation image to finish downloading.
3. Connect the USB drive to your computer. Attention: during the installation process, all data located on the flash drive will be deleted!
4. Launch UltraISO. Click "File" - "Open" and select the newly downloaded image in *.img or *.iso format.

5. The image will open in the UltraISO application. Go to the menu: “Boot” - “Burn Hard Disk Image”.

6. Make sure that the installed flash drive is selected as the target disk to be written to (Disk Drive item), and the downloaded .iso/.img file with the Android system is selected as the “Image file”.

7. Click on the “Record” item. The utility will warn you that all data on the flash drive has been destroyed and will begin recording the installation image.
Wait until copying finishes.
8. Restart your computer.
In the BIOS/UEFI settings, make sure that USB is selected in the Boot Device Priority - First Boot Device item (depending on the motherboard model, boot drive priority items may have different names).
If you have an Apple computer:
When rebooting, when a white screen appears, hold down the “Alt” key until the menu for selecting boot disks appears. Select the created drive.
9. After loading, the Live CD menu will appear on the screen, with which you can immediately launch the Android OS without preliminary installation, go into one of the debugging modes, or perform a full installation.

Select Installation and press Enter.
10. In the menu that appears, select the partition on your hard drive created for installing Android. Be careful - installing on top of Windows or OS X will completely erase the system.

Note: In some cases, especially when trying to install Android on a laptop, you may need to connect a USB keyboard. The built-in keyboard may stop responding until installation is complete.

The installer window will warn you about the loss of all data located on the selected partition. Click Yes.
12. Agree to install the GRUB bootloader and the EFI GRUB2 subkey.


13. To be able to overwrite data in the Android system and work with files, in the Do you want to install/system directory as read-write? dialog box. select Yes.

14. The Android OS installation will begin.


At the end of the process, the installer will offer to create a user partition within the system. By default, 512 MB is allocated for data. Click Yes and specify a recommended size of 2000 MB.
15. At this point, the installation of the Android operating system can be considered complete. In the window that appears, select Run Android-x86 - “Run Android”.

Further setup of the system completely repeats the first turn on of a new smartphone running Android, and consists of the following steps: selecting the system language, connecting to a Wi-Fi wireless network, authorization using a Google account and, directly, downloading applications and games from the Google store Play, or installing APK files.
Possible problems
When formatting a hard drive partition (step 11), it is preferable to choose FAT32 and NTFS systems. This is due to the optimal compatibility of the flash drives used with installation APK files copied using Windows OS (differences in the file systems of the drive and partition can lead to a conflict - the system simply will not see the flash drive). If there is no need for this method of installing games and applications, you can choose any type of formatting.