Replacing a DVD drive with an additional HDD or SSD. How to install a second hard drive in a laptop
Every user would like to install on their PC modern SSD disk for better productivity and more high speed system operation. Put solid state drive transferring to a computer is incredibly simple, and the process itself is usually not accompanied by any difficulties.
By the way, previously there was similar article, but we are in it, for this we just needed to remove a small cover on the back of the case, which does not create any difficulties.
But install an SSD in a laptop instead DVD drive, is much more difficult, because first you need to carefully disassemble it. And many users already have difficulties at this stage. So let's look at the whole process in more detail.
What is required for installation?
First, you should familiarize yourself with the characteristics of your laptop to understand what components you need to purchase. As practice shows, in the majority modern models with a CD drive you can easily install an additional HDD. Therefore, there should be no problems.
Before you start, you should make sure that you have everything you need for full-fledged work.
You will need:

Special attention should be paid to the last point, so let's look at it in more detail.
How to choose an adapter?
The drive size comes in two types and differs in thickness - 9.5mm and 12.7mm. Before purchasing an adapter, carefully measure the thickness of your drive and only then buy the appropriate adapter. Otherwise, the SSD drive adapter simply will not fit into the laptop in place of the DVD drive.


You should also pay attention to the interface through which the drive is connected. If SATA interface, then using an adapter with an adapter to mSATA, you can easily install an SSD instead of a disk drive. But if your DVD drive is connected via IDE, and this is an outdated technology, then to connect the SSD you will need an adapter from IDE to SATA.


As mentioned above, the adapters differ only in thickness, while their shape and width are the same. The adapter usually comes with a disposable screwdriver, screws for fastening the hard drive and a plastic cover. The latter is needed for installation on the adapter to close free space, which is formed after removing the drive.
Disassembling a laptop
After we have prepared everything necessary for replacement and purchased a suitable adapter for the SSD, we can begin opening the laptop and then replacing the drive.
You can do this as follows:

After the battery is disconnected, you need to remove installed hard disk.
For this:

Under the cover there is a hard drive and memory modules. We need to remove the hard drive, since a solid-state drive will be installed in its place.
If you ask why we install the SSD here, and not instead of the drive, then there is a simple explanation for this.
When the speed of the bus to which the hard drive is connected is faster (in in this case the hard drive is connected via SATA 3, while the drive has SATA 2), then the SSD is installed in place of the HDD.
To properly remove the drive, you must carefully follow the following instructions:

We put both drives aside; we will return to them later.
Removing the Top Cover
Now we need to remove the top cover of the laptop by unscrewing all the fixing screws. It should be taken into account that they are different sizes and you definitely need to remember where they came from.
After all the screws are unscrewed, the matter remains with the pick. Now you need to separate the bottom and top part laptop. You need to be extremely careful when opening it, as most models have unreliable latches that can easily break. Check again that all screws have been removed, otherwise there is a risk of damaging the device case.

To remove the cover, you need to insert the pick into the slot that is located between the top and bottom covers, and slowly turn it to release the latches located inside the case. You should start from the front of the laptop, where the indicator lights. It is necessary to walk the mediator around the perimeter of the entire body.
After you separate the top cover from the bottom, do not lift it up suddenly. Both parts are connected by cables and you can damage them.
When working with some devices, you do not have to disconnect the cables, since sometimes you can replace the DVD drive without removing the top part of the device, which can significantly save your time.
DVD drive
Now unscrew the DVD drive. We will need a short screwdriver to remove the screw that secures the drive to the case. Once it is unscrewed, you can remove the drive without any problems.


Then remove the plastic cover from the DVD drive. To do this, you need to open it. To do this you will need a paperclip or a needle. Find a small hole on the front panel of the device and insert a paper clip into it. After lightly pressing, the drive carriage will move out of the housing, and you will have full access to its lower part and can easily separate the plug from the carriage.

Once the plug is removed, it will need to be placed on the adapter.


After this, we install the adapter in place of the drive we previously removed and tighten the fastening screw.

All that's left is to turn the laptop over bottom side and install the SSD disk in place of the old HDD. Close the cover removed at the beginning of disassembly and tighten the remaining bolts around the perimeter of the device, insert the battery.
The laptop is now assembled and ready to use. We installed two hard drives: we put the old HDD in an adapter and connected it instead of a disk drive, and a new solid-state drive is mounted in its place.
Software settings
The next step will be Bios setting, namely the inclusion AHCI mode. This mode allows you to increase the speed of the drive, mainly due to the advantages of NCQ technology. It also opens up other possibilities, such as hot swapping.

Now you know how to install an SSD in a laptop instead of an old DVD drive, and you can do it yourself without any problems, following our instructions exactly.
By the way, you can completely transfer the system without losing its functionality using special programs, for example, such as, Acronis Universal Restore, Macrium Reflect and others. They have wide functionality and will help you in this situation.
The topic is fully discussed in this video
Hello. SSD drives are becoming more and more popular in the component market every day. Very soon, I think, they will become a necessity rather than a luxury (by at least, some users consider them a luxury).
Installing an SSD in a laptop provides a number of advantages: more fast loading Windows OS (boot time is reduced by 4-5 times), more long work laptop from the battery, the SSD drive is more resistant to shocks and shocks, the grinding noise disappears (which sometimes happens on some models HDD drives). In this article, I want to analyze step-by-step installation SSD drive in a laptop (especially since there are quite a lot of questions about SSD drives).
What is needed to get started
Although installing an SSD drive is enough simple operation, which almost any user can handle, I want to warn you that everything you do is done at your own risk and risk. Also, in some cases, installing another disk may result in denial of warranty service!
1. Laptop and SSD drive (naturally).
Rice. 1. Disk drive SPCC Solid State Disk (120 GB)
2. Phillips and straight screwdrivers (most likely the first, depending on how your laptop covers are secured).
Rice. 2. Phillips screwdriver
3. Plastic card (any card will do; it can be used to conveniently pry off the cover that protects the disk and RAM laptop).
4. Flash drive or external hard drive (if you just replace the HDD drive with an SSD, then you probably have files and documents that need to be copied from the old one hard drive. Later you will transfer them from the flash drive to new SSD disk).
Options SSD installation disk
A lot of questions come in regarding options for installing an SSD drive in a laptop. Well, for example:
- “How to install an SSD drive so that it works and old hard disk and a new one?";
- “Is it possible to install an SSD disk instead of a CD-ROM?”;
- “If I just replace the old HDD with a new SSD drive, how will I transfer my files to it?” etc.
I would like to immediately highlight several ways to install an SSD in a laptop:
1) Simply remove the old HDD and put a new SSD in its place (the laptop has a special cover that covers the disk and RAM). To use your data from the old HDD, you need to copy all data to other media in advance, before replacing the disk.
2) Install an SSD disk instead of a disk drive for optical disks. To do this you need a special adapter. The point is general view like this: take out the CD-ROM and insert this adapter (into which you insert the SSD drive in advance). In the English version, it is called as follows: HDD Caddy for Laptop Notebook.
Important! If you buy such an adapter, pay attention to the thickness. The fact is that there are 2 types of such adapters: 12.7 mm and 9.5 mm. To know exactly which one you need, you can do the following: run the AIDA program (for example), find out exact model your his optical drive and then find its characteristics on the Internet. In addition, you can simply remove the drive and measure it with a ruler or caliper.
3) This is the reverse of the second option: install an SSD instead of the old one HDD drive, and install the HDD instead of the drive using the same adapter as in Fig. 3. This option is preferable (in our opinion).
4) Last option: install an SSD instead of the old HDD, but buy a special box for the HDD to connect it to USB port(see Fig. 4). This way you can also use both an SSD and an HDD drive. The only problem - extra wire and a box on the table (for laptops that are often carried - a bad option).
How to install an SSD drive instead of an old HDD
I will consider the most standard and frequently encountered option.
1) First, turn off the laptop and disconnect all wires from it (power, headphones, mice, external hard disks, etc.). Next, turn it over - on the bottom wall of the laptop there should be a panel covering the laptop’s hard drive and accumulator battery(see Fig. 5). Remove the battery by sliding the latches to different sides*.
* Mount on different models laptops may vary slightly.
Rice. 5. Attaching the battery and the cover covering the laptop disk. Dell laptop Inspiron 15 3000 series
2) After the battery is removed, unscrew the screws that secure the cover that covers the hard drive (see Fig. 6).
3) The hard drive in laptops is usually secured with several screws. To remove it, just unscrew them and then remove the hard drive from the SATA connector. After that, insert it in its place new disk SSD and secure it with screws. This is done quite simply (see Fig. 7 - the disk mount (green arrows) and the SATA connector (red arrow) are shown).
4) After replacing the disk, secure the cover with a screw and install the battery. Connect all the wires (disconnected earlier) to the laptop and turn it on. When booting, go directly to the BIOS (article about login keys:
Rice. 8. Has a new one been identified? SSD drive(in the photo the disk is recognized, which means you can continue working with it).
If the disk is detected, check what mode it is operating in (it should work in AHCI). In the BIOS, this tab is most often Advanced (see Fig. 9). If you have a different operating mode in your settings, switch it to ACHI, then save the BIOS settings.
After the settings have been made, you can begin installing Windows and optimizing it for SSD. By the way, after installing the SSD, it is recommended to install Windows again. The point is that when Windows installations- it automatically configures services for optimal performance with SSD disk.
By the way, very often I get asked questions about what to update to speed up the PC (video card, processor, etc.). But rarely does anyone talk about the possible transition to an SSD to speed up work. Although on some systems, switching to an SSD will help speed up the work significantly!
That's all for me today. Everyone fast work Windows!
A typical laptop configuration involves installing two drives: one of which is a hard drive, the other is an optical drive. There is only one compartment for installing a hard drive.
Therefore, to install second hard the disk must be sacrificed to a CD-ROM device (usually a burner drive DVD discs). For this purpose, there are adapter devices that completely replicate the shape of the internal optical drive with a mount for standard HDD 2.5 inch format.
In this article I will tell you in detail how to replace the cd rom in a laptop with a hdd.
How to determine the thickness of the device
I know of two types optical drives used on laptops that differ in thickness. "Thick" has a height of 12.7 mm, and "thin" - 9.5 mm. You can determine the thickness of the device you have installed without disassembling the laptop. To do this, first look at the device manager and look at the product model.

I have this Optiarc AD-7580S. Now let's visit any popular internet a resource selling similar products or Yandex.market and look at the characteristics of the device.

As you can see, the thickness of the device, according to the description, is 13 mm (taking into account rounding, in reality 12.7 mm).
If in doubt, you can measure it yourself using an ordinary ruler. You can tell the difference between 12.7 and 9.5 drives with the naked eye.
Where to buy an adapter for HDD to ODD bay

It is a plastic box with small fee with connectors and chip, also included USB cord for connection and a decorative strip on the front side. For some reason, the package included a mini-CD with drivers, but Windows 7 saw the device without installing additional software. Moreover, the device is detected from the BIOS, so it can be used as a bootable CD-ROM.
Drives for recording CD/DVD discs are increasingly losing relevance over time, because now almost everything modern devices capable of reproducing information through USB drives, i.e., for example, flash drives, external hard disks. And it turns out that in those laptops that were purchased with a disk drive, this same disk drive sits idle and is almost never used. However, it can be replaced with additional hard drive, thus you will have one more place for HDD connections.
In this article I will tell you how you can install a regular HDD in a laptop instead of a CD/DVD drive.
It is especially important to change the CD/DVD drive in those laptops that initially have only one standard bay for installing a hard drive or SSD. And if you want to install a high-speed SSD instead of a hard drive, then this turns out to be impossible for many. For the reason that the price is 1 GB. The space on the SSD is very large, i.e. such a disk with large capacity it will be very expensive. And if you put SSD small capacity (approximately 100-200 GB is very popular), then this amount of space is unlikely to be enough for anyone. Only one system, for example, Windows 10 with all the necessary programs will eat up to 150 GB. Therefore, a good solution in this case is to install a small SSD instead of a regular hard drive, and replace the drive with a hard drive, either an old one or a new one with an even larger capacity.
For desktop computers, all this is irrelevant. IN system unit There is always room to connect additional HDD or SSD drives.
Put instead SSD drive The disk makes no sense. Because disk drives operate at a lower speed SATA port and a high-speed SSD drive simply will not reveal its full potential. Therefore, instead of a disk drive, it makes sense to install only an HDD disk!
The principle of replacing a CD/DVD drive with an HDD hard drive
The replacement process itself is not at all complicated, but you will need to buy one part - an adapter, which I will discuss below.
So, point by point:
First of all, you need to remove the disk drive from your laptop. This is usually done on all laptops in a similar way. WITH reverse side The laptop must have a screw holding the drive mount in place. This screw is usually located directly above the drive, closer to the center of the laptop and is closed with a special rubber plug. And above the hole for this screw, a designation can be drawn, for example, disk, which will immediately make it clear that this particular screw holds the disk drive.
It is enough to pull out the plug with something sharp (for example, a needle, a thin screwdriver, the edge of a knife), unscrew the screw and you can pull the drive out of the compartment with your fingers.
Measure the drive for length, width and height. Because instead of it you will buy a special adapter, which will have the shape of a disk drive and an HDD disk will be inserted there. This adapter should have exactly the same dimensions (it’s okay if it’s 1 mm smaller in height and width) as your drive.
Buy an adapter to connect an HDD drive instead of a floppy drive. It is usually called this: dvd slim to hdd adapter (msata to sata).
The name also indicates the height, for example, 12.7 mm.
Upon purchase, in mandatory look at the dimensions of the adapter! They must match the dimensions of your disk drive, or be 1 mm apart. less on one side or on each side (this is acceptable). But if the adapter turns out to be thicker or longer on some side, then it simply will not fit into the corresponding compartment of your laptop.
Such adapters cost differently, on average around 1000 rubles. They are made different manufacturers, but all these adapters perform only one function. Therefore, you don’t have to choose manufacturers that produce higher-quality adapters; you can take something that is cheaper and fits in size.
- Having purchased an adapter, connect the desired HDD drive to it.
Let me remind you that there is no point in connecting an SSD to this adapter!
Connecting the disk is simple: insert it into the appropriate SATA connector and push it a little to fit into the adapter compartment.
To prevent the disk from dangling, holding on only to the connector to which you connected it, it must be secured with screws. The screws should be included in the kit, and there will most likely be the necessary small screwdriver.
- All that remains is to insert the adapter into the same compartment where you had the CD/DVD drive and secure the drive with the same screw, placing a rubber plug on top (if you had one).
All! A hard drive is connected instead of an unnecessary CD/DVD drive. You can turn on the computer and work :)
Possible problem when installing an HDD instead of a disk drive and its solution
When connecting a hard drive instead of a laptop's CD/DVD drive through a special adapter, a problem may arise that I encountered on 2 laptops.
It lies in the fact that after installing the HDD through an adapter instead of a disk drive, the computer stops shutting down normally and also goes into various modes sleep. When you try to perform one of these actions, the computer ends all programs, but does not completely turn off. At the same time, the fans continue to work, and at increased speeds, and the computer may turn off or go into a blackout. desired mode sleep after more than an hour, and may continue to work and heat up endlessly.
When I first encountered this problem, I spent a very long time looking for the cause, went through all the drivers and looked for the problem in the system itself and installed programs, because the hardware itself is all in good condition.
It turned out to be very simple. There is a switch on the adapter (sled) that connects the HDD instead of the disk drive. I was not able to find out what exactly it switches, but apparently some kind of operating mode. Here's what it looks like:
Just move this switch from starting position into one of the two available ones, after which you install the HDD in the laptop again and check if the situation has changed. If not, move the switch to the last 3rd position. In this case, everything should work 100% as it should.
Conclusion
If your computer has a CD/DVD drive and you don't use it, replace it with a regular hard drive. At least it will be useful, especially if your laptop only has one HDD installed. And so, why just let the drive sit idle, taking up only space in the laptop.
DVD to HDD adapter
It so happened that the space on the hard drive (500GB) in my laptop “unexpectedly” ran out, and the painful choice began of what to delete. This went on for over a year. The last straw was the need to rearrange the operating system for some reason.
Remembering that reviews of DVD to HDD adapters popped up here on music, I quickly studied the search results, but the questions only increased. I had to understand this issue and read different articles.
I will do this review as an instruction for those who decided to follow my path.
I will install regular HDD for 1 TB. The question may immediately arise: why not an SSD?
Here I have several answers:
- I need volume. At the same cost, the HDD capacity will be several times larger than the SSD.
- I have it on my native HDD hidden section with disk image operating system. This image is designed for the original disk, and I don’t want to do anything with it.
Even before HDD installation The question may arise: what about DVDs?
How often have I used the DVD drive? It turned out that during the entire time I owned the laptop - only 2 times. And this is in 4 years!!!
I think that for these cases you can rewrite/burn the disc somewhere else.
Let's begin.
The first step is to remove the DVD drive from the laptop and measure its thickness. Why do you need to do this? The fact is that all DVD/CD drives are standard in size. The only differences are in thickness. The thickness is either 12.7 mm or 9 mm (some sources mention 9.5 mm).
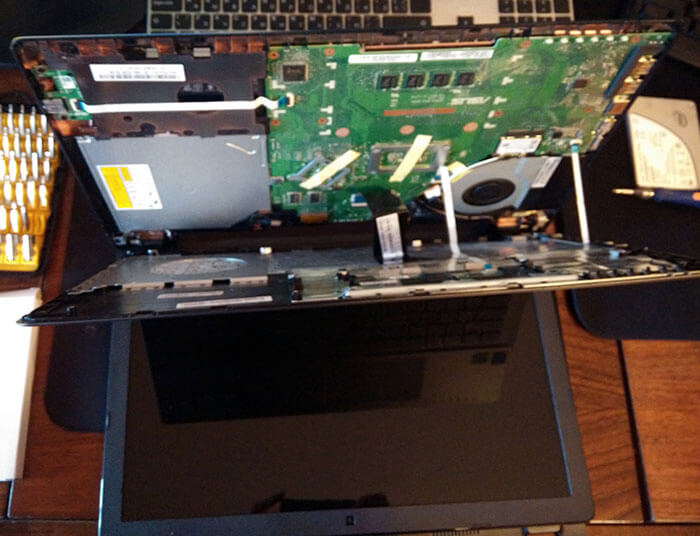
How to remove a DVD drive. There is no clear answer here. Later in the review I will show how I disassembled mine ASUS laptop A53S. 

The mounting principle is the same for almost all drives. There is a bracket on the back of the drive, which is screwed to the housing with one or two screws. Access to these screws is either under the keyboard (like mine) or from the bottom of the laptop under the internal modules (HDD, Wi-Fi module and so on). Usually, to find out how to disassemble a laptop, you just need to type “how to disassemble” on YouTube and then indicate the laptop model.
We take out the DVD drive and measure its thickness: 
It can be seen that the thickness of the drive is approximately 12.5 mm 
At the back of the drive we see a mounting bracket and an eSATA connector
According to the measurements taken, we can safely order an adapter with a thickness of 12.7 mm.
Adapters are different. Completely plastic (cheap), plastic, but look like metal (a little more expensive) and metal (expensive). The difference in price between plastic adapters and metal ones is three times or more. As I understand it, metal adapters are needed for better heat dissipation. But the point is that the HDD will not come into contact with the case. Dissipating heat only through the side faces of the HDD, in my opinion, is not very effective. Therefore, I chose the economy option and ordered a plastic adapter.
The adapter waited a long time. Either the seller sent it late, or the post office was slow to deliver, but in the end I waited more than 2 months.
For packaging lovers

Inside was a white box: 
Inside was an adapter with a screwdriver and 4 screws for attaching the HDD

On the adapter we see a board fastened with three screws with external interface eSATA

And internal SATA interface

There is also a three-position switch on this board (shown with a blue arrow). The description doesn't say anything about it. Next I will write why it was needed.
Close-up of the Phillips screwdriver that was included in the kit


It is not suitable for serious purposes, but it is enough to screw the HDD to the adapter. If you pull too hard, the edges on the screwdriver begin to curl.
We buy a 2.5-inch HDD at a local store. I bought WD 1TB. The laptop has WD 500GB. When purchasing, I advise you to look at the thickness of the HDD, especially if you have a 9 mm adapter.

I tried to paste new HDD into the adapter, it did not fit in size (length). I had to unscrew the interface board.


We insert the HDD into this board

And then we screw this sandwich to the adapter. First, it is better to screw the HDD itself to the adapter, and then the board.


Everything seems to be assembled, all that remains is to remove the DVD drive and insert the HDD in its place.
Disassembling a laptop.
Turn the laptop over and disconnect the battery.
To do this, we remove the latches to the right and left of the battery (shown with green arrows). The right latch is fixed in any position, the left one is spring-loaded and returns to its place.


We return the laptop to its original (normal) position and open the lid (screen).

We need to raise the keyboard. To lift it, you need to insert a small flat-head screwdriver into the special grooves at the top of the keyboard (shown with a blue arrow) and push the latch forward. In videos on YouTube, I saw that people simply pressed a screwdriver into these grooves, but I do not recommend doing this, since the base of the keyboard will bend, which will then have to be adjusted with pliers. After all the latches are released, lift the top edge of the keyboard. On this edge you can see the tabs (blue arrows) that hold the latches (green arrows).

The keyboard must be lifted carefully, as there is a folded cable underneath it. There is no need to disable it. 
Under the keyboard there is a bolt that holds the DVD drive (indicated by a red arrow). 
Unscrew it and push out the DVD drive 
For comparison: adapter and DVD drive 
You can immediately see that the DVD drive has a bar screwed to the back and a tray plug to the front. All this must be transferred to the adapter. First, unscrew the back bar. 
It is necessary to unscrew two bolts and screw the bar to the adapter. The adapter already has all the holes. In the end it turned out like this: 
To remove the DVD drive tray cover, you must open the tray. 
To open the tray, there is a hole in the plug. Insert a regular paperclip there and the tray will open 
On one side we see two latches (red arrows) 
On the other hand, another one 
We bend them and slowly pull the plug towards ourselves. In fact, there are five latches, but two more came off on their own. 
Now we insert the plug into the adapter (all technological holes are there) 
Now we insert the entire adapter into the laptop 
We fasten the bolt under the keyboard, which previously held the DVD drive, and snap the keyboard into place. Insert the battery back. Now the laptop looks no different. 
Let's start the laptop. In Windows 7 the disk was detected normally. After initialization and formatting, you can use it. I ran some tests - copied files back and forth, everything went fine. Copy speed averages from 30 to 50 MB/s.
Joyfully, I sent the computer to shut down, but my joy was short-lived.
The computer shut down normally, the screen went dark, but the power button remained lit in white, and the fans remained spinning. I waited 5 minutes - no effect. I decided to leave the laptop in this state and observe. After some time, a blue splash screen appeared on the screen (which I thought was turned off) with error 0x0000009F. I didn't even bother to remember the rest of the codes.
To solve this problem, I went to a search engine and literally immediately came across a forum where the same problem was mentioned when people changed a DVD drive to an HDD. The solution to the problem was either to connect two legs (who do not have a switch) to the adapter, or setting the switch to the middle position.
I had to disassemble the laptop again and set the switch to the middle position. 
To do this, it is not necessary to remove the HDD from the adapter.
Then we assemble everything in reverse order. After these manipulations, everything worked fine, the laptop turns off as usual, easily goes to sleep and wakes up. I didn't notice any changes when copying files.