Word Excel training program. How to select a large piece of text
Popular test editor Microsoft Word is very popular among users around the world. This is the most powerful and convenient professional application for working with text documents.
Microsoft Word is included with the office suite Microsoft Office. For work in Word program Many books and manuals have been published. Many users learned to use the program on their own, so some settings and functionality programs may be unknown to them.
In this article I wrote some simple tips on working with the Word program, which will be useful for novice users. These 15 useful tips Word, work in versions of the program Microsoft Word 2007, Microsoft Word 2010, Microsoft Word 2013, Microsoft Word 2016. Perhaps almost everything works in the version of Microsoft Word 2003 (I have no way to check).
How to select an entire document
In the open Word document window, press the keyboard shortcut “Ctrl” + “A”.
How to highlight an offer
Press the “Ctrl” button, and then click with the mouse cursor on any word from the sentence.
How to highlight a paragraph
To select a paragraph, click three times on any word in that paragraph.
How to highlight text fragments in different places in a document
Select anything in a Word document in a convenient way the first desired fragment of text, and then, by pressing the “Ctrl” key, select the other desired fragments of text.
How to select a large piece of text
Place the mouse cursor at the beginning of the fragment, and then, pressing the “Shift” key, click the mouse cursor at the end of the fragment.
How to change case
If you accidentally typed text in capital letters, then you can return the letter case to normal by first selecting the text and then pressing the “Shift” + “F3” keys.
Simple text wrapping
Wrap text in a document without using copy/paste functions. Select part of the text and then press "F2", move the cursor to Right place document, and then press the Enter key.
The text will be moved to a new location in the document.
Underline text by skipping spaces
By default, Word works in the standard order: when underlining text, words and spaces are affected (solid underlining). What if you need to underline only words in the text, skipping spaces? To do this, select the text and then press the “Ctrl” + “Shift” + “W” keys.
As a result, only words in the document text will be underlined and spaces will be skipped. Pressing these keys again will cancel the underline.
Go to the beginning or end of the document
In an open Word document window, click on the keyboard shortcuts:
- “Ctrl” + “Home” - go to the beginning of the document
- “Ctrl” + “End” - goes to the end of the document
Quickly follow hyperlinks
By default, in Word, to follow a link (hyperlink), you must first press the “Ctrl” key and then click on the link. Hyperlinks can go to sites on the Internet, to other files, or within the document itself, to specific place in the text of the document. Now I will tell you how to follow a link with one click.
Sign in Word settings, select Options and then Advanced. In the Editing Options section, uncheck the box next to CTRL + click to select hyperlink.
Taking a Screenshot in Word
Beginning with Word versions 2010, the program added the ability to create screenshots (screenshots). The screenshot is pasted directly into Word document.
Go to the “Insert” tab, in the “Images” group, click on the “Snapshot” button. Next, select a window thumbnail from the list open windows, or click on “Screen Clipping”, and then select the desired portion of the monitor screen with a frame.
Next, Word will automatically insert the screenshot into open document. This image can be moved or resized like any other image in a Word document. The screenshot feature works in Word 2010, Word 2013, Word 2016.
Merging documents
In Word, you can quickly combine documents without having to select, copy, and paste documents one at a time.
First open new document Word, then go to the “Insert” tab, click on the arrow next to the “Object” button, in the menu that opens, select “Text from file...”.

After this, the contents of the selected documents will be sequentially copied into a new Word document.
Document comparison
Let's say you need to compare two versions of the same document. Select a document, open the “Review” tab, click on the “Compare” button. The menu will open two options: “Compare...” and “Merge...”. Click on the "Compare..." option.

In the window that opens, you will see differences between versions of the document, highlighted in red.
Password protection
To ensure privacy, encrypt your Word document using a password. Access to the encrypted document will be opened only after entering the password. You can read more about this.
How to repeat your actions several times in a row
In order not to repeat your actions several times in a row (text entry, insertion, deletion, etc.), use the repeat action command. After the action you want to repeat, press the “F4” keyboard button.
Conclusions of the article
With the help of 15 useful tips, the user can work more productively and quickly in Microsoft program Word.
Microsoft Excel is extremely useful program in different areas. Ready table with the ability to autocomplete, quickly calculate and calculate, build graphs, diagrams, create reports or analyses, etc.
Tools table processor can significantly facilitate the work of specialists from many industries. The information presented below is the basics of working in Excel for dummies. After mastering this article, you will acquire the basic skills with which any work in Excel begins.
Instructions for working in Excel
An Excel workbook consists of sheets. Leaf – Workspace in the window. Its elements:
To add a value to a cell, left-click on it. Enter text or numbers from the keyboard. Press Enter.
Values can be numeric, text, monetary, percentage, etc. To set/change the format, right-click on the cell and select “Format Cells”. Or press the hotkey combination CTRL+1.
For number formats, you can assign the number of decimal places.

Note. To quickly set the number format for a cell, press the hotkey combination CTRL+SHIFT+1.
For Date and Time formats, Excel offers several options for displaying values.

Let's edit the cell values:


To delete a cell value, use the Delete button.
To move a cell with a value, select it and press the button with scissors (“cut”). Or press the combination CTRL+X. A dotted line appears around the cell. The selected fragment remains on the clipboard.

Place the cursor somewhere else in the work field and click “Insert” or the CTRL+V combination.

In the same way, you can move several cells at once. On the same sheet, on another sheet, in another book.
To move multiple cells, you need to select them:
- Place the cursor at the end top cell left.
- Press Shift, hold and use the arrows on the keyboard to select the entire range.

To select a column, click on its name ( Latin letter). To highlight a line, use a number.
To change the size of rows or columns, move the borders (the cursor in this case takes the form of a cross, the crossbar of which has arrows at the ends).

To make the value fit in the cell, the column can be expanded automatically: click on the right border 2 times.


To make it more beautiful, let's move the border of column E a little, align the text in the center relative to the vertical and horizontal.

Let’s merge several cells: select them and click the “Merge and Place in Center” button.

Excel has an AutoFill feature. Enter the word “January” in cell A2. The program recognizes the date format and will fill in the remaining months automatically.
We grab the lower right corner of the cell with the value “January” and drag it along the line.

Let's test the autocomplete function on numeric values. We put “1” in cell A3, and “2” in A4. Select two cells, grab the autofill marker with the mouse and drag it down.

If we select only one cell with a number and drag it down, then this is the number “multiply”.
To copy a column to an adjacent one, select this column, “catch” the autofill marker and drag it to the side.
You can copy strings in the same way.
Let's delete a column: select it - right-click - "Delete". Or by pressing the hotkey combination: CTRL+"-"(minus).
To insert a column, select the one adjacent to the right (the column is always inserted from the left), click right button mouse – “Insert” - “Column”. Combination: CTRL+SHIFT+"="
To insert a line, select the one adjacent to the bottom. Key combination: SHIFT+SPACEBAR to select a line and press the right mouse button - “Insert” - “Row” (CTRL+SHIFT+"=")(the line is always inserted from above).
How to work in Excel: formulas and functions for dummies
In order for the program to perceive the information entered into a cell as a formula, we put the “=” sign. For example, = (2+3)*5. After you press ENTER, Excel calculates the result.

The calculation sequence is the same as in mathematics.
The formula may contain not only numeric values, but also references to cells with values. For example, =(A1+B1)*5, where A1 and B1 are cell references.

To copy a formula to other cells, you need to “hook” the autofill marker in the cell with the formula and drag it down (to the side - if copying to row cells).

When copying a formula with relative references to Excel cells changes constants depending on the address of the current cell (column).


In each cell of column C, the second term in parentheses is 3 (the reference to cell B1 is constant and unchangeable).

Built-in functions significantly expand the functionality of the program. To insert a function, you need to press the fx button (or the SHIFT+F3 key combination). A window like this will open:

To avoid scrolling through a large list of functions, you must first select a category.
When the function is selected, click OK. The Function Arguments window opens.

The functions recognize both numeric values and cell references. To put a link in the argument field, you need to click on the cell.

Excel recognizes another way to enter a function. Place the “=” sign in the cell and begin entering the name of the function. After the first characters a list will appear possible options. If you hover your cursor over any of them, a tooltip will appear.

Double click on required function– becomes available order filling in the arguments. To finish entering arguments, you need to close the parenthesis and press Enter.

ENTER – program found Square root from the number 40.
Microsoft Office Word is software tool for writing and processing text. This program very common in everyday life office work. Often, employees who have to work with text are required to have minimal Office skills. There is nothing complicated in printing text, but to process it and correct design certain knowledge is required.
Microsoft Word Basics
You can create texts using Word different types: abstracts, term papers, documents and more. It is possible to design the text by changing the appearance, adding pictures, tables and other necessary elements.
Typing text into a document
By opening the program from the desktop or menu "Start", we will be met by a clean one White list A4 size paper. The sheet format can be changed to any other standard, more on that a little later.

You can scroll through pages using a special slider to the right of the A4 sheet, or with the wheel of a computer mouse.
To start printing text using left button mouse, position the cursor at the beginning of the intended text at the top of the page.
If you accidentally did something wrong or deleted a piece of text, you can return the action back. To do this, use the key combination "Ctrl+Z".
Saving the finished document
To preserve your works written in clean slate electronic “paper”, into a full-fledged file for him further use or processing, there are several options:


Microsoft Word sets the option by default automatic saving document. You can disable this option using the following path: "File" — "Options" — "Preservation". In this menu, you can select both the ability to disable autosave and the time interval after which this function will save the modified file automatically. Very useful feature for people who forget to save their documents manually.

When working with documents that are important to you, do not disable the automatic saving function to avoid data loss. The cause of a program crash can be anything: accidental closing of the program, crash computer operation due to weather conditions, etc.
Working with the font
Visual perception of the text is very important for the reader. Sometimes, due to incorrect formatting, the person reading the text loses any desire to finish reading it, no matter how interesting it may be. To make the typed stream of letters and symbols look presentable, there are tools built into the program.
The more complex the text design looks, the less desire users of the document will have to read it. It is customary to use a font when choosing the appearance of text "Times New Roman" Size 14. Size 16 is used for headings.
If you still decide to use a different font at your discretion, Word offers its users a ready-made list of fonts pre-installed with operating system. If the amount provided to you is not enough, you can install additional fonts downloaded or purchased on the Internet.
A font has two main parameters: the font type and its size. Besides these, there are also others Extra options for a more original text design. To apply any of the parameters, you first need to select a specific fragment of the document for processing. To do this, left-click on the beginning of the fragment and drag to its end. To select all documents at once, press the key combination "Ctrl + A".

- To change a type, just click on its name on the panel and select from the list new font. When you hover over the option you want, you'll be able to preview what the text will look like before making your final selection. You can scroll through the list using the mouse wheel or by clicking the slider that appears on the right in the open window.

- To change the font size, click on digital value to the right of the font name and in the same way you can select the size of letters and symbols.

Additionally, you can change the font size without selecting digital parameter, but only by pressing the two buttons responsible for this. The left button increases the size of the letters by one step, and the right one, accordingly, decreases it.


Aligning document content
There are four functions for aligning content in a document to a sheet:
- Align Left (keyboard shortcut "Ctrl + L");
- Center alignment (keyboard shortcut "Ctrl+E");
- Align right (keyboard shortcut "Ctrl + R");
- Justify (keyboard shortcut "Ctrl+E").
If everything is clear with the first three functions, then what is the essence of width alignment? Everything is extremely simple. This parameter is required when accepting documents in some organizations, since after its use the text regularly fills the sheet on both sides. To understand this, let's look at its action using an example:
- Left alignment:

- Width alignment:

The example shows that in the second version the text with right side placed more neatly, closer to the edge. This is exactly what the format of official material should be when it comes to alignment.
Changing the text style
Almost any editor has the ability to change the text style, and this function, of course, did not bypass the legendary Word. These options also have keyboard shortcuts for quickly designing materials.
The Word editor provides three main functions for changing the style. Access to them is available in top panel controls, in the same window as the font selection.

- Bold (keyboard shortcut "Ctrl+B");

- Italic (key combination "Ctrl + I");

- Underlined (key combination "Ctrl + U").

These parameters can be combined with each other. This is what the text will look like with the three style options mentioned above applied to it:

Insert an image into a Word document
- To insert an element into a document, you must first open the submenu "Insert" in the top panel of the program.
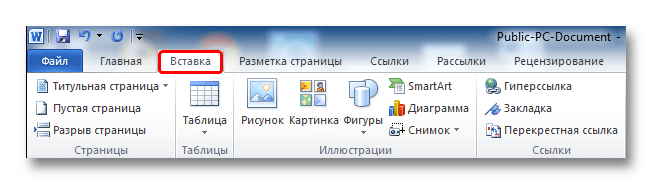
- The Word gallery already has a certain set of images for inserting into a document. To view these files, click the button "Picture".


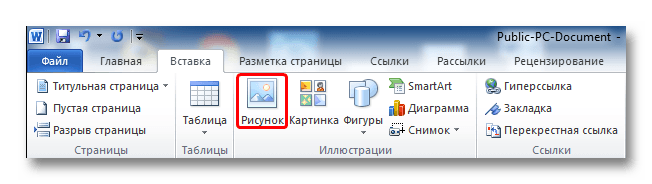
In the window that appears, look for the desired image among the files on your computer.

As you can see, doing basic work in the Word office program is not difficult, the main thing is to get used to the interface and get used to the functions in order to understand their purpose.
Video Word lessons for those who want to understand the Word interface at a professional level and make the most of all the possibilities of this office program. I wandered around YouTube and found a selection of good lessons.
It's not that Word is so difficult that you have to learn it. But sometimes, for example, I have problems with Word; changing the case of letters (from small to large) causes difficulties. Other little things. So I think training in Word can be useful for everyone. Of course, the main thing is to be able to type quickly, and also to be literate. Word helps in this matter, for example, spell checking is a very useful function.
There are 39 MS Word lessons in this playlist. The lessons go from simple to complex, there is a whole video course, I have never seen anything like this before. In any case, in free access absolutely not.
Watch Word video lessons
It might also be interesting to see This program is quite a complex thing and it’s not always easy to figure it out at random; for example, Excel has always bothered me.
Friends, subscribe to and receive useful, educational, educational and unique, sometimes exclusive content in your mail... I wrote so much, I wanted to subscribe myself.
This article introduces the basic concepts used in Microsoft Word to help new users get started creating complex, professional-looking documents.

Heading 1
On the panel quick access 2 Preservation, Cancel, And Return
File tab 3 New, Open, Preservation, Seal And Close.
Ribbon 4
Edit window 5
Scroll bar 6
Status bar 7
8
In Word, you need to save the document in order to exit the program without losing data. When you save a document, it is stored as a file on local computer or in network folder. With a later version, you can open the file, edit it, and print it.
Open File Explorer and select documentation. A list of documents will appear.
If the document you want to work on is in the list, click the file name to open the document. If the document is not listed, navigate to the location where the file is stored and double-click the file. The Word splash screen appears, and then the document displays.
Advice: file and selecting the command Open. To open a recently saved document, click latest.
Most text formatting tools can be found by clicking on the tab home, and then selecting in the group “ Font ».

1 this is on the tab home.
2 this group " Font"on tab" home ".
3 Font ».
|
Changing the font. |
||
|
Font size |
Change text size. |
|
|
Font enlargement |
Increase text size. |
|
|
Reducing the font |
Reduce text size. |
|
|
Change case |
Change selected text to uppercase, lowercase, or other common word styles. |
|
|
Removes all formatting from selected text, leaving only plain text. |
||
|
Bold |
Changes the selected text to bold. |
|
|
Italicizes the selected text. |
||
|
Stressed |
Draws a line under the selected text. Click the drop-down arrow to select an underline type. |
|
|
Crossed out |
Draws a centered line over the selected text. |
|
|
Interlinear |
Creates subscript characters. |
|
|
Superscript |
Creates superscript characters. |
|
|
Text effects |
Apply visual effects such as shadows, glows, and reflections to selected text. |
|
|
Text highlight color |
Transforming text marked with a marker into an attractive one. |
|
|
Font color |
Change text color. |
Using Styles
Styles let you quickly format key elements in your document, such as headings, headings, and subheadings. Follow these steps to apply styles to text in your document.
Select the text you want to change.
On the tab home in Group Styles Hover over any style to view dynamically directly in the document. To view full list styles, click the arrow Additionally to open the area styles.
To apply the style that best suits the text, click it.
When everything is ready, apply styles to individual elements Word allows you to use a set of styles to simultaneously change the appearance of your entire document.
On the "tab" Constructor" in Group Formatting a Document select one of the predefined style sets, for example Regular authentication or ordinary. Hover over any style assigned to view it dynamically directly in the document. To view ready style sets, click the down arrow to the right of the group Formatting a Document.
To apply a style set that best suits the text, click it.
Change line spacing in the document
WITH using Word You can easily change the spacing between lines and paragraphs in your document.
On the "tab" Constructor" select Paragraph spacing to view a drop-down list of paragraph spacing options. Hover over any paragraph spacing style to view dynamically directly in the document.
When you find the right type, click it.
Advice: To set your own paragraph spacing, select Custom spacing between paragraphs.
Preview and printing
Short review user interface Word

Heading 1 : Displays the file name of the document being edited and the name of the program you are using. It also includes the standard minimize, restore, and close buttons.
On the Quick Access Toolbar 2 : commands that are often used, e.g. Preservation, Cancel, And Return They are here. At the end of the Quick Access Toolbar is a drop-down menu where you can add other commonly used or commonly used commands.
File tab 3 : Click this button to find commands that are executed by the document itself instead of the document content, such as New, Open, Preservation, Seal And Close.
Ribbon 4 : The commands that are needed to work are located here. Appearance on the tape will change depending on the size on the monitor. Word will compress the ribbons by rearranging their control order to fit smaller monitors.
Edit window 5 : Shows the contents of the document you are changing.
Scroll bar 6 : Allows you to change the position of the screen you are editing a document.
Status bar 7 : You change the display of document information.
View buttons 8 : Allows you to change the display mode you edit the document according to your needs.
Slide zoom control 9 : Allows you to change the zoom settings of the document you are resizing.
Saving and opening a document
Specify a location to save the document in the field Save to. When you save a document for the first time, it is pre-filled as the file name in the field file name Enter the first line of text in the document. To change the file name, enter a new file name.
The document is saved in . Change the file name in the title bar to match the name of the saved file.
You can open a Word document to continue working. To open a document, do the following:
Click the Start button and select documentation.
Browse to the location where the file is stored and double-click the file. The Word splash screen appears, and then the document displays.
Advice: You can also open the document in Word by going to the tab file and selecting the command Open. To open a recently saved document, select Recent
Editing and formatting text
Before you can edit or format text, you must first select the text. Follow the steps below to select text.
Place the cursor at the beginning of the text you want to edit or format and click the left mouse button.
While holding down the left mouse button, move it to the right (called "dragging") to select text. A background color will be added at the location to indicate the selection range of the selected text.
Most text formatting tools are found by clicking on the tab home, and then selecting in the group “ Font ».
1 this is on the tab home.
2 this group " Font"on tab" home ".
3 This is the Bold button. In the table below for the names and functions of the buttons "" in the "" group Font ».
|
Changing the font. |
||
|
Font size |
Change text size. |
|