Is it possible to delete the application data folder. AppData what is this folder
The appdata folder contains data for all applications used by the Windows operating system. How to find this folder and how to clean unnecessary files is described in the full article.
Starting with the Windows Vista operating system, some users began to find the appdata folder on their computers, the weight of which sometimes reached 10 GB or more. Given the fact that Vista was a little popular system, few people tried to help solve the problem, but with Windows 7 it became more widespread. Let's look at it in more detail.
How to find the appdata folder
By default, the appdata folder is hidden from the user. To open it, you first need to enable the display of hidden folders. If in Windows XP this could be done in any window through the service/folder properties, then starting with Windows 7, Microsoft decided to remove such quick access to this option. You can find the display setting in the Control Panel, in the “Folder Options” section. This is where the very section for setting up the display of folder properties on a computer running Windows 7 is now located. Check the “Show hidden folders” item in the “View” subsection.
Note: in Windows 8 everything is completely identical.
Now you can find the appdata folder in the following path: System Drive -> Users -> Username. This is where she is.
What's in the appdata folder
The folder contains a kind of “essential junk” from programs and games, for example, history, settings, saves, bookmarks, etc. Almost everything that happens on your computer. Over time, the size of the folder increases, as a result of which the free space on the disk decreases, because not all programs delete their settings and other files in appdata, taking into account the fact that someday you will install them again.
The hidden appdata folder contains three subfolders:
- Roaming (the folder contains data that you can save to a portable device at any time and, after reinstalling Windows, paste it along the same path, while saving all your settings). This is where all your browser data, bookmarks, etc. are most likely located.
- Local (the folder contains exclusively local data that cannot be transferred together with the profile). Here you can most often find large files that cannot be synchronized with the server, for example, downloaded files, game saves, torrent dates, etc.
- LocalLow (the folder contains data that cannot be moved and has the lowest access level). Here you can find data from programs that run or ran in a protected, safe mode.
An ordinary user cannot influence the location folder in any way, and applications themselves determine in which folder they will save their data.
Note: If you need to delete any data that is taking up a huge amount of memory on your system drive, you should first go to a search engine and find out what program created the folder (in most cases the folder is named after the program, but not always), then make sure that You don’t need her data, so feel free to delete it.
Is it possible to delete the appdata folder in Windows 7 and Windows 8
Considering what was written above, you probably realized that you can free up space by deleting unnecessary data. But the system will not allow you to destroy the entire appdata folder. There is only one reason - some open system and user files also use appdata and their destruction can cause destabilization of the system. Accordingly, you can only delete the folders of the applications themselves, and then only those that are currently inactive. To do this, you need to go to one of the folders: Roaming, Local and within these system folders find and delete the necessary data.
How to delete a folder with an unnecessary program
In most cases, you are not allowed to delete a program's data because it is being used by the system. Close the program and then you can delete its data.
If the program is running in the background (invisible) mode, the task manager will help you, which can be called through the combination Alt+Ctrl+Del or by clicking on the bottom panel -> Task Manager.
If you are 100% sure that this is a program you do not need, find it among the installed programs and look at the name of the executable file. In 90% of cases, this is how the program is signed in the task manager. Open the processes tab, filter them by user and find the executable file. Complete the process.
Note: Never do this with system programs! In most cases, this can lead to destabilization of Windows 7 and Windows 8.
After the process is completed, you can delete the program and its data in appdata.
Last time we looked at it, but this time I’ll tell you how delete computer junk manually, by using Windows tools and programs.
1. First, let's look at where garbage is stored in operating systems.
In Windows XP
We go in and delete everything in the folders: Windows temporary files:
- C:\Documents and Settings\username\Local Settings\History
- C:\Windows\Temp
- C:\Documents and Settings\username\Local Settings\Temp
- C:\Documents and Settings\Default User\Local Settings\History
For Windows 7 and 8
Windows temporary files:
- C:\Windows\Temp
- C:\Users\Username\AppData\Local\Temp
- C:\Users\All Users\TEMP
- C:\Users\All Users\TEMP
- C:\Users\Default\AppData\Local\Temp
Browser cache
Opera cache:
- C:\users\username\AppData\Local\Opera\Opera\cache\
Mozilla cache:
- C:\Users\username\AppData\Local\Mozilla\Firefox\Profiles\ folder\Cache
Google Chrome cache:
- C:\Users\username\AppData\Local\Bromium\User Data\Default\Cache
- C:\Users\User\AppData\Local\Google\Chrome\User Data\Default\Cache
Or enter it in the address chrome://version/ and see the path to the profile. There will be a folder there Cache
Temporary Internet files:
- C:\Users\username\AppData\Local\Microsoft\Windows\Temporary Internet Files\
Recent documents:
- C:\Users\username\AppData\Roaming\Microsoft\Windows\Recent\
Some folders may be hidden from prying eyes. To show them you need.
2. Cleaning the disk from temporary and unused files using
Standard Disk Cleanup tool
1. Go to “Start” -> “All Programs” -> “Accessories” -> “System Tools” and run the “Disk Cleanup” program.
2. Select the disk to clean:

The disk scanning process will begin...
3. A window will open with information about the amount of space occupied by temporary files:

Check the boxes next to the partitions you want to clear and click OK.
4. But this not all. If you installed Windows 7 not on a blank disk, but on top of a previously installed operating system, you probably have space-consuming folders such as Windows.old or $WINDOWS.~Q.
Additionally, it may make sense to delete system restore checkpoints (except the last one). To perform this operation, repeat steps 1-3, but this time click “Clean up system files”:

5. After the procedure described in step 2, the same window will open, but the “Advanced” tab will appear at the top. Go to it.

Under System Restore and Shadow Copies, click Clean.
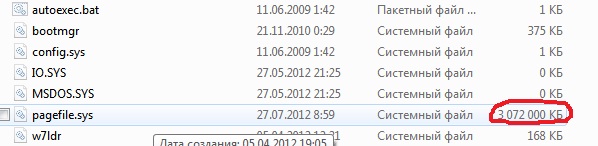
3. Files pagefile.sys and hiberfil.sys
The files are located at the root of the system disk and take up quite a lot of space.
1. The pagefile.sys file is system swap file(virtual memory). You cannot delete it (it is not recommended to reduce it either), but you can and even need to move it to another disk.
This is done very simply, open “Control Panel - System and Security - System”, select “Advanced system settings” in the “Performance” section, click “Options”, switch to the “Advanced” tab (or press the win + R key combination, the command “execute” will open and there type SystemPropertiesAdvanced) and in the “Virtual Memory” section click “Change”. There you can select the location of the paging file and its size (I recommend leaving “Size as selected by the system”).
4. Removing unnecessary programs from the disk
A good way to free up disk space (and as an added bonus, increase system performance) is to remove programs you don't use.

Go to Control Panel and select “Uninstall Programs”. A list will appear in which you can select the program you want to remove and click “Delete”.
5. Defragmentation
Defragmentation of a hard disk, carried out by a defragmenter program, allows you to organize the contents of clusters, that is, move them on the disk so that clusters with the same file are placed sequentially, and empty clusters are combined. This leads to increase speed access to files, and therefore to some increase in computer performance, which at high level fragmentation the disk may turn out to be quite noticeable. The standard disk defragmenter program is located at: start>all programs>standard>utilities>disk defragmenter

This is what the program looks like. In which you can analyze disk, where the program will show a diagram of disk fragmentation and tell you whether or not you need to defragment. You can also set a schedule for when the disk will be defragmented. This is a program built into Windows; there are also separate disk defragmentation programs, for example which you can download here:

Its interface is also quite simple.

Here are its advantages over the standard program:

- Analysis before disk defragmentation Do a disk analysis before defragmenting. After the analysis, a dialog box is displayed with a diagram showing the percentage of fragmented files and folders on the disk and a recommendation for action. It is recommended to carry out analysis regularly, and defragmentation only after appropriate recommendations from a disk defragmentation program. It is recommended to perform disk analysis at least once a week. If the need for defragmentation occurs rarely, the disk analysis interval can be increased to one month.
- Analysis after adding a large number of files After adding a large number of files or folders, the disks may become excessively fragmented, so in such cases it is recommended to analyze them.
- Checking that you have at least 15% free disk space To defragment completely and correctly using Disk Defragmenter, the disk must have at least 15% free space. Disk Defragmenter uses this volume as an area to sort file fragments. If the amount is less than 15% of free space, Disk Defragmenter will only perform a partial defragmentation. To free up more disk space, delete unnecessary files or move them to another disk.
- Defragmentation after installing software or installing Windows Defragment drives after installing software or after performing an update or clean install of Windows. Disks often become fragmented after installing software, so running Disk Defragmenter can help ensure peak file system performance.
- Save time on disk defragmentation You can save a little time required for defragmentation if you remove junk files from your computer before starting the operation, and also exclude from consideration the system files pagefile.sys and hiberfil.sys, which are used by the system as temporary, buffer files and are recreated at the beginning of each Windows session .
6. Remove unnecessary things from startup
7. Remove everything unnecessary from
Well, I think you know for yourself what you don’t need on your desktop. And you can read how to use it. , a very important procedure, so don’t forget about it!
The Windows operating system hides many secrets, but some are more interesting than others, and if you take the time to unravel them, you can reap undeniable benefits.
Take, for example, a directory that first appeared in Windows Vista and whose existence few people suspect. The reason is that it is hidden from the eyes of users, since it stores extremely important system information. However, understanding its nature can help you save precious disk space on your primary partition and possibly improve the performance of your entire system.
AppData (or Application Data) is a hidden (by default) system folder, a subdirectory of the Users folder with personal files of all registered users. The folder contains all the information generated by installed programs on the computer and is invisible to users because (at least in theory) the files stored in it should not be of any interest to them.
However, reality often diverges from Microsoft's original vision. With prolonged and active use of Windows without reinstalling the system, the size of this folder will grow rapidly, and you may soon run out of free space on the system partition - especially if you are using a relatively modest size SSD device, where every megabyte matters.
Let's take a closer look at the AppData structure and find out which of the files stored in this folder are critical and which are not.
As mentioned, AppData is hidden by default, so to get to it you will have to change some Windows system settings. To do this, open the “Control Panel” and go to the “Appearance and Personalization” section. Next, open the Folder Options dialog box and on the View tab, in the list of options, find the Hidden files and folders option. Now simply change the default settings (“Do not show hidden files, folders and drives”) to “Show hidden files, folders and drives”.

This will make visible not only AppData, but also a number of other system directories and files, as well as files and folders that you have hidden.
AppData is located in the C:\Users folder, but note that each logged-in user has their own AppData directory, so look for a folder in the directory with your username.
By default, this directory contains three subdirectories: Local, LocalLow and Roaming. Each of them stores data from different profiles.
Local contains files created during the operation of installed programs. This information is strictly specific to the individual computer user and cannot be transferred to a new machine. Here you will also find a folder named Microsoft, containing a history of all Windows activity.
Local also contains a folder with temporary files (Temp) created while various applications are running. Its contents, since very often these records are unnecessary and only take up disk space.
Folder Roaming stores certain user files that can be transferred from computer to computer.
Folder LocalLow is intended mainly for buffer data generated by Internet Explorer, Java and Adobe programs.
Very often, quite a lot of software “waste” accumulates in these AppData subdirectories, which over time can grow to incredible sizes. To clean the system of all these junk files, it is not at all necessary to delve into the depths of AppData. You can get to the folder with temporary files to be deleted in an easier way.
If you write in the address bar of Explorer shell:history and press Enter, you will instantly find yourself in the Internet Explorer history folder. shell:cache opens the directory with the browser's offline buffer, shell:cookies shows all recorded cookies, and with shell:sendto you can remove and add shortcuts to the Send menu.
If you want to explore the contents of the AppData folder in more detail, then a small but powerful tool can bring you invaluable help. It will quickly scan your hard drive and then visualize the distribution of files stored on it in a very attractive graphical form, so you can easily navigate if one or a large group of similar files is taking up too much space.

Well, the easiest and best way to clean not only AppData, but also everything unnecessary on your hard drive, is still to periodically scan the system with the wonderful CCleaner tool from Piriform.
Have a great day!
Despite the fact that the AppData folder is called the system folder, access to it is sometimes simply necessary for the average user of a personal computer. The fact is that this section stores a lot of information about installed games, applications, and programs. Sometimes you need to delete files that remain from unnecessary utilities, and sometimes you need to configure a game inside this folder. In this article, you will learn how to find AppData, access it, and most importantly, make it visible, along with non-system folders.
Where is the AppData folder?
By default, this folder can be found using the instructions:
- Go to your local Disk C in the “My Computer” section;
- Next, find the “Users” or “Users” folder in the English version;
- Click on the directory with your account name, it is important not to go to “General” or “Guest”;
- Select the AppData folder.
This is the fastest and easiest way to navigate to this system folder. However, this only works if you are configured to show hidden system folders. Other times you simply won't see it.
To proceed to this directory, you must decide for yourself: whether you will configure the display of system files, or simply go to AppData through the “Run” task bar. The first option is suitable for those who will need the AppData folder often, and the second is for one-time use, since entering a task often will be inconvenient for you.
How to access the AppData folder through the shortcut bar.
If you need to go into this directory a couple of times, and you are not ready to spend a lot of time setting up the display of system files for this action, then perform the following algorithm:
- Press the Win + R keys on your keyboard at the same time, or on the Russian keyboard Win + k. There is no difference.


- You will see the “Run” shortcut bar on your screen.


- Enter the query “%appdata%” without quotes into the empty field. Click on the “Ok” button.


- The desired directory will immediately open in front of you. In this way, you can easily access any folder on your computer, knowing only its name.


How to customize the display of the AppData folder
To always see the system folder you need, just turn on its display. Please note that after performing this algorithm, you will see absolutely all the system folders of your computer; for some users this will be a plus, for others it will be an unnecessary clutter of directories.
- Go to the Control Panel via Start in File Explorer on your desktop.


- In the window that appears, select the “Design and Personalization” section. If your icons are displayed completely differently, then find the “View” field at the top right and select the “Category” view option.


- Next, go to the “Folder Options” subsection.

- A small window with settings will appear in front of you; in it, go to the “View” tab.


- Scroll to the very end and find the “Hidden files and folders” item. It has two sub-items, select “Show hidden files, folders and drives” by checking the box next to it. Click “Ok” to complete the setup.


- Now follow the path indicated in the first step of this article. You will see the AppData folder you are looking for, it will be somewhat dimmer than the others, since it is a system one.


Now you can use the AppData directory, change it and delete files you don’t need.
Watch this short video if your system is Windows 8:
Users of the Windows Vista operating system were the first to discover an unknown folder on their computer, and the question immediately arose: AppData, what is this folder? Attention was drawn to it because it occupied a considerable part of the computer’s memory, and sometimes its weight reached 10 GB or more.
Since there were few Vista OS supporters compared to Windows 7 users, the issue was not so global. However, later more and more questions appeared related to the mysterious folder.
The detection settings for this folder are slightly different in Windows 10, so it makes sense to look into all the intricacies of the issue. At the same time, it is important to remember the main rules of programmers and not to disrupt the operation of the entire system or cause its complete destabilization by clearing seemingly “unnecessary” files.
In addition, it will be useful to learn about what vulnerabilities one interesting virus associated with this very AppData folder chooses to download and infect the system. All this will help protect and secure your PC and prolong its proper functioning.
Interesting?
What's in the AppData folder
In simple terms, this folder stores all sorts of “necessary junk”, which is saved from the operation of programs, games, and settings. There's also history, bookmarks, and the like. This information is saved in the hope that the user may need all this someday.
The more time the system runs, the more the size of this folder increases due to new data and information, and the less free space remains on the disk. If you get to this folder, then inside it you can see the following three more folders, like:
- "Roaming" The user can freely transfer the contents of this folder if necessary, for example when reinstalling the entire system, to a removable disk and then return everything back to its place, preserving the personal settings in their original form. Also, all information from browsers and bookmarks that the user saves is saved here.
- "Local". The contents of this folder are primarily local data that cannot be migrated with the user profile. For example, you can find saved games or downloaded files here.
- "Local Low". The third folder stores the most protected data and files that cannot be transferred from prying eyes. These files operate only in well-protected mode, which guarantees an adequate level of security for their contents.
The contents of the folder are shown in Figure 1.
Rice. 1. Contents of the Appdata folder
How to find the AppData folder?
Finding the folder is not at all difficult; to do this, it is important to follow a few simple instructions. Since this folder is classified as hidden, first you need to configure the display of hidden folders on your computer. In Windows XP, the problem is solved this way:
- you need to left-click on the folder;
- then you should go to the folder properties;
- after that, go to the “View” tab;
- check the box next to the “Show hidden files and folders” command.
Rice. 2. How to set the command to show hidden folders on Windows XP
Settings can be changed by simply opening the folder properties. When it comes to Windows 7 and Windows 8, there is no such quick and easy access. Folder settings can be found in the Control Panel. There you need to select “folder options”, as shown in Figure 3.
Rice. 3. Path to search for the Folder Options command.
Rice. 4. How to set the show hidden folders command on Windows 7 and Windows 8
Deleting a folder
It is important to remember one important detail that can affect the correct operation of the entire system.
Important: If a folder or file takes up a lot of disk space and you want to quickly get rid of it, freeing up a decent amount of free space, you need to be completely convinced that it is unnecessary and unimportant. This also applies to the Appdata folder.
As for the Appdata folder, you need to make sure that it does not contain files necessary for the operation of some programs. To do this, simply go to the folder and view its contents.
In fact, a lot of “needed junk” can be deleted from the AppData folder and, accordingly, the amount of free space can be increased. However, this entire folder cannot be deleted, because many system and user files use the contents of Appdata in their work.
If her data were deleted, it would immediately lead to a disruption in the system. Each user can analyze which files are not needed and which will not affect the correct operation of the OS, after which they can selectively clear unnecessary data and only at the moment when they are inactive.
Hint: The analysis is quite simple - if you constantly use some program, the files from which are in the Appdata folder, you do not need to delete them. Everything else can be removed.
AppData on Windows 10
By and large, searching for the AppData folder is practically no different from the same path that needs to be taken in the “seven” and “eight”.
The only difference is that in order to open the Control Panel itself, where you can configure the folder properties, you need to do slightly different steps. This OS has two control panels: one is classic, which most PC users are used to, and the other is shortened.
The classic panel contains many more tools that the user can use for control. The shortened panel, in turn, opens the most frequently used commands, and with its help it is even easier to find the required section.
Many reviews indicate that these changes were amazing, but how to find AppData in Windows 10? To do this, again you need to go to the “Folder Options” section, which can be accessed through the “Control Panel”. The search process is as follows:
- right-click on the “Start” menu;
- select the desired line to configure;
Rice. 5. How to find the Folder Options section through the Classic Control Panel to display the Appdata folder.
After this, you need to do the same steps as in seven and eight to configure folder properties and display hidden files. After this, the AppData folder will be visible to the user, as a result of which its contents can be cleaned or moved.
Deleting files in the AppData folder with an unnecessary program
To begin with, it is important to remember that deleting a system program will cause the most dire consequences for the entire OS. Therefore, if there are files of some system program in the AppData folder, it is better not to touch them.
Hint: It’s very easy to recognize the system program - in the “Task Manager”, on the “Processes” tab in the “Description” column it will be written “Microsoft” or “Windows”. We'll talk further about how to open this same dispatcher.
However, if the file being deleted is not a system one, then there are several options for deleting it.
In some cases, as soon as the user clicks the “uninstall program” button, the system does not allow this action to be carried out. This happens because it is currently active and in use.
Therefore, you first need to close the program itself, stopping its working process, after which its unhindered removal will be guaranteed. This is very relevant for cases when the user wants to remove something from the Appdata folder.
If the program that will be removed is running in the background or invisible, then to stop it you need to:
- press “Alt”, “Ctrl” and “Del” at the same time;
- go to the “Processes” section;
- select the desired program by name;
- Click the “end process” button.
Rice. 6. Working with the task manager to end the process of a specific program.
When you are completely sure that a program is no longer needed, you can find it by name among the general list of programs installed on your computer and delete it. After the operation has been completed, the AppData folder can be cleared of all unnecessary information.
AppData and viruses
For many viruses, AppData is a favorite download location. Since the folder is hidden, it can be viewed using a common program such as Total Commander. Only in this program you need to click the “Show hidden/system files” button. This way you can remove the virus.
Rice. 7. “Show hidden/system files” button in Total Commander
When simply viewing folders, it is almost impossible to see the virus, since its name is well disguised and difficult to recognize. This is why it is important to regularly scan your computer using an antivirus.