How to boot from an “installation” DVD or flash drive - BIOS setup in pictures. Installing Windows XP - installation process via BIOS
Hello! Today I will write about the most sacred thing that can be in the computer business, this is about how to install Windows 7. I think that everyone at least once had such a problem as “Windows crashed”, and only specialists can reinstall it and charge you a considerable amount of money.
But you think so, today I will write how to install Windows 7 yourself and completely free. I've been meaning to write this article for a long time, but never got around to it. Until I myself needed to reinstall Windows 7 on my computer. I quickly figured it out and took photos for this article. I apologize in advance for the quality of the photos, I took the photos with a video camera. And then I will describe point by point what is needed to install Windows 7 and how to actually install it.
This article describes in detail the installation process of Windows 7. But I wrote another article in which I collected. Take a look, I think you will find it useful.
What do you need to install Windows 7?
1. Naturally, we will need a disk with Windows 7. You can buy it in a store or download it on the Internet. After you download it, it will most likely be in .iso format; I wrote about how to burn a disc in the article.
2. Before installation, we need to “save” your files that are located on the disk on which you have the operating system installed. Usually this is drive “C”, the fact is that during the installation process we will format it and all files from it will be deleted. If you have a new computer (only from the store), then this does not concern you, but in another case, you need to transfer all the files from drive “C” to another drive. Data stored on the desktop and in a folder “My documents” will also be deleted!
3. And the last thing you need to prepare is to put it in BIOS booting from a CD/DVD drive, so that we can boot from it first (By default, the computer boots from the hard drive). I wrote about what BIOS is and how to enter it here and. You can check how your computer is configured; you may already have boot from the drive installed. Just insert the Windows 7 disk into the drive and restart the computer; if the computer boots from the disk, then everything is OK (you will see the white text and dots). Well, if the PC does not boot at all, or Windows starts loading, then you need to configure the BIOS. Preparations for installation are completed, let's move on to installation. I already wrote about that.
Installing Windows 7
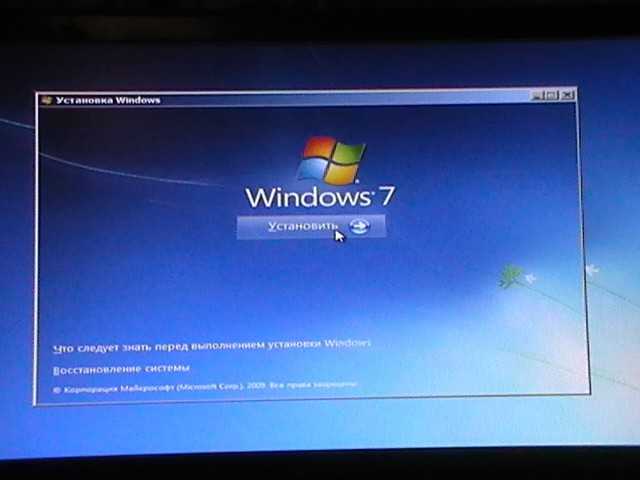
1. Place the disc in the drive and restart the computer. If you did everything correctly during preparation, then you should see a white inscription with dots. You need to quickly press any key. Next you should see this picture:


3. After this, we see this picture, on which we click “Install”


5. At the next stage, click “Full installation”

6. Now comes the fun part. If you already had an operating system, and your hard drive is already broken, then do this: We look in the list for the partition that we need (we need drive “C”), opposite it should be written “System”. The names may differ from what I have. For example, I have “Disk 0 Partition 6”, yours may be different. If you are sure of your choice, then click “Disk Settings” and “Format”, confirm, wait for completion, see that our disk is selected (Remains selected) and only after checking everything again, click “Next”. When formatting, all data from the partition you selected will be deleted!
If you have a new computer, then you will need to partition the disk. In your case, you will only have an unmarked area. I described in detail the process of partitioning a new hard drive in the article. Do this: Select it (the unmarked area), click “Disk Settings” and “Create” and enter the size of the first partition. The first partition that you will create will be a partition for the system (drive “C”), I advise you to allocate 50-100 GB for this partition. The remaining unmarked area needs to be divided, preferably twice. Let's create again and enter, for example, 200 GB, and with what remains we create another partition and you should get a picture similar to mine:


7. After clicking on the “Next” button in the previous paragraph, the process of copying files and installing Windows 7 will begin.


8. Now let’s move on to setting up Windows 7. Enter the user name and click “Next”

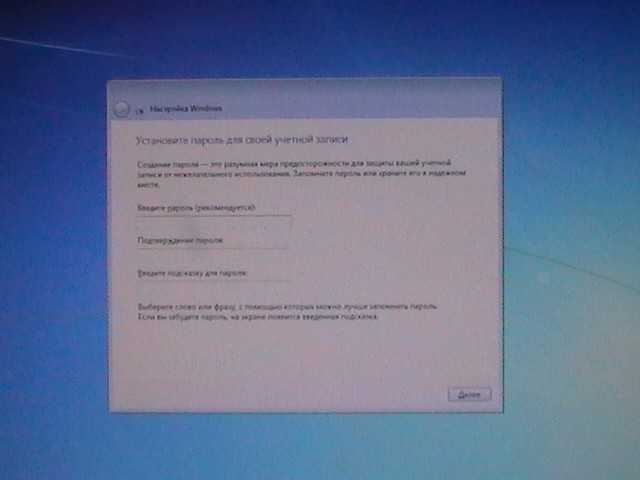
9. Enter the password, or not, as desired and click “Next”
10. If you have a key, then write it down, and if not, then uncheck the “Activate when connected to the Internet” and click “Next”


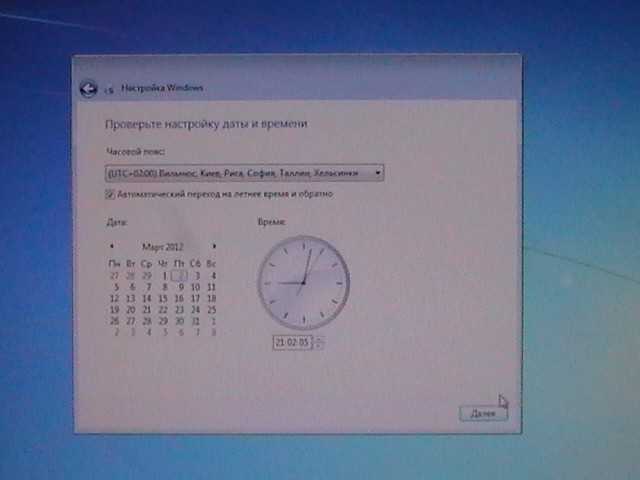
12. Last stage. Specify time zone, time and date. And of course, click “Next” :)
13. That's it, I congratulate you! Windows 7 is installed, a couple more beautiful pictures and the desktop is in front of you.


Updated: January 11, 2013 by: admin
To install Windows yourself via BIOS, you need a Windows OS boot disk and basic knowledge of BIOS. In this article we will teach you the intricacies of working in BIOSe so as not to harm your computer and get a working operating system.
Before installing the OS, download and burn to disk drivers for such computer parts as:- motherboard;
- sound card;
- DVD/CD drive;
- network card, Wi-Fi, Bluetooth;
- CPU;
- BIOS;
- video card;
- Touchpad, Web-camera, monitor;
- USB devices (mouse, keyboard, printer), USB ports.
Save all the files you need from your desktop and the “My Documents” folder to a flash drive, since all data from “Local Disk C” is erased when installing Windows.
The installation begins by restarting the computer and entering the BIOS. On different motherboards, different manufacturers have their own key combination for entering. Most often, you can enter the BIOS by pressing Del, F1 or F2, F12. We advise you to pay attention to the lower right corner of the screen when you start to boot your computer. It is there that the combination is written that will allow you to enter Bios.


There are no difficulties in installing Windows via Bios if you understand it thoroughly. We advise you to write down the main points of work in the BIOS before starting the OS installation. BIOS is the heart and brain of computers, do not change the settings just like that, otherwise your work with your PC will end until repaired by a service center or forever.
Instructions
First you need to get into the BIOS menu. To do this, you need to press the Del key immediately after turning on the computer, when the initial information about your system appears. Sometimes, instead of the Del key, another one can be used, for example, one of the F keys. On many models of modern motherboards, the initial screen displays a list of keys for entering different settings modes. In this list you can see which key is used to enter the BIOS. You can also find out about this from the instructions for the motherboard.
A list of devices will appear that you can set to boot first. Among them, you should select the hard drive (HDD, Hard Drive), then press Enter. Exit the BIOS after saving the settings. After this, the computer will restart. Now, after turning on the PC, your operating system will load first.
If this does not help and your operating system does not boot, then in the BIOS menu you can configure the system to boot from disk and, if necessary, reinstall the OS or restore its functionality. To do this, install your optical drive in step 1-st Boot Devise.
Now you just need to insert the boot disk into the optical drive and then restart the computer. The system will start from the boot disk. You will have the opportunity to either reinstall the operating system or use the recovery console to return it to functionality.
After you reinstall the operating system or restore it, do not forget to install your hard drive again in step 1-st Boot Devise.
Sources:
- how windows starts
Installing the operating system through BIOS is the most correct way. Even if you do not understand anything in this menu, you can easily install the system on your computer. Everything is done by pressing a couple of keys.
You will need
- Computer, disk with Windows OS.
Instructions
First of all, you need to make sure that the system disk is multiboot. To check this, insert the system disc into the drive. If a window opens on the desktop with the option to install the system, the disk is multiboot. If a window appears displaying folders, the disk is not a folder. Once you are sure that the Windows disk supports multiboot, restart your computer after copying the necessary files to a separate media.
During reboot you should regularly press "F9". This provokes a forced start of the system from the disk. After some time, you will need to confirm launching from disk by pressing ENTER. After clicking it, a window will be displayed allowing the user to select installation parameters. Select "Automatic from disk". The system will restart again - this time there is no need to press F9.
In the next stage of installation, you need to remove all partitions. For the correct actions, pay attention to the tips that will be located at the bottom of the screen. Once you delete all the sectors, the disk partition will appear showing the volume. Divide this partition into the required number of disks (leave 30-40 GB for the system partition).
As soon as the partition for the system is created, install Windows into it, first selecting the “ Normal” option. The installation of the operating system will begin automatically, you will only occasionally have to make adjustments, for example, username, time zone, etc. Once the OS installation is complete, install the necessary codecs and drivers on your computer.
Sources:
- installing windows via bios
The BIOS program acts as an intermediary between the operating system and the computer hardware. It is with its help that you need to configure the optical drive, and not the hard drive, as the first Windows boot device. Carrying out this operation does not require the involvement of computer special forces and will not take much time.

Instructions
Restart your computer.
Press the Delete or F2 key (depending on the BIOS version) several times in the first seconds of boot when the computer monitor screen appears on a black background. Information about the key used is always at the bottom of the screen and looks like Press Del to enter BIOS. The key must be pressed before the operating system starts loading. Otherwise, you will need to restart your computer again.
Press the Enter key to enter the selected partition and specify the CD-Rom in the 1st Boot Device field using the Page Up and Page Down keys.
Specify Hard Disk in the 2nd Boot Device field and select Exit & Save Changes to save the selected changes.
Go to the Exit menu and press the Y key at the BIOS exit confirmation window.
Insert the Windows installation disc into the drive and press Enter at the Setup window.
Press F8 to agree to the license agreement.
Select (or create) a disk partition to install the operating system in the dialog box that opens. Determine the number and size of the required disks based on the computer parameters and user needs.
Confirm your choice by pressing the Enter key and specify the NTFS format in the new dialog box for choosing the format for formatting the selected partition.
Wait for the formatting process to complete and reboot.
Configure system parameters in the familiar Windows graphical interface, following the system prompts.
Useful advice
The specific names of partitions and individual parameters may change depending on the version of Windows used, while maintaining the key values (Boot, Hard Disk, Bios).
Sources:
- Installing BIOS in Windows XP
Sometimes you may encounter a problem when a certain program requires administrator rights. There are other reasons that lead users to search for an answer to the question of how to run the computer as an administrator. There are several answers to this question.

Instructions
Using Safe Mode
So, if your computer is on, restart it. When the first letters and numbers appear on the screen on a black background, press the F8 key on your keyboard. You will see a screen that lists the different ways to boot the operating system. Select "Safe Mode".
After selecting the desired item, you will automatically log into the operating system under an administrator account. Nothing more is needed. Unless you are asked to enter a password, if you set one when you changed the settings of the “Administrator” account.
Without using the welcome screen
If instead of the welcome screen you see the “Login to Windows” window (where there are only two fields - “User” and “Password”, as well as 3 buttons - “Ok” “Cancel” “Options”), everything is simple here too. Enter “Administrator” in the first field and password in the second. If you have not specified a password, leave this field blank.
If the operating system does not require you to enter a username and password, do this: wait until the desktop loads, click the “Start” menu -> “Shut down”. Next, in the “Select the desired action” item, select “End session...” and click “OK”. Enter the username, i.e. “Administrator” and password.
Using the Welcome Screen
Wait for the welcome screen to load with a list of available accounts, press the Ctrl and Alt keys simultaneously and, without releasing them, press the Del key 2 times. The “Login to Windows” window should appear on the screen. Now enter your username and password.
To install the operating system or restore the operating parameters of a mobile computer, you need to run a special disk. To successfully perform this operation, you most often have to change the BIOS menu settings.

Instructions
Turn on your mobile computer and open the DVD drive tray. Insert the desired disc into it, close the tray and reboot laptop. Immediately after turning on your mobile device, press the F8 key. It is worth noting that when working with certain models of mobile computers, you must press a different key.
Wait for a window with a list of available devices to appear. Select Internal DVD-Rom and press Enter. After a while, the message Press any key to boot from CD should appear on the screen. If you need to run programs with disk, then press any keyboard button.
Unfortunately, it is not always possible to use the menu for quickly changing the boot device. If, after pressing the F8 key, the mobile computer continues to boot normally, turn off the device. Turn it back on laptop and press F2. Select Start BIOS and press Enter.
After entering the motherboard menu, open the Boot Options or Boot Settings tab. Find Boot Device Priority or its equivalent. Set the First Boot Device option to Internal DVD-Rom. Return to the main BIOS menu window. Highlight Save & Exit. Press the Enter key and after restarting the computer, wait for the Press any key to boot from CD message to appear.
If your mobile computer does not have a built-in DVD drive, use a portable device that connects to a USB port. Connect the external DVD drive to laptop ohm Insert the desired disc into the device. Repeat the operations described in the previous steps. In this case, you must select External DVD-Rom devices. If you have it at your disposal, then set the boot priority for the USB-HDD device in the BIOS menu.
Sources:
Since the BIOS determines how the operating system boots, changing these settings is of great importance to the user. Running installation is the most common method of reinstalling the system, which may be required in a variety of situations.

Instructions
Turn off the computer by pressing the Power button on the case and turn it on again. Press the Del function key to enter BIOS mode. Please note that depending on the model, other function keys may be used - F2 or F10. The specific key is usually indicated at the bottom of the screen - in the Press ... to enter SETUP line. You may also need to press the desired key several times.
In AMI BIOS, you need to go to the Boot tab of the top toolbar using the up and down arrow keys and confirm your selection by pressing the Enter function key. After that, expand the Boot Device Priority item and select the 1st Boot Device line. Press the Enter key and highlight the CDROM line in the Options item. Confirm changing the boot options by pressing the Enter key again and use the Esc softkey to exit the boot menu. Go to the Exit tab in the top panel of the BIOS window and click on the OK button in the window that opens asking you to save the changes made. Wait for the automatic reboot and make sure that the operating system boots from the disk.
If your computer uses Award Bios, select Advanced BIOS Features in the left pane of the window using the arrow keys and press the Enter function key. Highlight the First Boot Device line and confirm your choice by pressing the Enter key. Select the CDROM item in the boot devices submenu that opens and go to Save and Exit Setup in the main window. Save the changes made by pressing the Y key in the system prompt window that opens, and wait until the reboot completes, which will be performed automatically.
Sources:
If the operating system does not start, you can try to restore it through the BIOS menu. In the BIOS, you can start the system recovery process using a special recovery disk or using regular OS boot media.

You will need
- - boot disk with Windows XP OS.
Instructions
Insert the boot disk into your computer's optical drive. Restart your PC. On the initial system startup screen, press the DEL key, most often used to open the BIOS menu. If you were unable to open the BIOS using DEL, check the instructions for your motherboard. So there should be information about the keys to enter different settings modes.
In the BIOS, find the 1st Boot Device option. Select it and press Enter. Select your optical drive from the list that appears. Exit the BIOS, making sure to save the settings first. The computer will restart. The disc in the optical drive will begin to spin up. At this moment, press any key on the keyboard. You activate the boot disk. Wait for the first dialog box to appear.
Next, we will look at the process of restoring the operating system using the console, using the example of a boot disk with Windows XP. After the initial screen appears, press R. In the next window, select the operating system to restore. If there is only one, then you will see the C:\WINDOWS folder. Press Enter.
A line will appear. Enter fixboot in this line. Then press Enter and the Y key. Repairing the operating system's boot sector will begin. When notified that the new boot sector has been successfully created, enter the fixmbr command. Then press the Y key. A new boot entry will be created. After creating it, enter Exit in the line. The computer will reboot and start in normal mode. The system has been restored.
After completing all the steps, enter the computer's BIOS menu again. Select the 1st Boot Device option and check the hard drive. If you don't do this, your computer will start more slowly if there is any media in the optical drive.
Sources:
- how to restore bios
You can install the Windows 7 operating system yourself from a DVD or USB drive. In both cases, you must first create a boot device with the files necessary to install the OS.

You will need
- - DVD disc;
- - Windows 7 usb/dvd download tool.
Instructions
Download the Windows 7 installation disk image. You can use the original files available on the Microsoft website. The downloaded file must have iso permission. Select the operating system version that matches the license key available to you.
You can create a boot disk using a huge number of programs. Let's look at this process using the Windows 7 usb/dvd download tool as an example. This is an official utility from Microsoft. Download this program and install it. Insert the DVD-R or DVD-RW drive into the optical drive. Please note that once the files are written, you will not be able to change the contents of the disc.
Launch the installed program. In the first window, click the Browse button and specify the path to the downloaded iso file. Click Next. Now click the DVD button and select the optical drive with a blank disc inside. Start the process of writing files to disk by clicking Start. After the program finishes, restart your computer.
Immediately after turning on the PC, activate the Boot Menu. Typically this requires pressing the F12 button. Select your DVD drive from the list of available devices. If you were unable to launch the specified menu, go to the BIOS of the computer's motherboard by pressing Del. Open the Boot Device Priority menu. Move the DVD to the top line. Press F10 and confirm saving the settings.
Once your computer restarts, the Windows 7 operating system setup program will launch. In the first dialog box, select the Full installation option. Wait while the utility scans your hard drive and creates a list of available partitions. You can change the size and number of hard drive partitions. To do this, use the “Delete” and “Create” buttons. After preparing the hard drive, select the area where the new copy of Windows will be installed and click Next.
You will also need drivers for devices installed in the computer (chipset, sound card, video card, webcam, etc.)
Burning a Windows XP installation disc
To burn a Windows installation disk, we need a disk image, a disk burning program from the image, a CD writer, and the CD itself.
Download the Windows XP SP3 Professional disk image
Any disc burning program that supports burning from an iso image will do, for example Nero or DeepBurner, which can be downloaded for free.
So, we downloaded the disk image and installed the DeepBurner program. Now let's look at the disc burning process.
Insert a blank CD-R into the drive and launch DeepBurner. Once launched, DeepBurner prompts you to select the type of project to create.
Choose Burning an ISO Image and click Next.
I don’t know about you, but for me the project window opened in a compressed form. Therefore, you need to stretch it by grabbing the lower right corner with the mouse or expand it to the full screen so that it looks like in the figure below.

In the project window, click the button with three dots (Browse) and select the file of the downloaded iso image of the Windows XP installation disk. In our case this is the file ZverCDlego_9.2.3.iso.
Now you need to select the recording speed and press the button Burn ISO. In order for the disc to record better, the speed should be selected slightly less than the maximum. Now all you have to do is wait for the disc to burn. Once the Windows XP SP3 installation disc has been burned, the drive tray will eject itself. The disc is ready!
Windows XP(internal version - Windows NT 5.1) - operating system (OS) of the Windows NT family of Microsoft Corporation. It was released on October 25, 2001 and is an evolution of Windows 2000 Professional. The name XP comes from the English. eXPerience(experience).
Unlike the previous Windows 2000, which came in both server and client versions, Windows XP is a client-only system.
According to web analytics, from September 2003 to July 2011, Windows XP was the most used operating system for accessing the Internet in the world. As of February 2013, Windows XP was in second place after Windows 7 with a share of 19.1%. The maximum of this value was 76.1% and was reached in January 2007.
How to install Windows XP from a disk via BIOS
Now it's time to look at the process itself installing Windows XP on a computer from a disk.
First of all, you need to configure boot from the floppy drive in the BIOS. To do this, go to the BIOS menu. How to do this may vary depending on the motherboard model. In most cases, this menu can be accessed by pressing the button Del(on some motherboard models you need to press the key F2) after turning on the computer (during the startup splash screen). It's better to press this key several times to be sure.
The BIOS menu differs depending on the manufacturer and version. There are two main types of BIOS: AMI and AWARD.
Below are screenshots of the AWARD BIOS. Need to go to the menu Advanced BIOS Features.

Here in the menu item First Boot Device press Enter and select CD-ROM

After this, press the Esc key to exit to the previous menus, where select Save and Exit Setup. That's it, now the first device to boot your computer will be the DVD drive. You can move on to the process installing Windows XP from disk.
Now let's look at how to install disk boot in AMI BIOS
Select a tab Boot, and in it we go to the menu Boot Device Priority

Set the first boot device (1st Boot Device) to a CD-ROM or DVD-ROM (your drive model)

In some BIOS versions, the first device is selected after pressing the Enter key on the desired item and selecting a device; in others, devices are moved up and down using the F5 and F6 or + and - keys
After this, you need to exit to the main menu using the Esc key and go to the tab Exit. Select an item Exit and Save Changes to save changes and exit.
Now let's look at the process itself installing Windows XP from disk to computer.
Insert the installation disc into the drive and restart the computer. The disc menu below appears.

Select an item Installing Microsoft Windows XP SP3 manually and press Enter.
Please be warned that installing Windows XP SP3 on a computer takes about 40 minutes. So be patient.
On the first screen, press the Enter key to continue the installation.

In the next step, read the license agreement and press F8
Now select the disk partition where you want to install Windows XP. If the hard drive is new and not yet formatted, you need to create a partition by pressing the C key.
Select the section and press Enter. If the partition already existed, you need to confirm installation to this partition by pressing WITH.

At the next stage, the installation program prompts you to format the disk. Select an item Format partition in NTFS system (Quick) and press Enter.

To confirm formatting, press F
After formatting, the process of copying the necessary files to the hard drive will begin.

Once the files are copied, the computer will restart.
When you boot your computer, it will start again from the boot CD. In the disk menu, select the item
A window will open for selecting driver packages for unpacking and installation. These are built-in drivers for many devices included in this build. If you install Windows XP from a Microsoft distribution, this window will not appear.

Select the required driver packages by checking the boxes and click OK. If you don't know exactly which drivers are needed and which are not, select all. If you have disks with drivers for all devices (motherboard, video card, etc.), then uncheck all the boxes to speed up the OS installation process. In this case, you will need to install the drivers manually from the disks after Windows installation is complete. Read more here: How to install Windows XP drivers.
After clicking OK, the unpacking of driver packages will begin, and when it is finished, Windows installation will continue.
Next, the Regional and Language selection window will appear. If the distribution kit is the Russian version of Windows XP, then nothing needs to be changed here.


In the next window you need to enter your product key and click Next.
A window will appear in which you need to enter the computer name and administrator password. You don't have to change anything in this window. Then the administrator password will not be set.
In the time and date settings window, set the correct date and time, as well as the time zone.

In the OS network parameters window, select Regular Options and click Next.

In the workgroup window, write the name of the workgroup or domain in which the computer participates. If you don't have a home or office network, you can leave everything unchanged and click Next.

After this, Windows installation will continue, after which the computer will automatically restart.
We go into the BIOS and set the first option to boot from the hard drive, as described at the beginning of the article. We exit the BIOS and save the changes.
Now before that how to completely install Windows XP on a computer last minutes left.
When loading, the system will prompt you to automatically adjust the screen resolution. Click OK.
In the Windows XP welcome window, click Next.

A window will appear asking you to select a Windows update mode.

Choose Postpone this action to disable automatic system updates and press the button Next.
The next window will ask you to set up your Internet connection. Click Skip.
We refuse the offer to register by selecting No, some other time and press Next.

In the final window, click Ready.
That's it! Now you know how to install Windows XP from an installation disk on your computer.

All that remains is to install drivers and programs, but this is beyond the scope of this article.
Many of those who have encountered the installation or re-installation of Windows systems know that in most cases external media such as USB drives are used to carry out this operation. If you try to run the installation file from the hard drive, the user will not get the desired result. Therefore, for Windows 7, installation from a hard drive must be done using completely different techniques. For the average user, there are five main options, which we will now discuss.
Windows 7: installation from hard drive. Installation options
So, let's look at some directions in installing the seventh version of the system. Among the main options are the following:
- installation on top of the old “seven”;
- installation as a second OS;
- installation using the command line;
- use of special utilities;
- installing the system on an external HDD.
Each of these methods has its own advantages and disadvantages, but for all of them one common rule is the presence of an image of the installation distribution of the system, which you will subsequently have to work with. In addition, if your computer already has hard drive partitions created, you can leave them alone when installing Windows 7. Otherwise they will need to be created. But more on that a little later.
Preliminary information
Now let's look at some initial conditions that must be met without fail.
The system requirements are such that a 32-bit system requires at least 16 GB of free disk space, and an x64 system requires about 20 GB. And this is provided that there is an already installed system, the directory of which will be renamed to Windows.old after installation. Under no circumstances should you delete it manually (unless you do a disk cleanup). Then it will simply be impossible to roll back.
Installation over the old system
Using this technique, you immediately need to understand that formatting your hard drive when installing Windows 7 will not work, even if it is a system partition. But we will rely on the fact that the distribution is on drive C when the partition is done. How to partition the disk will be discussed later.
As is already clear, the downloaded distribution must first be placed on an independent partition (usually drive D). You can, of course, start the installation from there, but then errors will appear. Now we simply select the installation file Setup.exe from the Archive directory, after which the installation of Windows 7 follows, no different from the standard procedure.
In this case, for Windows 7, installing from a hard drive is more of a means of updating system files, since the new configuration may inherit errors from the old one. It's inconvenient.
Alternative method for installing Windows 7 as a second OS: what might you need?
However, you can do it differently. To install the system, there is a way to install it not on top of the existing OS, but as an additional OS, which can then be loaded when selected from the boot menu. The main thing is to create a boot partition on the source volume.
To carry out all operations, you only need to have an application that can work with images and create a utility that creates an MBR boot sector on the selected partition. As an example, we use Daemon Tools and the EasyBCD program.
Creating a section
It may be impossible to simply download the installation distribution, even if it is located on the system disk. This is only due to the fact that the system itself does not recognize it, and if it sees it, it prohibits downloading. Here you need to go to the disk management section, which can be accessed through computer administration.

Fortunately, Windows 7, like all subsequent versions, has such a tool. First, we look at virtual partition D. Call up the menu and select volume compression (the specified size should slightly exceed the volume of the distribution). Next, right-click to open the menu and use the command to create a simple volume (without this, the system will not determine that this partition is operational).
It’s clear how to partition a hard drive when installing Windows 7. Let's get to the most important part.
System installation
Now we are directly interested in installing Window 7. The hard drive systems are such that they still do not see the distribution.
We launch the Daemon Tools program and mount the image using the appropriate command, specifying the path to the saved file. We copy it to the newly created partition (unpacked image file).

Now we launch the EasyBCD application and click the add entry button, after which we indicate the WinPE tab at the bottom, and then enter “New Volume” in the name field, and in the path line we determine the location of the boot.wim file.

After the entry is added, simply restart the computer or laptop. At the same time, the standard installation of the “seven” starts.
Installing Windows 7 using the command line
Again, this option cannot be used when the initial system is damaged or buggy. But in case of restoration it will do.

When Windows starts, press the F8 key (standard method, unlike Windows 10) and select the troubleshooting line from the menu (first in the list). In the additional parameters we indicate the same thing, after which we use what we need in the language selection window and proceed to system recovery, where we select the command line.
We write two lines in the console:
- X:\>windows\system32>E;
- E:>setup.exe
Don't be afraid to make mistakes. The drive letters in DOS and Windows do not match. In extreme cases, it will simply throw an error, after which you will need to correct the corresponding symbol, but, as a rule, this is not required. Well, then the process begins, no different from the standard one. Please note that in this case there is no need to even reboot the system.
Installation on top of any system using the BOOTICE utility
Now let's say we want another installation of Windows 7. We have a formatted hard drive. The catch is to create a boot device in the form of a HDD partition.
The BOOTICE utility is designed to emulate the continuation of the installation of Windows 7, creating and overwriting the boot sector (for this purpose, there is a bootmgr folder in the unpacked distribution).
To begin installation, you need to change the MBR boot record to GRUB4DOS. But here you need to take into account one feature. The fact is that the utility requires creating a bootloader manager name of no more than five characters (letters).

Rename the bootmgr file to GRLDR, and then launch the utility itself. A new entry is immediately visible in the menu, so put a checkmark there (destination disk), and then press the change installation button and select saving to disk in the configuration. All that remains is to reboot the device, after which the installation of Windows 7 will be activated. Installation from the hard drive will follow immediately. As a rule, there should be no problems.
Installing Windows 7 on an external hard drive
But, despite all the nuances of installing the “seven” on a hard drive, some users try to install the system on removable media, in particular USB-HDD. What can I say? This is fundamentally wrong!

The question arises: why create problems for yourself out of the blue? Booting from any USB device is much slower than from a hard drive. The external drive itself (hard drive) is subject to stronger physical impact and is not immune to failures and errors. However, “especially gifted” users will have to use (at a minimum) a virtual machine. And many of these “prodigies” have no idea what it is.
Of course, for the rest we can say that any virtual emulation, for example, using WMWare or the same built-in Hyper-V module can be carried out quite simply. But the matter will not be limited to automatic settings. Here you will have to set the parameters corresponding to the system configuration. And all those who claim that with the operating system installed in it can be created in a couple of clicks and in five minutes are absolutely wrong. Nothing of the kind!
Possible errors and failures
Now the saddest part. What to do if installation Issues of equipment failure are not considered as a matter of principle. The external hard drive must be enabled in the BIOS, as well as boot priority from the main device.
If you have problems with the file system, you can always use a command like sfc /scannow or chkntfs x/ c (if partition C is selected as the system drive). Well, if the hard drive “crumbles”, there’s nothing you can do about it. We'll have to change it. Although... Many experts advise first using a program that supposedly reverses the magnetization of the disk surface, but this method is hard to believe.
On the other hand, when installing the system on an external drive, you cannot do without utilities like ImageX, included with the Windows AIK package. In addition, the PWBoot module does not recognize Cyrillic characters at all, but works like a command line. So is it worth doing?
And that's not all! When you start selecting multiple simultaneous installations, you will have to choose between the standard VHD container format and a regular removable device. It is believed that the VHD format is read faster, but the problem of enabling this type of media lies precisely in the use of BIOS settings. And when switching from BIOS to UEFI (which is not always supported), there can be significantly more problems. However, for Windows 7, installation can be done using any of the above methods. But in most cases, formatting partitions will not work.
Thus, the conclusion suggests itself that the simplest is the ideal solution. The average user will not use specific methods to create boot sectors. This is understandable. But the method of updating the system looks much simpler, but it also has its drawbacks. In general, it is better to perform a “clean” installation, having first copied the necessary information to another medium.