Virtual Windows 7 on a flash drive. Booting from a USB drive into VirtualBox
The goal of the development is to make VirtualBox work without installation and run from anywhere, for example from a USB drive. It’s interesting that the utility is entirely written in AutoIt scripts (all the sources are open source, but because of this, however, it doesn’t look very elegant. But the main thing is the result. So, download the application (I have it Portable-VirtualBox_v4.1.6- Starter_v6.4.8-Win_all.exe) and run it - the program will prompt you to select the path for unpacking. After this, you can run Portable-VirtualBox.exe. All settings are set automatically, there is no need to correct anything manually (for example, paths). This is the so-called launcher. It appears once and is designed to download the latest VirtualBox distribution and extract the necessary files from there. Interestingly, at this stage the files can also be packaged in a special way so that they take up less space on the USB flash drive (although at the current size. flash drives, this is hardly relevant). Click on the “Download installation files of VirtualBox” button, select the system bit size (for example, “Extract the files for 32-Bit system”) and wait for the launcher to do its job. In order for the installer to adapt the paths to the system (correct the necessary parameters in the VirtualBox.xml config), the Portable-VirtualBox.exe binary must be launched again. Voila - we have a full-fledged VirtualBox at our disposal. Without any installation into the system.
A VirtualBox icon will appear in the tray, with which you can manage the virtual machine and further configure it. In guest OSes, both USB and network work by default. But in order to release the guest OS to the external network (Internet), you will have to carry out some additional manipulations. In the tray you need to select “Settings -> Network” and enable the “Start VirtualBox with network support” option. Next, you need to restart Portable-VirtualBox and agree to install the driver. The process is organized in such a way that when you finish working with the virtual machine, everything that was installed on the system is deleted. It makes sense to place the guest OS files directly on the flash drive along with VirtualBox. I have only one system, so it can be launched immediately, without additional manipulations, by specifying its name in the parameters:
Portable-VirtualBox.exe "leopard"
Considering that the virtual machine is always not in the off state, but in the “Save the state” mode, its startup occurs very quickly. Therefore, she is always ready to work without unnecessary hemorrhoids. And anywhere.
While doing system administration, I often have to use virtual machines like Oracle WM VirtualBox And WMWare Workstation. I use VirtualBox more often due to the fact that it is simpler and lighter for single launches. There was a need to boot a virtual machine from a real USB flash drive, in this case, to test a freshly assembled bootable flash drive. But there is one problem - through the main interface of the VirtualBox program It is impossible to boot a virtual machine from a physical USB drive, however, there is a way to solve this problem. This method will be discussed in the article.
To boot the VirtualBox virtual machine from an external USB drive, you need to create USB disk clone as *.vmdk file, through which the VirtualBox host will communicate with a physical external USB drive. Such a file will occupy several kilobytes, because... contains only data for communication with a USB drive.
1. Create a file that serves as a bridge between VirtualBox and a USB drive.
To create a *.vmdk file, there is a utility called vboxmanage.exe, which is included in the standard package of VirtualBox, so you do not need to download it separately.
So, to create such a file, you need to run the following command in the command line window, replacing the path to the VirtualBox directory with your own:
"C:\\Program Files\\Oracle\\VirtualBox\\VBoxManage.exe" internalcommands createrawvmdk -filename c:\\temp\\usb.vmdk -rawdisk \\\\.\\PhysicalDrive2 -register
There are two parameters to pay attention to here:
To find out the number of the external USB drive to which the file should be associated (usually an external USB HDD under the number 1 , if only one hard drive is installed), you can peek at it in “Control Panel → Administrative Tools → Computer Management → Disk Management”.

Now all that remains is to configure the VirtualBox host to boot from the newly created virtual disk.
2. Install a *.vmdk file in VirtualBox as a boot disk.
First you need to add the created usb.vmdk to the list of hard drives in the VirtualBox virtual media manager.

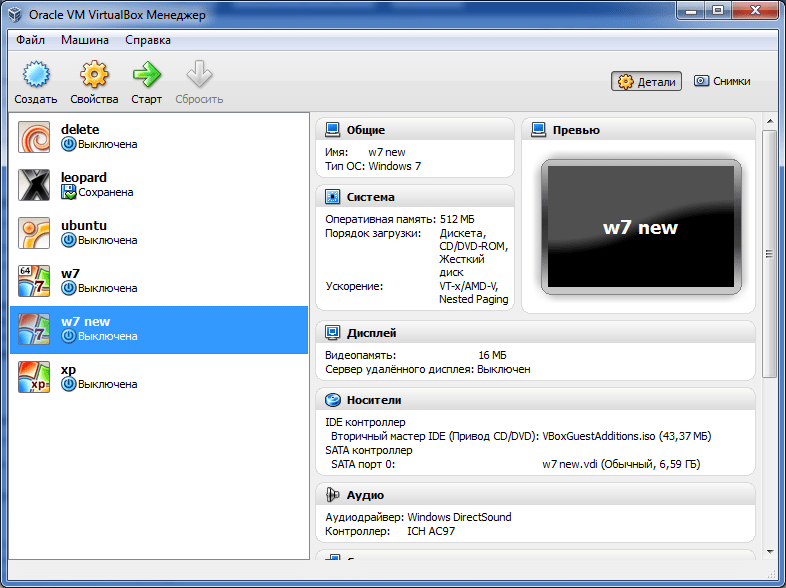
Next, you should go to the “Properties” of the virtual machine (which must be loaded from a USB external drive) and in the “Media” section, install the added virtual hard disk usb.vmdk in Slot“Primary IDE Master”, as in the screenshot.

Done, now you can boot the virtual machine from an external USB drive.
All popular hypervisors for Windows - Hyper-V
, VirtualBox
, VMware– provide for the launch of virtual machines (VM) from boot ISO-images and flash drives. Launch VM with the latter, not in every case there will be a process without problems: without dancing with a tambourine from flash drives UEFI only run VM based on BY EFI in programs VirtualBox And VMware. How can I make it easier to launch VMs from flash drives in other cases?
To do this, you can create a so-called virtual flash drive– all the contents of the real USB- transfer the media to a virtual hard disk and, accordingly, launch VM from him. But the contents must be transferred along with the structure of the physical flash drive - so that the virtual disk inherits all partitions if there are several of them (for example, in the case of Mac OS or Chrome OS) , as well as boot device attributes (unless it's UEFI media) . This can be done in at least two ways, described below.
All actions in our case will be carried out with . In other virtualization programs, you must act in a similar way.
1. R-Drive Image program
The first way to create a virtual flash drive is to transfer the structure and contents of a real one. USB-media to a virtual disk using the program- backup. Open the parameters of the existing VM and click .
Add another disk.

We leave the controller type as default.

Let's create a new disk. We indicate its size: let it be approximately the same as the size of the flash drive, but still be slightly different. This is necessary to avoid confusing devices during cloning. Save as one file.

Specify the placement path. Click.

Let's launch VM, connect a real flash drive to it. Install in the guest OS trial-program version . In its window we select "Copy Disk to Disk".

In the column "Source" choose a real flash drive. In the column "Receiver"— the newly created virtual disk.


AND - "Begin".

Once cloning is complete, exit the program.

Now in the explorer guest OS We now have two identical devices.

We can disconnect the real flash drive from VM. Likewise, we can disconnect a virtual disk from the current one VM and use it to launch others VM.
2. Rufus program
The second way to create a virtual flash drive is to use the program's capabilities Rufus 3.1. In the updated version 3.x this program, in addition to the existing functions for creating bootloaders USB-devices, learned to clone real flash drives into files VHD. A VHD compatible with Hyper-V, and with VirtualBox, And VMware. Let's launch Rufus 3.1 on the host system. Select the one you need USB-carrier, if several are connected, in the column "Device". Next, press the button in the form of a floppy disk.

Specify the file storage path VHD .

We wait for the operation to complete and close Rufus.

3. Connecting a virtual flash drive and launching from it
So, the virtual flash drive has been created, how to connect it to the VM and, accordingly, launch it?
In parameters VM click hard drive.


Select an existing one.

In the Explorer window, specify the path to the file storage folder VHD. In the file display column we put . And click our virtual VHD-flash drive.


On EFI-cars enter BIOS– either use the button on the hypervisor toolbar, or at startup VM press F2.

In the bootloader window select Hard Drive with the number under which it is listed in the general list of connected virtual disks, but calculated from scratch. In our case, the virtual flash drive is the second disk VM, because in EFI-in the firmware it is listed as Hard Drive 1.0.

On regular VM, created on the basis of emulation BIOS Legacy to boot from a virtual flash drive, you need to in the parameters VM specify it as the first hard drive. You need to remove all existing disks on the machine and add them again, specifying the virtual flash drive first.

From a flash drive, but not as removable media, but as bootable media. But let's talk about everything in order.
The Virtualbox functionality allows you to boot from a flash drive.
The first method works for Virtualbox versions 4.2.36 and lower. For newer versions, a second method has been added.
You must log into the command line with administrator rights. To do this, go to “Start” and type “cmd” in the search bar, right-click on the result and select “Run as administrator”. Necessarily! Otherwise the command will not create the file. If you don’t want to run Command Prompt as an administrator every time, you can disable User Account Control. The shutdown process is described at the end of the article.
The second method requires that Virtualbox and Virtual Machine USB Boot be run as an administrator. You can check this by right-clicking on the programs shortcut, going to the “Properties” window, and then switching to the “Compatibility” tab and making sure that the “Run this program as an administrator” checkbox is checked.
We try to connect in the usual way
Open the Virtual Machine Manager. Click the “Configure” button. Go to the “USB” section and click on the add a new device icon, select our flash drive. Click “OK”. Let's start the virtual machine. As we can see, we now have a removable disk; it can be opened in “My Computer”. Let's try to boot from it. Click “Reboot”. During the reboot, we press the “F12” key and we do not see our flash drive in the list. Unfortunately, you won't be able to boot from it this way. What to do? And you don’t need to do much, but it’s interesting.

We turn off our virtual machine and close the Virtual Machine Manager for now. A removable media autorun message appears, which means that the Manager has transferred control of the flash drive to the system.
Using the command line to create a file
To boot from a flash drive into Virtualbox you need to run this command:
C:\Program Files\Oracle\VirtualBox\VBoxManage.exe" internalcommands createrawvmdk -filename D:\Transcend.vmdk -rawdisk \\.\PhysicalDrive2
Which states:
- C:\Program Files\Oracle\VirtualBox\VBoxManage.exe - which program will execute the command (the path must be changed if the program was installed in a different location);
- internalcommands createrawvmdk -filename - the command itself;
- D:\Transcend.vmdk -rawdisk \\.\PhysicalDrive2 - with which file the disk will be created; The letter “D” at the beginning can be replaced with the letter of any of your drives, a file will be created there; the number “2” at the end is the disk number; we’ll look further at how to find it out.
We go to computer management, from there to disk management and find our drive among all the others. Its number will tell us which number to use in the command. In our case, “Disk 2”. This is important. If you specify the wrong drive, the system will not boot and work. We copy our command using the keyboard shortcut “Ctrl + C”. Open the command line as administrator and paste the command using “Ctrl+V”, click “OK”. A command line window will appear for a split second. Now let's find our file. It is located in the path that we specified earlier in the command and is named “Transcend.vmdk”. For convenience, move the file to the desktop.
Functionality check
Launch the Virtual Machine Manager and click “Configure”. There is a very important point here: the system will not boot until we disconnect our device in the “USB” tab. Go to the “Media” section and assign the first port to the existing “Test.vdi” disk. Select the controller, click the icon for adding a new hard drive, click “Select an existing disk” and select our file, click “Open”. Our flash drive has a zero port. What is this for? If you leave the default zero port on the disk that was in the virtual machine, and assign the first port to the flash drive file, then the system will boot from the disk that has a zero port. Let's check how it works, click "OK" and start the virtual machine.
We now have a menu where we can boot from the hard drive, select the programs we need, restart or turn off the computer. Let's try to restart the computer, everything is fine.
You can also connect an external hard drive to the Virtualbox virtual machine. Turn off the computer. Let's summarize.
If we connect a flash drive in the “USB” section, it will be displayed in our system, but we will not be able to find it. If you connect it in the “Media” section, then everything will work. If the number of the flash drive in the system suddenly changes, the file that was created can be edited using a regular notepad. We need to find the line with the phrase PhysicalDrive and replace the number with a new one.
The second method is with the Virtual Machine USB Boot program
As noted, the first method is only suitable for Virtualbox versions 4.2.36 and lower. The manipulations described below were tested on version 5.0.12 and definitely work on it.
Since version 4.3, users have had problems installing Windows from a bootable USB flash drive in a virtual machine. An error could appear at any stage of the installation and the process would be interrupted. The problem is solved by the Virtual Machine USB Boot program; the developers’ website has both a portable version and an installer; it weighs quite a bit. Be sure to check both the Virtual Machine Manager and our program to work with administrator rights. Before running the Virtual Machine USB Boot utility on the machine under test, you need to switch the hard drive from the SATA0 port to the SATA2 or SATA3 port. SATA0 should be empty; the utility will connect our flash drive into it.

We launch the Virtual Machine Manager, then launch the utility. In the utility window, click the “Add” button. We choose a name for the virtual machine and name it at our discretion. In the third line, we select exactly the virtual machine that we will subsequently use. The utility looks through the Virtualbox directory and gives us all the mounted machines, select the one we need. In the “Drice to add and boot” field, select our flash drive. Click “OK” and “Start” twice. This completes the setup and you can start the virtual machine.
Disabling User Account Control
An addition to the first method, which will allow you to enter the command line without administrator rights or even execute a command directly from the Run window. We need to open the registry editor, to do this, press the “Win + R” key combination, the “Run” window will open, enter the “regedit” command there. We move along the path HKEY_LOCAL_MACHINE/SOFTWARE/Microsoft/Windows/CurrentVersion/Policies/System, in this folder we look for the EnableLUA line and change the value from 1 to 0. To do this, right-click on the line and select “Change” in the context menu. Subsequently, the value can be returned back and User Account Control will return.

Conclusion
So, we used the Virtual Machine Manager Virtualbox, booting from the flash drive was completed. We looked at two methods, for VirtualBox versions lower and higher than 4.2.36. The setup process itself is simple, but you need to take into account many factors and subtleties, most of them are listed under the heading “Warnings”, the rest are included in the analysis of methods. Be careful and over time virtual machines will be your faithful companion when working with new applications and utilities. After all, it’s better to check the functionality of a dangerous or unknown program 5 times than to disable a real machine once, isn’t it?
Everyone is good for testing operating systems and software, but for some reason, none of these hypervisor programs provide the option to boot from a flash drive in a normal usable format. Having the ability to boot from bootable CD/DVD images may solve the problem of viewing the contents of the latter, but this will not satisfy the need for testing a finished bootable flash drive. Check the functionality of a bootable flash drive on a virtual machine, test the software contained in the resuscitation Live disk in conjunction with virtual hardware, take screenshots of this action, install an operating system, the distribution kit of which is only available on the flash drive - but you never know for what needs it can You will need the ability to boot from a USB drive.
How to configure booting from a flash drive on VirtualBox and VMware Workstation virtual machines - we will look into this below. And for these purposes we will use the bootloader Plop Boot Manager.
1. Preparing the Plop Boot Manager disk image
The purpose of the free bootloader program Plop Boot Manager was discussed in detail in an article on the site. Designed to solve the problem of the lack of an option to boot from USB devices in the BIOS of older computers, Plop Boot Manager will also help in solving the problem of booting from a flash drive in virtual machines. Download the latest distribution from the developer’s official website.
After unpacking the Plop Boot Manager archive, we can delete the contents of the folder, leaving only the required ISO disk image - the file "plpbt.iso".

It is better to immediately move this file to a secluded place, say, to a folder with the same virtual machines, since during the process of using this ISO image its placement path will be specified in the hypervisor settings. The latter, in fact, is what we will do next - we will configure the “plpbt” ISO image as a source for loading VirtualBox and VMware Workstation virtual machines.
2. Booting from a USB flash drive into VirtualBox
The VirtualBox virtual machine must be turned off when setting it up to boot from a flash drive. Click the settings button. In the window that appears, first look at the section “ System" to ensure that the boot order is for the drive initially. The checkbox should be checked at the “ CD/DVD».

Now go to the section " Carriers" Click " Controller: IDE" and select the button labeled " Empty"(if no other disk image is attached to the virtual machine). Next we need the parameter “ Attributes" At the end of the column " Drive"Press the button in the form of a disk, then click the review button with the inscription " Select optical disk image».

In the Explorer window, open the same file “ plpbt.iso».

That's it: now the Plop Boot Manager disk image will be mounted into the VirtualBox virtual drive. Click " OK».

Insert the flash drive into the USB port of the computer. Let's start the virtual machine. The latter will boot from the Plop Boot Manager disk image and in its window we will see a minimalist boot menu, the options of which include USB devices. But first you need to connect the flash drive to the virtual machine. Click the small button at the bottom of the window with the image of a USB input and check the box for the desired USB device. In our case, the flash drive is the only one of these.


We will see the Plop Boot Manager interface again and now we can select the boot option – USB. To interact with the bootloader interface, you need to log into the virtual machine and grab the mouse - that is, double-click inside its window. Let us remind you that by default, releasing the mouse pointer from being captured by the virtual machine in the VirtualBox program is done using the right Ctrl key. To navigate through the boot options in the Plop Boot Manager menu, use the navigation keys “” “↓”, and confirm the choice of boot device with the Enter key.

In order for the VirtualBox virtual machine to boot from the hard drive again, you can either set the boot order from the last one in the settings section " System" - which we, in fact, checked above, or extract the disk image from the virtual machine drive. The easiest way to do this is by clicking the disk-shaped button at the bottom of the virtual machine window. One of the available functions will be " Remove the disc from the drive».

However, if bootable flash drives are tested frequently, you can simply select the option to boot from the desired disk partition in the Plop Boot Manager window.
3. Booting from a USB flash drive to VMware Workstation
Okay, VirtualBox is still free, but for the paid VMware Workstation program, the lack of a simple and clear option for booting a virtual machine from a flash drive is unacceptable. However, even after paying, we will solve this problem through our own efforts.
As with VirtualBox, the VMware Workstation virtual machine must also be turned off. In its details window, click the option to change settings.

Let's get into the parameters of the virtual machine, here we need the tab " Equipment" Move to the tab " CD/DVD", set the active option " ISO Image File", then use the browse button to specify the path to the file " plpbt.iso" Click " OK».

Returning to the virtual machine details window, click on the drop-down list of its states and select “ Enable when flashing" In our case, we are dealing with the latest version of VMware Workstation 11. But in earlier versions of the program or in different editions of the VMware Workstation translation, this option may be called differently, for example, “ Enable in BIOS", English version - " Power On to BIOS».

Unlike VirtualBox, VMware Workstation does not provide for setting the boot order of the virtual machine in its settings. Everything happens as on a real computer: the priority of boot devices is assigned in the virtual BIOS - an analogue of a real basic input/output system.
After starting the virtual machine in BIOS mode, log into it (by double-clicking inside the window or using the keys Ctrl+G). For reference: by default, releasing the mouse pointer in VMware Workstation is done using the Ctrl+Alt keys. Using the navigation keys “→” we move to the “ Boot", then use the "↓" key to go down to the parameter " CD-ROM Drive" Use the “+” key to push it to the beginning of the list and click “ F10».

We confirm the decision by pressing Enter in the window with the preset answer option “ Yes» to the request to save the configuration.

The virtual machine will restart and we will see the Plop Boot Manager interface. Just as in the case of VirtualBox, at the bottom of the virtual machine window, click the USB devices button and connect the flash drive.

Restart the virtual machine.

Now we can go inside it and select the option to boot from USB devices in the Plop Boot Manager menu.

Returning the VMware Workstation virtual machine to boot from the hard drive is the reverse process. You need to enter the BIOS and set the boot priority to " Hard Drive" - just as it was before. You can do it differently and remove the Plop Boot Manager disk image itself. At the bottom of the virtual machine window there is a button in the form of a disk; it provides quick access to the drive settings. Click " Options».

In the virtual machine drive settings window, we can either uncheck the device status “ Connect", or make active the option to detect a physical CD/DVD drive.

Did this article help you?