Setting up Yandex mail in Outlook. Setting up Outlook for different mail servers
Outlook is not only an email program, but also a powerful tool for managing your time.
Using Outlook, you can keep a notebook, plan your day, and Outlook will not let you forget about what you have planned and will persistently remind you of it. Notes, a diary, tasks and, most importantly, the ability to synchronize with mobile devices (for these purposes I prefer the ZEN mp3 player, it is with me much more often than all other mobile things).

And now, in order, about the settings of all this beauty.
The first thing we will configure will be the main function - intercepting and downloading mail.
Go.
We launch Outlook, cancel the automatic configuration, agreeing with all the questions, and go to the menu -
service - next - setting up accounts. 
In the window that opens, click create. 
Check the box for manual settings and click next. 
Place a checkmark in the “Internet email” box. Click next. 
Fill in all the fields provided. In the email field, enter your mailbox in full, and in the user field, enter the login with which you entered the mail on the yandex.ru page (or any other, depending on what kind of mailbox we have). In the password field – enter the password for the mailbox. Check the “Remember password” checkbox. And go to the “Other Settings” menu. 
Settings for popular email services.
mail.ru (list.ru, bk.ru, inbox.ru)
POP3 server: pop.mail.ru (pop.list.ru pop.bk.ru pop.inbox.ru)
SMTP server: smtp.mail.ru (smtp.list.ru smtp.bk.ru smtp.inbox.ru)
Username: mailbox name before the “@” icon
Port: POP3 - 110, SMTP - 25 or 2525
pochta.ru
POP3/IMAP server: mail.pochta.ru
SMTP server: smtp.pochta.ru
Password: Your password for your mailbox
Port: POP3 - 110
SMTP - 25
IMAP - 143
SMTP server requires authentication
yandex.ru (narod.ru)
POP3 server: pop.yandex.ru (pop.narod.ru)
SMTP server: smtp.yandex.ru (smtp.narod.ru)
Username: full mailbox name ( [email protected])
Password: Your password for your mailbox
Port: POP3 - 110
SMTP - 25
SMTP server requires authentication
To get started, you need to go to the yandex.ru web interface and in the settings allow receiving mail via pop3 and save the changes
rambler.ru
POP3 server: pop3.rambler.ru
SMTP server: smtp.rambler.ru
Username: full address of your mailbox
Password: Your password for your mailbox
Port: POP3 - 110
SMTP - 25
SMTP server requires authentication
gmail.com
POP3 server: pop.gmail.com
Port: 995
IMAP server: imap.gmail.com
Connection: Secure on a special TLS port.
Port: 993
SMTP server: smtp.gmail.com
Connection: Secure on a special TLS port.
Port: 465 or 587
Username: full address of your mailbox
Password: Your password for your mailbox
To get started, you need to go to the gmail.com web interface and in the settings allow receiving mail via pop3 and save changes SMTP server requires authentication
newmail.ru (hotmail.ru, nm.ru, nightmail.ru)
POP3 server: pop.newmail.ru (pop.hotmail.ru, pop.nm.ru, pop.nightmail.ru)
SMTP server: smtp.newmail.ru (smtp.hotmail.ru, smtp.nm.ru, smtp.nightmail.ru)
Username: full address of your mailbox
Password: Your password for your mailbox
Port: POP3 - 110
SMTP - 25
SMTP server requires authentication
POP3 server: pop.km.ru
SMTP server: smtp.km.ru
Username: full address of your mailbox
Password: Your password for your mailbox
Port: POP3 - 110
SMTP - 25
SMTP server requires authentication
Go to the outgoing mail server tab and mark everything as in the following picture. 
On the “Advanced” tab, we note in the “delivery” field that we need to leave copies of letters on the mail server. This will prevent emails from being deleted when they are downloaded to your computer.
You can also check the box to enable the function of deleting emails from the server when emptying the trash in Outlook. 
Click “OK” and return to the account settings window. It remains to check that the settings are correct. To do this, click the “Account Verification” button. If everything is done correctly, you will see the same window as in the next picture.

If the test is successful, click the “Next” button, and then “Finish”.
If the test is not successful, do not rush to change the mail server settings. Go to the website where you have your mailbox and log in. And check whether you have permission to access mail for email programs.


This completes the configuration of the main Outlook function. Everything should work.
For ease of use, you can specify in the settings to hide Outlook in minimized form. That is, when you minimize Outlook, it will be hidden in the tray (place near the clock) and will not hang on the taskbar. To do this, you need to launch Outlook and right-click on the icon that appears in the tray. And check the boxes as shown in the picture.

Mail from Microsoft, called Outlook, began to rapidly gain popularity, thanks to its unobtrusive style and convenient functionality, as well as a rich interface that any user can customize for themselves. This article will help you set up your Outlook email, even if you are a new user of the service.
If you already have an Outlook email account, then immediately proceed to point number ten of these instructions. If you want to configure the settings during the account creation process, then stay at this stage.Go to the official Outlook website and click on the blue “Register” button.
- Fill in your profile's basic information.
- Indicate your last name and first name for ease of communication with your colleagues and friends; it is better to use real data.
- Come up with a name for the email address, this is the name that will appear before the “@Outlook.com” part. Just below you will be shown the full email name and the availability of this domain.

Next, indicate your country, your date of birth so that it is displayed correctly in your friends’ calendar, gender, and, if desired, a backup email address and mobile phone. Using the last two points, you can restore access to your account if you forget your password.


This tab can also be useful with the special “Cancel sending” function, which is rarely found in other email accounts.


In the same way, configure the “Filters and Reports”, “Safe Senders” sections, setting priorities.


The entire process of setting priorities and options in Microsoft email takes a lot more time and steps, but after that you will receive a personalized service that meets all your requirements and desires.
With the development of postal systems, many Internet users acquired e-mail and, often, more than one. Therefore, for convenience, many begin to use special programs. For example, Microsoft Outlook. Thanks to this article, you will learn how to configure it correctly using the example of the two most popular services - Yandex.Mail and Mail.ru.
Description and functionality of the program
Before setting up mail, the user needs to understand what Microsoft Outlook is?
MS Outlook is a program that combines the functions of an email manager, organizer, calendar, notebook and contact manager.
How to set up Outlook email?
Having understood the functionality and understanding what kind of MS Outlook program this is, let’s move on to setting up Yandex mail in Outlook. Let's look at synchronizing mail with three versions of Outlook - 2003/2007 (in which the settings are similar) and 2010.
Versions 2010
After starting Outlook 2010:
All further actions are carried out in the current window. If you have the 2010 version installed, then go to .
Versions 2003/2007
In Outlook 2003/2007, this window opens slightly differently:

Further settings in both versions are the same (with minor exceptions) and change only depending on the selected protocol (IMAP and POP3).
Advice! There is no fundamental difference which type of protocol you choose, but keep in mind that the program settings are different for them!
Yandex Mail
Having found the necessary window, let's move on to setting up the program. Let's break it down point by point:
- In the first column you are asked to enter a name, that is, the name of the author of the letter, displayed when viewed by the recipient.
- In the second column, enter the address that you registered (in this case, on Yandex.ru).
- The record type (aka protocol) is only displayed in the 2010 version, since in 2003/2007 we already selected it in the previous step. You can choose any one, but the settings of the following items depend on this.
- The incoming mail server is configured based on the protocol: IMAP - imap.yandex.ru, POP3 - pop.yandex.ru.
- The outgoing mail server for both types is the same - smtp.yandex.ru.
- The user will be entered by filling out the second column.
- Password – the password you set on the website (in this case, on Yandex.ru).
In MS Outlook 2010, remove the “Accounts” check so as not to check until the program settings are completed.
Go to “Other settings”:
- In the Outgoing Mail Server section, you must confirm the need for authentication.

- In the “Advanced” tab, you must select “SSL” encryption.
- Depending on the selected protocol, enter “993” in the “IMAP server” field, “995” in the “POP3 server”, and “465” in the “SMTP server” (in both options). Here you can configure the saving of letters, their retention period, and complete deletion.

- After completing the settings, confirm them by clicking “OK”. Login verification will be carried out.

- Click Next. MS Outlook is configured.
Changes:
- incoming mail server: imap.mail.ru or pop.mail.ru;
- outgoing mail server – smtp.mail.ru;
- changes in the “User” column.
Important! After entering the address, the “User” field will be filled in automatically. Unlike Yandex.Mail, Mail.ru offers different domains when registering, so you need to enter the email completely yourself.
Otherwise, setting up Mail.ru in Outlook is the same as setting up Yandex.Mail.
If you have any questions about setting up your email, write to us. Please indicate what is difficult so that we can help.
After you have selected the mail settings item, you will see a connection window. Here you need to correctly enter the email address you are using and the password for the mailbox. You can enter any name in the “Your name” field; in the future it will be used to sign the letter. In this window, you can connect an account to absolutely any email service, for example, Google or. To connect a mailbox, you must first register on the website of your postal service, for example, for Gmail, register a Google account.
In some versions of Outlook, you will have access to a link to register a mailbox account from Outlook.
The “Manual configuration or additional server types” section is also available. By selecting this item, you can manually enter the types (POP3 or IMAP) and specify the addresses of the incoming and outgoing mail servers, as well as configure the ports for accessing them. This item should be selected when setting up corporate mail or mail registered on separate servers with different types of encryption.
When registering a mailbox, problems may arise with connecting Outlook to an encrypted server; this can happen if the server does not use encrypted connections, in which case the program will automatically switch to using an open connection. When such a notification appears, click “Next” again so that the program switches to a different type of connection to the server.
We recommend using email services that provide a secure connection to the email server. By using this type of connection, you can be sure that no one will intercept your letter on the way to the server.
After completing the settings, you can immediately start working with mail; the program interface will open in front of you, in which you will immediately see all your incoming letters. For more fine-tuning read
Mail settings in Outlook
Now we will look at the instructions, which will describe how to connect an additional box through the program settings.
To enter the mail settings menu, you need to open the “File” menu, which is located in the upper left corner of the program window.
After opening the "File" menu, you need to go to the "Information" section. Having opened this menu, you need to left-click on the “Account Settings” section and select the same section again in the drop-down menu.
After you have selected the “Account Settings” item, a window will open in front of you in which, to create an additional mailbox, you need to go to the “Email” tab, and then select the “Create” button.
If you need to change the settings of a previously registered mail, to do this, select the desired mailbox from the list and click “Change”.
After clicking on the “Create” button, a registration window will open; further steps will be exactly the same as described above.
The "Default" button will help you determine the main mailbox. By marking the desired mailbox with this button, you will set this mailbox as the standard one for writing and sending letters.
In order to delete a mailbox registered in the program, you need to select the one you want and click the “Delete” button. After this action, the mailbox will be removed from the Outlook client, but not from the servers of your mail service, so you can connect it again in the future.
When you delete a mailbox from the Outlook email list, a mailbox file remains in which all letters are saved, so to completely delete all information from your computer, you need to go to the “Data Files” tab and delete the desired file from there.
Interface
The interface of the Outlook email client is quite simple and intuitive; it is also similar to the interfaces of the bazaar versions of email clients. Now we will describe the main components of the interface and its capabilities.
Let's start with the panel on the left side of the window. At the bottom there are 4 icons that will open “Mail”, “Calendar”, “Contacts” and “Notes”. The main section is mail; when you select the next section, its interface will open.
Above are lists of the main sections with separated folders for ease of working with mail. The first list is “Favorites”, in it you can view the common mail folder for all connected mailboxes. This list can be collapsed if necessary.
Below the Favorites list is a list of Outlook Data Files folders. Initially, all folders contained in it should be empty. Messages from all connected mailboxes will be duplicated there, but only fresh ones: those messages that were in the mailbox before it was registered by the system in Outlook will not be included in this list. If you want to move old messages to this list, you can do this manually.
Below there will be sections with incoming and outgoing mail folders for all other connected email accounts. All sent and received messages will be stored in Outlook data files.
When you select one of the folders from the left panel, the entire contents of this folder will be displayed to the right of it, namely the list of messages. The dimensions of such panels can be changed; to do this, it is enough to move the cursor over the border and, holding the left mouse button, move it to the desired distance.
When you select a letter from the central panel, you can display its contents in the panel on the right. Here you will see full details as well as the body of the email. 
In order for you to be able to read all incoming messages from all mailboxes at once, you should place all folders with incoming messages in the “Favorites” list. This way you won’t have to view each inbox separately for each mailbox; all letters will arrive in one folder. To do this, you need to right-click on the desired folder and select “Show in favorites” from the drop-down menu.
If you need to duplicate all old messages located in different folders of different mailboxes in order to read all these messages in one big list. To do this, you need to select the folder from which you want to duplicate messages, then select any message or press the Ctrl+A key combination to select all messages. After selecting the required letters, right-click on any of the selected ones and in the drop-down menu click on the “Move” item, then “Copy to folder...”. After these steps, a window will open in which you need to select the folder corresponding to the type of messages and click OK.
Basic Outlook tools and features
In this section, we will examine in detail the main functions of the Outlook email client for which it was designed.
Creating and sending letters
In order to send a letter, you must click the “Create message” button, which is located in the upper left corner of the window in the “Home” tab. Do not forget that letters will be sent on behalf of the mailbox that is selected by default in the account settings.
In the window that opens for creating a letter, everything is quite simple, fill out the fields and write the desired letter. To attach files, you can either drag x into this window or use the “Attach File” button 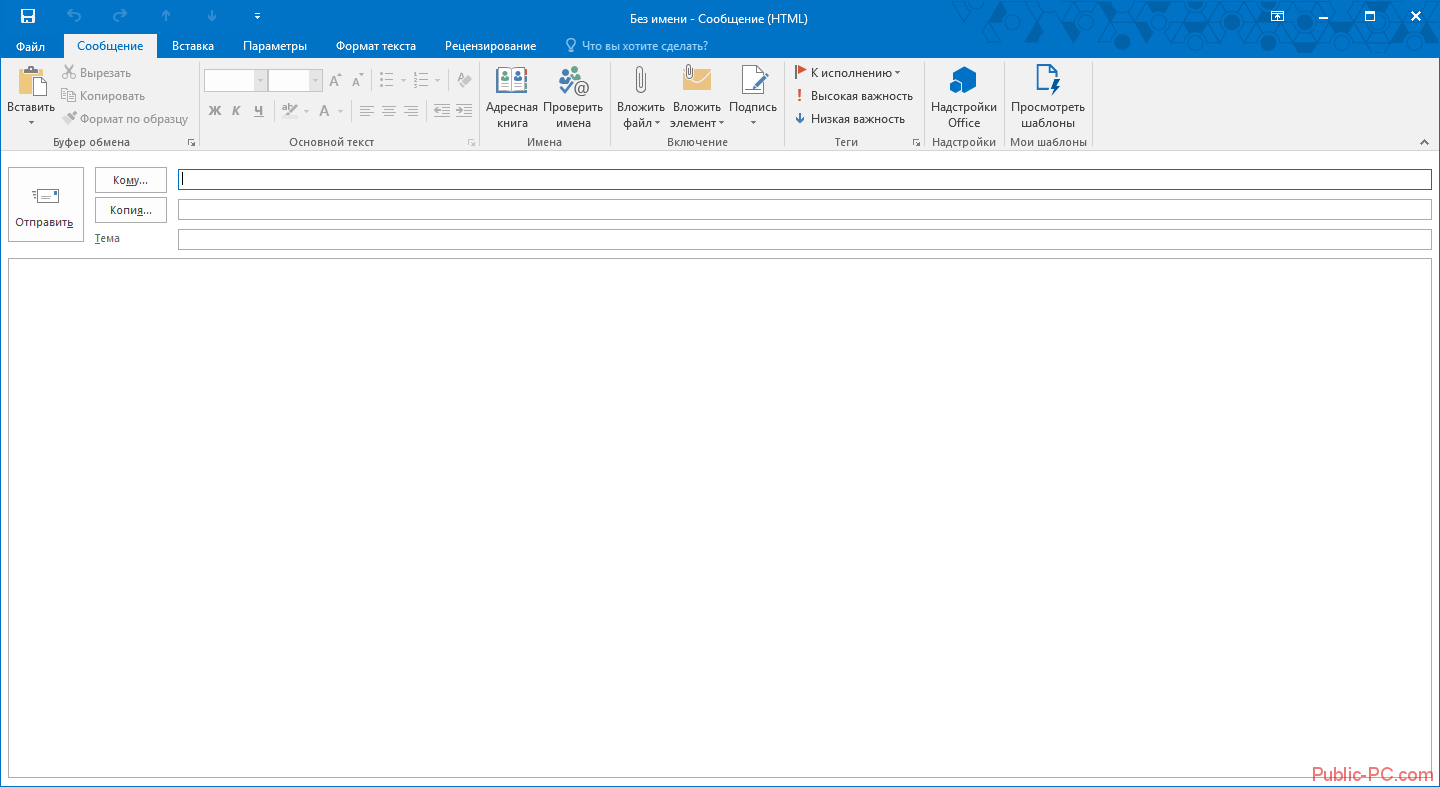
Deleting and restoring emails
Messages are deleted equally for all mailbox folders. To delete a letter, right-click on it and select “Delete” in the drop-down menu, or you can select the desired letter and click the Delete button.
All such messages will not be deleted immediately; they will first be placed in the “Deleted Items” folder and then, after a period of time, they will be permanently deleted. This is done to ensure that you do not accidentally lose important information.
To recover a previously deleted email, do the following: click on the “Deleted Items” folder and the email you want to recover, right-click on it and select “Move” and “Another folder...” in the drop-down menu. After this, a window will open with a list of folders, select the one you need and click “OK”. After that, look for your recovered email in the selected folder.
Error when deleting a message
If an error occurs during deletion, you should take some steps. First you need to clean out the “Deleted Items” folder, right-click on it and select “Empty Deleted Items”. When emptying this folder, a window will appear with two deletion options, you need to perform each option in turn.
If after these steps the error does not disappear and the letter still cannot be deleted, then right-click on the problematic message and select “Move”, then “Another folder...”. In the window that opens with a list of folders, select any from the list and click “OK”. After this, restart the program and try again to delete this message, which is now located in a new folder.
Mail update
In order to update your mailbox and receive or send letters, open the “Sending and Receiving” tab, then click on the “Send and receive mail - all folders” button. After this, the program will connect to the servers to receive incoming letters and send outgoing ones. If you need to update only one mailbox, to do this, select the desired mailbox and in the same tab click the “Update folder” button.
Additional features
The Outlook mail client provides maximum opportunities for convenient work with a large number of mailboxes. One of the necessary functions is to create your own folder hierarchy for your mailbox; you can add your own folders and send letters to them for convenient sorting. This function is not present in all similar programs.
Creating folders
To create a folder, right-click on the mailbox in which you want to create an additional folder, then in the drop-down list, select “Create a folder...”, after which your folder will appear in the hierarchy, then you will need to enter a name for it. To change the order of folders, you just need to left-click on the desired folder and drag it to the desired location.
Creating tasks
The task creation function is also very useful. You can create a task in the task list, set due dates, importance and reminder. You will then be able to stay on top of important tasks and complete them on time.
To create a task, open the task tab; to do this, click on the icon of this function located in the lower left corner. After this, a window will open; to create a task, right-click on the empty area and click “Create task” in the drop-down menu.
When creating a task, a window will open in which you can set parameters, due dates, etc. Once created, this task will be displayed both in the task list and in the calendar.
Create a meeting
Using this feature, you can schedule a meeting of employees by notifying them by mail. If everyone who receives this notification uses the Outlook email client, they will be able to automatically mark the date of the meeting in their calendar.
To create a meeting, you need to go to the “Calendar” section, which is located in the lower left corner and select “Create a meeting” in the top menu, after which a window will open in which you can create a list of meeting participants, set a time limit and date for the meeting. After creating a meeting, click the “Send” button, and everyone who was on the mailing list will receive your email with information about the meeting
Conclusion
The article described only the most basic functions of the Outlook email client. This program has a fairly large number of functions and tools, and can be a good alternative to web versions of email clients.
It is worth noting a very convenient and intuitive interface, which is very important when working with a large number of mailboxes.
To configure the program Microsoft Office Outlook To work with your mailbox, you need to add a new account.
To set up your account you will need the following information:
- your name, which will be displayed in the "From" field for the recipients of your correspondence.
- Mailbox address: your mailbox address in full with domain (for example, [email protected]).
- Login: the name of your mailbox without the domain (for example, user).
- Password: password for your mailbox.
- : for example, smtp.km.ru / Port: 25 (STARTTLS encryption can be used) or port: 465 (SSL encryption can be used). An SMTP server for sending mail requires authorization, it must be enabled in the outgoing mail server settings.
- Incoming mail server (POP3): for example, pop.km.ru / Port: 110 (STARTTLS encryption can be used).
- Incoming mail server (IMAP): for example, imap.km.ru / Port: 993 (SSL encryption can be used).
The process of adding a new account is similar for different versions of Microsoft Office Outlook. There may be differences in the organization of the main menu and some of the names of the settings fields. Below is an example of setting up a mailbox in the interface Microsoft Office Outlook 2013.
If you are using a different version of the program, it will also be useful for you to familiarize yourself with the example. To proceed to creating a new account in other versions of MS Outlook, carefully look through the main menu and find the item. For example, for Microsoft Office Outlook 2007, in the main menu, select "Service", then "Setting up accounts...". In the window that appears, click the button "Create..."(see Fig. 2), subsequent settings will be similar to the example described below.
You can also go to setting up MS Outlook accounts via Windows control panel. To do this, click on the menu button "Start", select item "Control Panel". In the list that opens, find "Mail"- a window will appear "Mail settings - Outlook"(see Fig. 1). Click the button "Accounts"- a list of current accounts will be loaded. To add a new account, click the button "Create..."(see Fig. 2).
Rice. 1. Setting up mail - Outlook.

Rice. 2. Setting up accounts.
Setting up Microsoft Office Outlook 2013
You will go directly to setting up a new account, enter the data (see Fig. 6):
- In field " your name"Indicate your first and last name - this is the name that the recipients of your correspondence will see.
- In field " Email address" - the full address of your mailbox indicating the domain.
- In field " Password" - the password for your mailbox, then confirm it in the " field Password verification".

Rice. 6. Setting up a new account.you can use automatic account setup, in this case press the button successively "Further" until setup is successful. The program itself will determine the necessary parameters for working with your mailbox; this process will take some time. At the end, a window will appear with a message about successful setup and a button "Ready", click it to start working with the mailbox (see Fig. 7).

Rice. 7. Automatic account setup.Or you can use manual configuration, to do this, set the switch to the "Manual configuration or additional server types" position and press the button "Further"(see Fig. 8).

Rice. 8. Manual account setup.When manually setting up an account, in the next step you need to specify the service - set the switch to "POP or IMAP protocol"(see Fig.9) and press the button "Further".

Rice. 9. Manual account setup - Selecting a service.At the next manual configuration step, you need to specify the connection parameters (see Fig. 10). Some fields will be filled in in accordance with the data specified in the first step of setting up a new account.
- In the dropdown list "Account Type" select "POP3" or "IMAP".
- In field " Incoming mail server"enter the server name in accordance with the template pop.[domain].ru (for example pop.megabox.ru), if you selected the "POP3" protocol and in accordance with the template imap.[domain].ru (for example pop.megabox.ru ), if you chose the "IMAP" protocol. The domain can be km.ru, bossmail.ru, boymail.ru, girlmail.ru, freemail.ru, megabox.ru, safebox.ru - use the domain of your mailbox.
- In field " Outgoing mail server (SMTP)"enter the server name in accordance with the template smtp.[domain].ru (for example, smtp.megabox.ru). The domain can be km.ru, bossmail.ru, boymail.ru, girlmail.ru, freemail.ru, megabox.ru, safebox.ru - use the domain of your mailbox.
- In field " User" - the name of your mailbox without specifying the domain.
- In field " Password" - password for your mailbox. Check the box "Remember password", if you don’t want to enter a password every time you start the program. If you do not check the box, you will be asked for a password when you start the program and account.
- Tick " Secure Password Verification (SPA)" does not need to be set. Otherwise, you will not be able to receive correspondence.
- If in the 4th point you chose to configure using the “POP3” protocol, then set the POP3 server to port 110, SMTP server to port 25 (see Fig. 12).
- If in the 4th step you selected the setting using the "IMAP" protocol, then set the IMAP server to port 993 and select the SSL encryption type, SMTP server - port 465 and the SSL encryption type.
- In the next window you will see a message about successful account creation (see Fig. 15). Click the button "Ready" and you will proceed to working with your mailbox.
Open Microsoft Office Outlook 2013. There are two options: You are running the program for the first time after installation, or You have already used the program before.


Rice. 10. Manual account setup - Account settings.
Then click the button "Other settings...". In the window that appears, select the tab "Outgoing mail server" and check the box "SMTP server requires authentication", leave the switch in position "Similar to incoming mail server"(see Fig. 11).

Rice. 11. Manual account setup - Other settings 1.
Go to the tab in the same window "Additionally" and check the port numbers:

Rice. 12. Manual account setup - Other settings 2.
Click the button "OK"- the additional settings window will close.
You can run account verification by clicking on the button "Account verification...", or immediately press the button "Further". When checked "Automatically check your account settings when you click Next" the scan will start automatically.
If you have configured your account using the "IMAP" protocol and use a domain other than km.ru, then when checking your account settings, a warning window "The server with which the connection is established uses a security certificate that cannot be verified" will appear in the field "Should I continue using this server?" answer "Yes".
Wait until the scan is completed. If setup is successful, you will see a message "Congratulations! All checks completed successfully, click the "Close" button.". Click the button "Close"(see Fig. 13).

Rice. 13. Manual account setup - Account verification.
If errors are found during the check (Fig. 14), close the check window and carefully check all the settings; perhaps you made a mistake somewhere.

Rice. 14. Manual account setup - Account verification error.

Rice. 15. Adding a new account.
If you have problems setting up your mail program, please contact