Show hidden files in win 7 folder using Run command
Sometimes there is a need to protect personal files or folders. This is especially true if more than one person is working with the computer. One solution is hiding. Of course, it will not help in the case of an experienced user. But it will hide information from unsuspecting eyes.
How to hide/show files and folders on a Windows 7 computer
Standard method
To hide a file or folder, you need to go through two steps:
Disable visibility of hidden folders

If the “Do not show...” option is set in the settings, then hidden files and folders will still be displayed, with the only difference that compared to ordinary element the label of such objects is duller.
Changing folder/file settings

After these steps, the folder or files will become hidden and will not be displayed.
Enable visibility and view
To show hidden items, you need to go to the folder settings and check the box next to “Show hidden files, folders and drives.” And for a specific object to stop being invisible, you need to uncheck the “Hidden” option.
How to make a folder invisible - video
Via Total Commander
This method is related to the previous one in that in “Folder Options” there should also be a checkmark next to the item “Do not show hidden files, folders and drives”.

How to view files and make them open
To display hidden files and folders, you must click Ctrl keys+ H.
To make documents visible again, you need to use Alt combination+ A and uncheck the “Hidden” box.
Via Free Hide Folder
If you want to make sure that no one can see hidden information, then you can use Free program Hide Folder, which requires setting a password.
Free Hide Folder does not hide separate files. Available for free download in the Internet.
- When you launch the program for the first time, a window will appear in which you need to enter and confirm a password. By the way, you will also need it when uninstalling the program.
- The next window will ask you to enter registration code but this is not prerequisite. To continue working, you need to select Skip.
- Then click on the Add icon and select the folder that you want to hide.
- After the folder is selected, a message will appear indicating that it is advisable to make a Backup. It is advisable to follow the advice.
Backup saves information about the program. If the latter is deleted, then after reinstallation access to hidden folders will be restored.
In addition to Add, the general window has buttons for:

How to find hidden information and transfer it to a flash drive
Free Hide Folder hides folders so that they cannot be found using search. The only way is to open the program and select the Unhide tool. Another special feature is that it does not hide documents located on removable disks.
Because Windows search cannot detect documents hidden using Free Hide Folder, you cannot use copying. Thus, invisible folders cannot be transferred to removable disks.
Using an image and an archiver
For this method you will need a folder with files, any image and the WinRAR archiver. The program is available for free download on the official website. In this case, the processor bit capacity must be taken into account. To find out, you need:

You can take any image, there are no restrictions.
- Add the desired folder to the archive.
- Place the archive and the image in one folder, preferably located in the root of the disk.
- Using the Win + R combination, launch the Run tool, enter cmd line and click “OK”.
- In the command line, go to the folder where the archive and image are located. To do this, enter the cd command and the address. IN in this case this is cd c:\.
- Then press Enter.
- Now in the line you need to write the names of the image, archive and new file. Also, extensions must be specified in all three positions. In this case it turns out: COPY /B Image.jpg + FolderWithFiles.rar ImageWithArchive.jpg.
- Press Enter. If everything was written correctly, a message will appear on the command line indicating that the files were copied.
If you now open the created file, only the image that was taken as a basis will open.
The original files can be deleted.
How to view hidden files
To be able to view files hidden in the image, you need to open the illustration itself using WinRAR.
But the archiver must first be added to the list of programs that can open images:
- In the “Open with” menu, click on “Select program”.
- Click on “Browse” and in the window that opens, find the folder with the archiver.
- Open the folder and select the program launch shortcut.
- Next, WinRAR will appear in the list of programs that can open the image. You also need to uncheck the “Use the selected program for all files of this type” option. Otherwise, all images will be opened using the archiver.
When the user opens the image using the archiver, it will be visible that there is a folder inside.
But don't hide too much information in one file. If it takes up tens of megabytes, even an inexperienced user will become suspicious.
Possible mistakes
How to enable the “Show hidden files and folders” option
Sometimes a situation occurs that the user activates the “Show hidden files and folders” option, but the switch automatically switches to the “Do not show hidden files and folders” position. In this case you need:

Otherwise, the parameter must be created. To do this, right-click on a free area of the window, select “New”, then “DWORD Value”. Call it CheckedValue and give the value 1.
- Go to: HKEY_CURRENT_USER\Software\Microsoft\Windows\CurrentVersion\Explorer\Advanced.
- Find the Hidden parameter (with value 0), type REG_SZ, in the list and delete it.
- If the list contains a Hidden parameter, type REG_DWORD, then change its value to 1. Otherwise, the parameter must be created.
- Find the SuperHidden parameter, type REG_DWORD, in the list and change its value to 1.
- Press "F5" to refresh the editor window and close it.
What to do if Folder Options is missing
This usually means that viruses have entered the system. Perhaps the antivirus simply failed to identify and remove malware. And so that the user cannot visually detect them, the authors of such applications use the “Hidden” or “System” attributes. In addition, the “Folder Options” menu item is removed.
Even if the malware is removed, the antivirus will not be able to restore this item. This will need to be done manually:

Perhaps after virus attack The Registry Editor was not blocked. In this case, you can use it:
- Using Win + R, launch the Run tool, enter regedit line and click "OK".
- Go to: HKEY_CURRENT_USER\Software\Microsoft\Windows\CurrentVersion\Policies\Explorer.
In the right part of the window, find the NoFolderOptions parameter, type REG_DWORD. Double-click LMB to open it and set the value to 0.
Hiding files and folders - simple and quick way protect personal information. Of course, the first two are less reliable, and sophisticated users may accidentally or intentionally discover the secret. But FHF and the archiver will hide personal data even from experienced eyes.
Do you know that in Windows Explorer 7 Not all files and folders are shown? Some of them are hidden. This was done primarily for security reasons, because the user administrative powers may accidentally or unknowingly delete, move, rename something...
However Windows protection 7 method of hiding files is a double-edged sword: on the one hand, the user will not see them and will not be able to damage them, but on the other hand, it creates additional features disguise malware.
So which is better? Make hidden files visible or leave them as is? Optimally, according to the author, it’s like this:
- if you didn't consider yourself one of the experienced users– even if hidden files remain hidden, their visibility will still not mean anything to you;
- If you are well versed in the structure of the system, you can “by eye” distinguish malicious file from legitimate – enable the display of hidden files.
How to show invisible files in Explorer?
For Windows users 7 the whole procedure is carried out as follows.
- Open Control Panel via the Start menu

or the “Run” program, to launch which you need to press “Windows” + “R” on the keyboard and enter the command in the “Open” field: control.

- Open Folder Options.

- Go to the “View” tab. Scroll all the way down the “Advanced options” list. Open “Hidden files and folders”, then check the box next to “Show hidden files, folders, drives”.
- Here, a little higher, there is another parameter responsible for displaying invisible files: “Hide protected system files.” By default, it is selected, that is, protected files are not shown to the user. Uncheck this item and click OK.

- After you uncheck “Hide protected system files,” Windows 7 will ask you whether you have thought carefully and whether you anticipate possible consequences such a choice. If you are confident that your actions are correct, click “Yes”.

Now on the desktop, as well as in other directories, you will see some translucent elements:
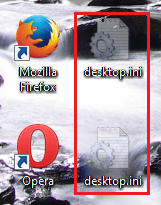
These are the files marked with the “hidden” attribute (a few words about attributes will be said below).
How to remove the visibility of hidden files
To restore the original file visibility settings, you need to open “Folder Options” – “View” again and click the “Restore Defaults” button.

How to hide your file or folder?
Hidden from prying eyes There can be not only Windows 7 files, but also custom ones. And you yourself can make any of your documents invisible, but provided that showing hidden files is disabled in the folder options. How to do it?
File attributes
Files created in Windows can have attributes—characteristics that give them special properties. Here are the most important ones:
- "Only for reading". This attribute marks files that are read-only by the operating system. They should not be modified as this may break the functionality of Windows.
- “System” – files marked with this attribute have more high degree protection than read-only. System files are critical to Windows operation, so they don't show up in File Explorer.
- “Hidden” – files and folders with this attribute are also not shown in Explorer. Hidden files are important to varying degrees for the functioning of Windows; often they are invisible only for the convenience of viewing data in directories.
- “Archive” is an obsolete attribute, inherited file system NTFS from the predecessor of FAT. IN earlier versions Windows used it to mark data for backup.
When you checked “Show hidden files, folders and drives” in the folder options settings, you did visible files with the “Hidden” attribute.
When you unchecked the “Hide protected system files” option, you made files with the “System” attribute visible.
Compare what the “Drive C:” directory looks like with only hidden files shown:

and here it is – hidden and systemic:

This means that to hide your user file or folder, you need to change its attributes accordingly. For this:
- expand with right mouse click context menu the desired file and select “Properties”.

- Open the “General” tab and in the “Attributes” section check the “Hidden” checkbox, then click OK.

The same action can be performed using the command line by running the command: attrib +h “C:UsersUser_1DesktopMoya_Papka” /s /d
- attrib– launch system utility attrib.exe, which sets the attributes of files and folders;
- +h– setting the attribute “hidden”, the “+” sign means “assign the attribute”, and “-” means remove it;
- “C:UsersUser_1DesktopMoya_Papka”– the path to the folder or file whose attributes we are changing; if the path contains non-Latin characters or spaces – quotes are required;
- parameter /s means “apply the action to all subfiles and subdirectories of the folder”;
- parameter /d means “process files and directories”.

Other programs for working with hidden files
You can also view hidden and system files through alternative file managers - Total Commander and its analogues.

To do this in Total settings Commander, as well as in Windows 7 folder properties, the “Show hidden and system files” option must be active. In Total Commander, this is located in the “Configuration” - “Settings” and “Panel Contents” menu.

To use Total Commander to make a file hidden or, conversely, visible, you need to open the “Files” menu, select “Change attributes” and set the appropriate settings in the window of the same name.

Another file manager– console FAR Manager, by default shows all hidden and system files in Windows. Here, what is not visible in the explorer appears darkened.

At the bottom of the table is command line, with which you can assign the desired attributes to any file or directory:

There are other tools for working with hidden Windows files, but what we've covered here is quite sufficient in most cases.
Windows 7 is based on a convenient system for displaying files and folders. They are clearly structured by location and purpose. When installing programs, depending on their operating principle, the files necessary for launching are created and stored in various directories. The most important files(for example, those that store program or user profile settings) are most often located in directories, by default hidden by the system from the user.
At standard viewing folders in Explorer the user does not visually see them. This is done in order to protect critical files and folders from incompetent tampering. However, if you still need to work with hidden elements, V Windows settings It is possible to enable their display.
The most popular hidden folder that users most often need is "Appdata", which is located in the user data folder. It is in this place that all programs installed on the system (and even some portable ones) record information about their work, leave logs, configuration files and other important information there. There are also files for Skype and most browsers.
To gain access to these folders, you must first meet several requirements:
- the user must have administrator rights, because only with such settings can you access the system configuration;
- If the user is not a computer administrator, then he must be granted the appropriate permissions.
Once these requirements are met, you can proceed directly to the instructions. In order to clearly see the result of the work, it is recommended to immediately go to the folder with the user, following the path:
C:\Users\Username
The resulting window should look like this:

Method 1: Activation via Start Menu
- Click on the Start button once and type the phrase in the search box at the bottom of the window that opens. "Show hidden files and folders".
- The system will quickly perform a search and offer the user one option, which can be opened by clicking the left mouse button once.
- After clicking the button, a small window will appear in which the parameters of the folders in the system will be presented. In this window you need to scroll with your mouse wheel to the very bottom and find the item "Hidden files and folders". There will be two buttons at this point - "Do not show hidden files, folders and drives"(by default this item will be enabled) and "Show hidden files, folders and drives". It is to the latter that we need to switch the option. After this you need to click on the button "Apply", then on "OK".
- After clicking the last button, the window will close. Now let's return to the window that we opened at the very beginning of the instructions. Now you can see that a previously hidden “AppData” folder has appeared inside, which you can now enter double click, just like in regular folders. All items that were previously hidden will appear in Windows 7 as semi-transparent icons.


Method 2: activation directly through Explorer
Difference with the previous way is the path to the folder options window.
Hidden directories are directories that, by default, are not visible to the average user in Explorer. Usually hidden from view system folders- like this Windows image protects components important for its operation from accidental modification or removal. To hide files and Windows folders 7 become visible, you need to make some changes to the OS settings.
How to open invisible folders for viewing
Although Windows developers 7 made sure that the directories needed for stable operation operating system, have not been modified by the user. But in In some cases it is necessary to show hidden OS data, for example, for the purpose of removing virus programs, which infected the computer and settled in system folders.
Hidden system components are located on the disk partition on which the operating system is installed. For most users, drive C plays the role of the main volume.
There are several ways to make invisible directories viewable.
Changing folder options
The easiest way is to make invisible directories open to public access, using the “Folder Options” function:

If for some reason you cannot open Options window by pressing the Alt button, use the search function in the Start menu. To do this, simply enter search bar request “Folder Options” - the system will find it itself the desired program and will offer to open it.
Another way to change directory settings is to open the Start menu, go to Control Panel and select Appearance and Personalization. In the contents of the section you will see the item “Folder Options”.
Making changes to the Registry Editor
To perform the algorithm described below, you must be logged into Windows with account administrator, otherwise the system will not allow changes to the registry:

Setting up via Total Commander
Another way to make a hidden folder not hidden is to use Total Commander. Popular the file manager is not only functional and easy to use, but also available for free download:
- Download and run the utility.
- IN top panel manager, select the “Configuration” tab.
- Find the item “Settings: Panel Contents” in the list of elements.
- Check the boxes next to “Show hidden files” and “Show hidden folders" Confirm the changes with the “Apply” button.
- Click OK.
You can check the effectiveness of the method used by going to system partition(that is, opening drive C). If translucent folders called ProgramData and MSOCashe appear there, the process was successful.
If desired, you can make hidden system directories ordinary, so that they do not differ in appearance from the rest. To do this, you should perform the following manipulations:
- Click on the directory whose attributes you want to change, right click mouse and open properties.
- Uncheck the box next to “Hidden” and click OK.
How to make directories invisible
 If there is a need to return the OS to original condition After hiding system data, use the methods described above in reverse order: remove the corresponding marks or change the registry values.
If you share your computer with others and want to protect certain information from prying eyes, You can use another simple way to hide- rename the folder and set a transparent icon for it. This method is not very reliable and is not suitable for system components, but it will help out in case of emergency:
- Highlight the directory you want to hide and press the F2 key and then the Alt key.
- Without releasing Alt, enter numeric keypad on the right is the number 255 (in this case, the Num Lock). If everything is done correctly, you will end up with a folder with an empty name.
- Click on directories right key mouse and open Properties.
- Go to the Settings tab and find the Change Icon option.
- Find the transparent one among the icons and select it. Click OK.
Now a person who does not know about the existence of a folder will not be able to detect it, even if he turns on the option to show hidden files. However, if you click on the location of such a directory the key combination Ctrl+A (Select all), it will not be difficult to notice. So for hiding especially important information This method will not work - it’s better to use special utilities.
All the described methods for viewing hidden folders in Windows 7 will help you see previously invisible directories, and, if you want, hide them from public access again. However, keep in mind that hidden directories usually contain important components, And accidental deletion any of them may entail the need reinstalling Windows. Therefore, it is better not to open system directories unless absolutely necessary.
class="eliadunit">
Often, operating room users Windows systems, in particular one of her latest versions- Windows 7, there is a need to make hidden folders visible in Explorer. You will learn how to do this from this short note. There are two main ways to enable the display of hidden folders in Windows 7. Each of them is quite simple, just one is shorter and the other is longer.
Method one. This is what is shown to schoolchildren and students in computer science lessons. Find the “My Computer” shortcut on the Desktop and left-click on it. At the top, in the very corner of the left side of the screen, you will see the “Arrange” item. Click on this word with the left mouse button. In the window that appears, select “Folder and Search Options.”

Another one will appear Windows window 7 “Folder Options”. Click on the second tab. IN additional parameters Find the “Hidden files and folders” item, check the “Show hidden files, folders and drives” checkbox.

Before closing the window, do not forget to click “Apply” and “OK”. That's it, after completing these simple steps hidden folders will appear on your computer.
Method two. It is not particularly different from the first one and, in principle, is similar to it. So, first, open “Control Panel” from the “Start” menu.


A Windows 7 window will open, where you will need to find the item “Folder Options” - “Show hidden folders”.

The exact same “Folder Options” window will open as we could see using the first method. Using the slider, find the “Hidden files and folders” item, check the “Show…” checkbox, save the changes by clicking on “Apply” and then “OK”.
As you can see, it is not difficult to make hidden folders appear in Explorer or Total Commander. All you have to do is choose how exactly you will do it. Good luck!
I believe that the article was useful!