Managing hard drives in Windows 7. Partitioning and increasing disk size in Windows using Disk Management Tool
The built-in Windows Disk Management utility is a great tool for performing a variety of operations on connected hard drives and other computer storage devices.
I wrote about how to partition a disk using disk management (change the partition structure) or how using this tool you can solve problems with a flash drive that is not detected. But that's not all the features: you can convert disks between MBR and GPT, create spanned, striped and mirrored volumes, assign letters to disks and removable devices, and more.

The Windows Disk Management interface is quite simple and intuitive - at the top you see a list of all volumes with information about them (one hard drive can and often contains several volumes or logical partitions), at the bottom - connected drives and the partitions they contain.
The fastest way to access most important actions is either by right-clicking on the image of the partition on which you want to perform an action, or by the designation of the drive itself - in the first case, a menu will appear with actions that can be applied to a specific partition, in the second - to the hard partition disk or other storage device as a whole.
Some tasks, such as creating and attaching a virtual disk, are available from the Action item in the main menu.
Disk Operations
In this article I will not touch upon such operations as creating, compressing and expanding a volume; you can read about them in the article. We will talk about other operations on disks, little known to novice users.
Convert to GPT and MBR
Disk Management allows you to easily convert your hard drive from MBR to GPT partition system and vice versa. This does not mean that the current MBR system disk can be converted to GPT, since all partitions on it will have to be deleted first.

Also, when connecting a disk without a partition structure on it, you will be prompted to initialize the disk and choose whether to use the Master Boot Record MBR or GUID Partition Table (GPT). (A prompt to initialize the disk may also appear if there is any malfunction, so if you know that the disk is not empty, do not take any action, but take care of recovering lost partitions on it using appropriate programs).
MBR hard drives can be seen by any computer, but modern computers with UEFI usually use the GPT structure, due to some limitations of the MBR:
- The maximum volume size is 2 terabytes, which today may not be enough;
- Supports only four main sections. It is possible to create more of them by converting the fourth primary partition to an extended partition and placing logical partitions inside it, but this can lead to various compatibility problems.
A GPT disk can have up to 128 primary partitions, and the size of each is limited to a billion terabytes.
Basic and dynamic disks, volume types for dynamic disks
Windows has two hard drive configuration options - basic and dynamic. Typically, computers use basic disks. However, by converting a disk to dynamic, you get the advanced disk management features of Windows, including the creation of striped, mirrored, and spanned volumes.

What are each type of volume:
- Basic volume - standard partition type for basic disks
- Split volume - when using this type of volume, data is first saved on one disk, and then, as it is full, transferred to another, that is, disk space is combined.
- Striped volume - the space of several disks is combined, but recording does not occur sequentially, as in the previous case, but with data distributed across all disks to ensure maximum data access speed.
- Mirror volume - all information is stored on two disks at once, so if one of them fails, it will remain on the other. In this case, the system will display the mirrored volume as one disk, and the writing speed to it may be lower than usual, since Windows writes data to two physical devices at once.
Creating a RAID-5 volume in Disk Management is only available for server versions of Windows. Dynamic volumes are not supported for external drives.

You can also create and mount a VHD (and VHDX in Windows 8.1) virtual hard disk in Windows Disk Management. To do this, just use the menu item “Action” - “Create a virtual hard disk”. As a result, you will receive a file with the extension . vhd somewhat reminiscent of an ISO disk image file, except that not only read but also write operations are available for the mounted hard disk image.
While working with a personal computer, it may be necessary to change, add or delete hard disk partitions. If during the initial installation of Windows 7 the creation of partitions takes place interactively and is intuitive, then making changes to the created partitions requires a certain skill. Due to the lack of any experience in these matters, the user may incorrectly perform the necessary actions, which will subsequently lead to complete loss of data or even failure of the hard drive. The Disk Management utility will help facilitate the process of creating and changing disk partitions.
Disk Management utility and its functions
The Disk Management utility is a tool for performing various operations with hard drives and their partitions.
With its help you can:
- create, delete, merge volumes on a disk;
- compress volumes;
- format volumes;
- assign letters for volumes;
- add volumes without rebooting;
- manage local and remote disks on the network.
Opening Disk Management
There are several ways to launch the program.
Via the Start menu
- Click on the “Start” menu and right-click on “Computer”. Select "Management".
Right-click on “Computer” and select “Manage”
- In the “Computer Management” window that opens, click on “Disk Management”.
Select "Disk Management"
- The Disk Management window will open.
Disk Management window
Via command line

Via "Control Panel"
- Click on the “Start” menu and select “Control Panel”.
Click “Control Panel”
- In the search bar, enter “administration” and click on the “Administration” section that appears.
Click on the “Administration” section
- Select “Computer Management” from the list.
Select "Computer Management"
- In the “Computer Management” window that opens, click on “Disk Management”.
Click on “Disk Management”
Why doesn't Disk Management open?
There are situations when the Disk Management console does not open or opens but the console window is blank and the warning “Could not connect to the Logical Disk Manager service” appears.
The reasons that caused this problem to appear may be different. To eliminate their influence on the disk management process, you must perform the following steps:
- Conduct an anti-virus scan. It is recommended to launch an antivirus program from an optical disk or from a protected flash drive. After checking, open the “Quarantine” of the antivirus. If the dmdskmgr.dll library is in Quarantine, then return it to its place.
- Run the command Rundll32 setupapi, InstallHinfSection DefaultInstall 132 %windir%\inf\dmreg.inf through the Start menu and the Run window.
- Go to “Control Panel” - “Administration” - “Services” and make sure that “Logical Disk Manager” and “Logical Disk Manager Administrative Service” are running. If they are stopped, then enable them.
- Enter the basic input/output system (BIOS) menu. To do this, when turning on the computer, press Del, F2 or Esc (the choice of key depends on the computer manufacturer). If the launch panel does not contain information about the connected HDD, then check the connecting cables at the points of connection to the drive.
How to create a logical drive
The very first hard drives, first created by IBM in 1973, contained 30 cylinders, each of which was divided into 30 tracks. By analogy with automatic rifles using the .30–30 Winchester cartridge, such discs were called “Winchesters”. Over time, in colloquial speech the word “Winchester” was transformed into “screw”.
Most hard drives are sold already prepared for installing Windows, i.e. the main partition has already been created on them.
The remaining operations are carried out during the system installation process. Installation is carried out from a bootable optical disk or USB device. At one of the installation stages, a window will appear asking you to select a space to install the system.
If the hard drive was not prepared for immediate installation of the system before going on sale, then all operations will have to be done by the user. To do this, you will need a bootable optical disc or USB drive.

When forming a partition on a hard drive, all free space is used, and additional partitions are created after installing Windows 7.
If possible, it is better to use Windows PE boot, which has Acronis Disk Director or Partition Magic built-in. These utilities are designed to manage hard drive partitions.
Windows Preinstallation Environment (Windows PE) is used to prepare your computer for Windows installation. It is a built-in component of other system installation and recovery tools and is not intended to be used as a primary operating system.
If you don't have a bootable disk like Windows PE, you can:

The created logical drives must be formatted using the format.com utility. Now you can proceed to installing Windows 7.
Hard drive logical drive management
You can manage hard drive partitions through the context menu of each of them. They provide a set of commands necessary for work.
Compressing a Partition
The command to compress a logical drive is specified in the context menu.

Creating a section
A new partition is created in a free area of the hard drive that is not yet part of a formatted volume. At the bottom of the Disk Management console, this space is highlighted in bright green, and in the legend line it is indicated as “Free”.
- Once the partition has been compressed, right-click on the unallocated space and select “Create simple volume” from the context menu.
Right-click on the unallocated space and select “Create simple volume” from the context menu
- The “Create Simple Volume Wizard” will launch.
After launching the “Create a Simple Volume Wizard”, click “Next”
- Specify the size of the new volume.
Specify the size of the new volume
- Assign a letter (letter) to the disk.
Assign a letter to the disk
- We decide on the file system, cluster size and volume label.
- We format the partition.
We format the partition
- In the last window, click on the “Finish” button and create a new logical drive.
Click on the “Finish” button

After reformatting, the volume is ready for use.
Changing the section letter

Merging sections
When there is a need to reduce the number of logical drives, two are merged into one joint logical drive. Before merging, the necessary information from the logical drive being removed is copied to another drive or removable media.
To merge one drive with another:
- Select the volume that we want to attach and call the context menu. Click on “Delete Volume”.
Select the volume, call the context menu and click on “Delete Volume”
- A message will appear in the window that appears indicating that all data on the volume will be deleted. Confirm deletion.
Confirm deletion
- A partition with the status “Free” will appear in place of the deleted volume. Select it and select “Delete partition” in the context menu.
- To attach an empty volume to the desired logical disk, right-click on the section to which the empty partition will be attached, and select “Extend volume” in the context menu.

The disk and file subsystems of a computer are usually not the subject of much user attention. The hard drive is a fairly reliable thing and functions as if on its own, without attracting the attention of the average user at all.
Having mastered the basic techniques for working with files and folders, such a user brings them to complete automation, without thinking about the existence of additional tools for servicing the hard drive. Disk management is completely transferred to the operating system.
The difficulty begins either when the file system shows a clear performance degradation, or when it begins to crash. Another reason for a more careful study of this topic: installing several “screws” on a PC at the same time.
Like any complex device, a hard drive needs regular maintenance. Although Windows 7 partially takes care of these concerns, it is not able to solve all the problems for you on its own. Otherwise, “brakes” are guaranteed over time. At a minimum, you need to be able to do the following things:
- Clean the file system from garbage. The concept of garbage includes temporary files, proliferated browser cookies, duplicate information, etc.
- Defragment your hard drive. The Windows file system is built in such a way that what the user sees as a whole is actually individual fragments of files scattered on the magnetic surface of the hard drive, combined into a chain: each previous fragment is known to each next one. To read a file as a whole, you need to assemble these parts together, which requires a large number of reading cycles from different places on the surface. The same thing happens when recording. Defragmentation allows you to collect all these pieces into one place.
- View and edit information about sections.
- Be able to open access to hidden and system files and folders.
- If necessary, be able to work with several “screws” at once.
And also perform some other useful actions. In our note we will not discuss the entire range of these issues, but will focus only on a few.
How to read partition information?
For those who are not in the know, let us explain: in Windows there is such a thing as a “snap-in”.
This is an executable file with a .msc extension that runs like a regular exe. All snap-ins have a uniform interface and are built on COM technology - the basis of the internal structure of this operating system.
The Disk Management window is also a snap-in. You can run it by typing its name diskmgmt.msc in the “Run” window as shown in the following figure:
 As a result, we will see the snap-in window with the heading “Disk Management”. This is what the application looks like:
 This interface is intuitive and simple. In the top panel of the window we see a list of all volumes (or partitions) available on the “screw” with accompanying information about them, such as:
- Section name.
- Type of section.
- Its full capacity.
- Its status (different sections may have different statuses).
- The remaining free space, expressed in gigabytes and as a percentage of the total.
And other information. The bottom panel contains a list of drives and partitions. It is from here that you can perform operations on volumes and drives. To do this, right-click on the volume name and select a specific operation from the “Actions” submenu.
The main advantage of the interface is that everything is collected here - there is no need to wander through different menus and windows to carry out your plans.
Volume Operations
Let's look at some non-obvious operations with partitions. First, let's discuss the transition from the MBR format to the GPT format. Both of these formats correspond to different types of bootloader. MBR is a classic, but now outdated bootloader format.
It has obvious limitations both in volume size (no more than 2 TB) and in the number of volumes - no more than four are supported. Do not confuse volume and section - these are somewhat different concepts from each other. Read about their differences on the Internet. The GPT format is built on GUID technology and does not have these restrictions.
So if you have a large disk, feel free to convert MBR to GPT. However, in this case, all data on the disk will be destroyed - they will need to be copied to another location.
 Virtualization technology has penetrated everywhere. It didn't bypass the file system either. If you wish, you can create and mount so-called “virtual disks”.
Such a “device” is a regular file with the .vhd extension and can be used like a regular physical device - both for reading and writing.
This opens up additional opportunities for cataloging information. This concludes our story. Disk management in Windows 7 is a fairly broad topic, and if you dive into it, you can discover a lot of new things.
» How to partition a hard drive in Windows 7?
How to partition a hard drive in Windows 7?
Do you have a laptop with Windows 7? Then you may be faced with having only one local drive C. This may not be convenient: if you need to reinstall the system or perform a rollback, all important information will need to be manually transferred to external media first. Afterwards you can format the local disk and then install the operating system. Having several local disks will allow you to initially save the necessary information in a partition other than the one containing system files. This will allow you to format your local drive C without fear of losing important files. Therefore, for convenience and greater reliability, the hard drive needs to be divided into partitions.
The procedure is quite simple; it does not require downloading additional software. After all, Windows 7 has a built-in utility that makes it easy to partition a disk. The partitioning will take place without losing any information, so there is no need to transfer files to external media before the procedure. Partitioning a hard drive and creating new partitions is only possible if there is sufficient free space.
How to access Disk Management in Windows 7?
- Just go to “START” and enter “diskmgmt.msc” in the search. The application of the same name will need to be opened.
- If you want to run the application with administrator rights, then just press “Win + R”, then also enter “diskmgmt.msc” and press the “Enter” button.
- Also in Windows 7, you can go to the “disk management” section using the control panel (Control Panel -> Administrative Tools -> Computer Management -> Disk Management)

In the top center you can see the available hard drive partitions. Below is the number of physical hard drives, optical drives, and external drives that have been installed. In the image, drive C is already partitioned, so the partition will be shown using drive “J” as an example, which is not significant.
Creating a new partition
To create a new partition in Windows 7, you can use unallocated space, but you may not have it. To create it, just do:
- You need to select a partition that has enough free space and right-click. After this, you need to select the “compress volume...” item. Remember, if you have several partitions, it is better to compress not the system volume.

As a result, a window will pop up, just wait for the process to complete.

- After some time, a new window will open where you will need to specify the size of the space that you decided to shrink. The maximum value will already be indicated in the window that appears, but you can specify a smaller size. The value you specify will be the size of the future logical disk. Remember that the compressible disk will be reduced by this amount, so using the maximum value is not recommended. After entering the required value, just press the “compress” button.

You will need to wait some time, which depends on the fragmentation of the shrinking partition and its volume.
Convert to hard drive partition
After these manipulations, an additional partition will be created in the “Disk Management” window with a black stripe at the top. The size will be listed here, along with the word “Unallocated.” This space needs to be converted into a hard disk partition. You need to right-click and select the line “Create a simple volume”.


Just select the maximum size and click “Next”. Finally, you will need to assign a letter that will be the “name” of the disk and click “Next”.

Then you need to check the box next to “Format this volume as follows:”. Specify NTFS in the file system. And set the cluster size to default. The "volume label" is the name of the disk that was created. You must check the “Quick Format” box, but there is no need to compress files and folders. After this, just click “Next” and you will see the message: “Completing the Create Simple Volume Wizard.” You need to check everything again and click the “Finish” button.

As a result, we managed to split the HDD using Windows 7 tools. Everything is ready to go. After completing the procedure, you no longer have to fear that personal information will be deleted during system recovery.
It must be remembered that one hard drive allows you to create only 4 main partitions.
What to do if the Windows 7 disk failed to partition?
When partitioning a disk in Windows 7, difficulties may arise due to the presence of files on it (hidden and system) that could not be moved to another location.

In this case, you need to use third-party utilities (Acronis or Paragon), which also allow you to partition the disk. You can also boot from any OS boot disk, and then defragment the department.
To partition a disk in Windows 7, you must have administrator or archive operator rights on this PC. With Windows 7 features, you can shrink a volume to a file size that cannot be moved.
Each of us has encountered a problem when a computer or laptop starts to freeze and slow down. But not everyone knows that it is most likely related to the operation of the hard drive (as the slowest link in the system performance chain). Fortunately, this problem can be solved at home, without getting up from your chair, just optimize the operation of your hard drive.
Optimizing your hard drive in Windows 7
The need to optimize a hard drive arises due to the accumulation of a large amount of unstructured and unnecessary junk on it. Your task will be to literally “clean” the hard drive. But first things first.
Advanced Disk Cleanup
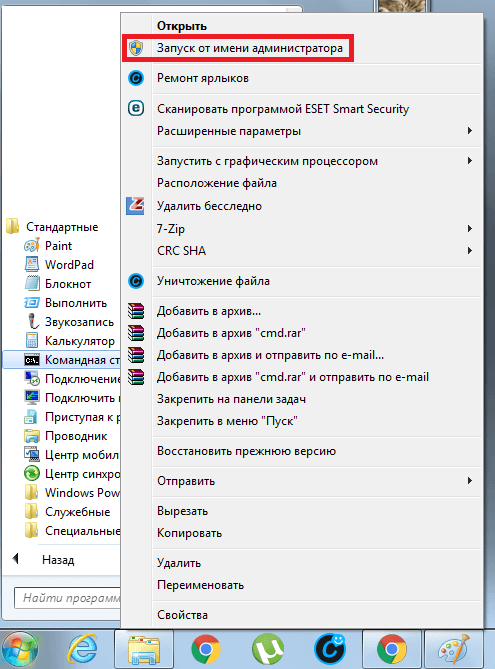
Advanced Disk Cleanup is a tool provided by the Windows 7 operating system itself. To perform this procedure, you need to open Command Prompt in one of two main ways:
- Through the Run window:
- From the Start menu:
- Type %systemroot%\system32\cmd.exe /c cleanmgr /sageset:65535 & cleanmgr /sagerun:65535 and press Enter.
 To call advanced hard drive cleaning, enter the command in the “Command Prompt”
 - Review the list of files and select those you want to delete. Pay attention to each point: delete only what you no longer need.
 Select the categories of files you want to delete
Disk Defragmenter
When writing a file to disk, Windows can distribute parts of it to any free cells on the disk. This makes it more difficult for the system to access it if it is a large file, such as a movie, and it is located in several places on the hard drive. Defragmentation allows you to overwrite all files one after another for faster access to them.
Windows 7 has a built-in defragmenter program. You can call it through the search bar in the Start menu.
 Find Disk Defragmenter by searching in Start
 Video: how to defragment a disk in Windows 7
Windows 7 optimization program for using SSD drives
SSD Mini Tweaker is a portable program for tuning the operating system to use SSD drives. It is needed in order to fully experience all the delights of using SSD drives on the Windows 7 operating system.
For some inexplicable reason, Microsoft developers do not create targeted software for working with SSD drives. There are a number of settings that prohibit overclocking SSDs, and to disable them all, you need to suffer. Therefore, enthusiasts created the SSD Mini Tweaker program, which allows you to configure the system in one click.
The operating principle is very simple. You download the program, run it and click the “Apply changes” button, since all the settings are already checked.
After successfully completing the program's action, restart your computer and enjoy the fast speed of your computer.
Video: How to use SSD Mini Tweaker
How to open Disk Management
Direct work with disks, their renaming or partitioning takes place in “Disk Management”. There are several ways to open this utility:

Video: How to open Disk Manager
What to do if the dynamic disk is invalid
There are often cases when, after reinstalling the Windows 7 operating system on computers with two or more hard drives, a problem arises in which one or more hard drives become unavailable for operation. At the same time, they are connected, detected and operational. In this case, they became dynamically invalid, that is, unsuitable for running on this operating system.
The solution to this problem is very simple:

Once the conversion process is complete, restart your computer for the changes to take effect.
Some mechanical and software damage to disks leads to their conversion to dynamic ones. In this case, only service center specialists will help you.
Video: How to convert a dynamic disk to a basic one
What to do if a hard drive failure is detected
Whatever the reason for the hard drive failure message, it does not bode well for you.
There are two types of errors:
- physical;
- logical (software).
The first ones occur when the magnetic layer of the disk surface is damaged. In this case, rather save the data on a safe medium, since sectors and blocks of the hard drive will deteriorate one after another, and feel free to go to the store for a new hard drive.
It is best to save data using another computer, connecting the hard drive as a second drive. And after performing all operations, carry out resuscitation procedures. The most popular utility for treating disk damage is MHDD. To restore damaged sectors, low-level formatting (ERASE) is used. And if after this you continue to have problems returning the hard drive to its place, then the problem is of a physical nature.
Video: what to do if Windows detects hard drive problems
How to format a disk to install Windows 7
When installing a new operating system, formatting is already built into the installer to put Windows on a fresh and clean disk. This helps solve many problems, such as, for example, a conflict between the old and new systems.

Make sure you select the correct drive to format, otherwise you may lose important information.
A program to format a disk before installing Windows 7
The most popular disk formatting program is Acronis Disk Director:

Video: how to format and repartition a hard drive when installing Windows 7
Disk programs
As mentioned above, some stationary utilities from Windows 7 are not the highest quality products for solving certain problems when working with a hard drive. Therefore, companies and enthusiasts are creating more convenient and functional software for working with disks.
Disk Cleanup Program
“Computer Accelerator” is a powerful program for cleaning your computer from unnecessary junk. "Top Sales" is the most powerful utility for cleaning your computer. The program is distinguished from others by its convenient and understandable Russian-language interface. It has a huge number of built-in functions, from controlling startup to cleaning the system from broken shortcuts.
Hard drive cloning program
EASEUS Disk Copy is a free and high-quality utility. Its advantage over its competitors is that it has the ability to work from a boot disk or flash drive.
This makes it universal.
The simple interface and quality of work also add points to the “usefulness” of this application.
Program for recovering hard disk partitions
Recuva is the most famous program for recovering deleted files. It is known for its multifunctional interface. You can choose to search and display files of only one category, for example, photos or text documents.
Without any competition in the disk emulation market for Windows, the best and most developing program is DAEMON Tools.
The program supports all existing disk image formats, and new versions are constantly being released. The advantages also include support and work with several virtual drives at the same time.
Sooner or later there is a need to improve the performance of your hard drive. Luckily, there are many ways to optimize it. But it should be remembered that actions to improve the performance of the computer should be carried out from time to time in order to extend the life of the hard drive.