How to compress a PDF file. How to Compress a PDF File (Working Methods)
The question of reducing the file size in pdf format is often raised by active computer users. This is due to the large weight of the scanned images. Because of this, the document takes up hundreds of megabytes on disk. Let's look at the problem in more detail.
Using Adobe Reader
You can reduce the size of your document using the free version of Adobe Acrobat Reader. The compression feature is only available with a paid subscription. The utility is installed without any problems, so let’s get straight to work.From the initial menu, go to the “File” tab. Click on “Open” and select the document. In this example, we will use a textbook weighing 69.9 MB. It consists entirely of scanned pages of the printed publication. You can also open a document by clicking on it in the file manager. Go to the menu shown in the screenshot.

Leave the default values in the called window. Select a location to save the compressed pdf. The example file now weighs 33.3 MB. The compression took about two minutes. The quality of the images has deteriorated. This may not be noticeable on a website or computer. However, after printing, the illustrations will be fuzzy or completely blurry. The disadvantage of this method is that there is no flexible setting for an advanced user.
If you need to set additional parameters, the optimizer will help. Open the document we need. Click on the button shown in the illustration below.

There are few settings, but they look difficult to master. Let's define the main ones. They are located in the left menu “Images”. Downsampling determines the resolution of images. To the right of the parameter you can set ppi (pixels per inch). Highly not recommended for printing. It is recommended when placing illustrations on the site. Below you can set the compression type. ZIP is used for simple images with a predominance of one color. JPEG - for any images. Its improved version is JPEG2000.

After setting, select a location to save the file. Let's compare the quality of the optimized document and the original. On the left is the original file, on the right is the compressed file.
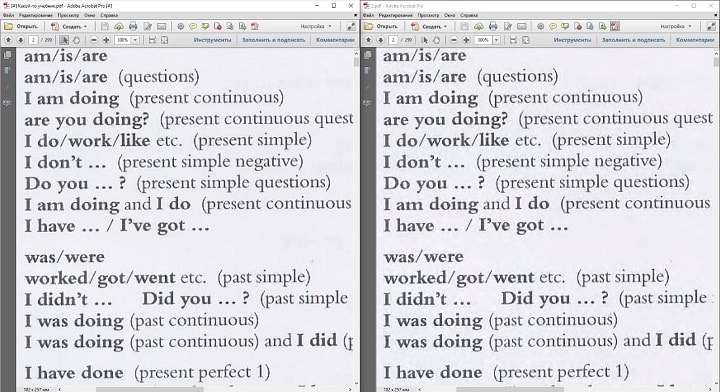
Changes in quality are invisible even when the image is enlarged three times.
Using third party software
PDF Compressor is suitable as a free analogue.
The intuitive interface and light weight of the program will appeal to any user. In the upper left part of the window, you must click the “Add Files” button to open the document. You can also drag the file directly into the program's work area.
To optimize, click “Start Compression”. The button is located at the top center. First you need to set the compression parameters by clicking the “Compression Settings” button.

After opening the settings menu, you will be notified about purchasing a license. It is needed to fine-tune the compression. Click “Continue” and check the boxes in the “Compression” and “Optimization” tabs. Close the window and click “Start Compression”.
During the compression process, the weight of the example textbook decreased from 69.9 MB to 56.9 MB. Let's compare the quality. On the left is the document before optimization, on the right is after.
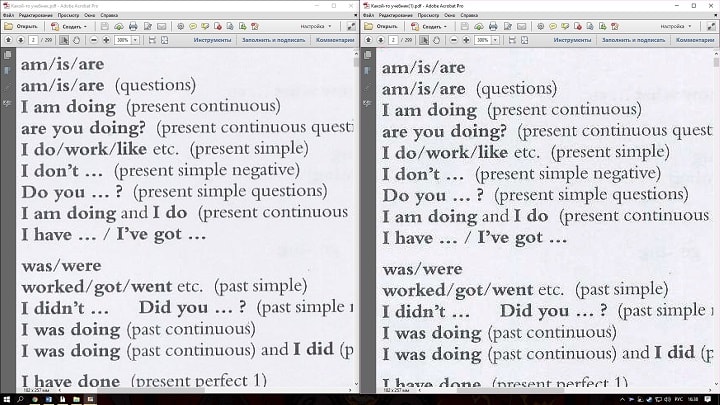
The result is worse than Adobe Acrobat Reader. There is now noticeable distortion in the compressed file. The advantage of the program is that you can compress the file absolutely free. As a result - worse quality and larger size. The utility logo is also added to the first page.
Using WinRAR
WinRAR is a free program with the option to purchase a license. Designed to place files in an archive and then compress them. The quality does not change. The original can be retrieved from the archive at any time.The utility work area displays your computer's file system. Select the folder to create the archive. Click on “Add”. The button is in the upper left corner. Here is the archive settings menu.

We are interested in the “Compression method” drop-down list in the “General” tab.

Their names speak for themselves. High-speed is less time-consuming and also has a low compression ratio. Maximum has the opposite characteristics.
Documents are added from the “Files” tab.

The file from the example was compressed in a few seconds. The file weight has changed from 69.9 MB to 68.3 MB. Conclusion: WinRAR does not work well with pdf files. The advantage of the program is that the original is preserved unchanged.
Using the online service ILovePdf
A convenient solution is web services for working with pdf files. ILovePdf can not only edit the contents of a file, but also reduce its size.
We start by clicking the big red “Select PDF files” button. An explorer will open where we specify the path to the pdf document.

After selecting it below, the compression settings will appear. They don't need any comments. Let's leave the recommended parameters. At the very bottom there is a “Compress PDF” button. Let's click on it.
After the compression process, we get to a new page and click on the big red button again.

In the screenshot above we were also informed about changes in document weight. Instead of 69.9 MB, the textbook now weighs 55.9 MB. The result is similar to that of the PDF Compressor application. The difference is that you don’t need to download or install anything. Let's compare the quality. On the left is the optimized document, on the right is the original.

A slight loss of quality is noticeable; it does not affect the perception of information.
Using the SmallPdf online service
This service allows you to download files from Google Drive or DropBox. From a computer, documents are sent through Explorer or by dragging a file into a browser window.
Click on the big red button. To reduce the file size in pdf format, you don't need to click anything. It happens immediately after loading. Then download the document by clicking on the “Download file” button.

From the service, the document can be sent to Google Drive or DropBox (adjacent buttons). The illustration shows the volume of the compressed document. The file size has changed from 69.9 MB to 59.2 MB. Slightly more than the previous service. Let's check the quality. On the left is the compressed pdf, on the right is the original.

SmallPdf was able to compress the file with virtually no loss of quality. The downside of the service is the lack of compression settings.
To conclude, archivers do not work well with PDF documents, and the best compression method is online services and the standard Adobe tool.
PDF files can be compressed for different purposes or you need to reduce the PDF size for various reasons. Let's think about the resume you submit via the Internet and mail. PDF files cannot be noticeably large when sending them by mail if you want the PDF file to reach the recipient. The mailbox is not always large and of course there is a risk that the recipient's mailbox will not accept your PDF file. Inexperienced users do not pay attention to file size. A PDF file of your resume can sometimes be very large if you haven't paid attention to certain points. Resumes often contain images and this is why PDF files become large; this is something that is often overlooked because the user did not pay enough attention to it when the file was created.
In case you want to take care of PDF size but have never done this before, don't worry, we have developed a small program that takes care of this task. This program is part of PDF24 Creator and is called PDF24 Compress. You can download the latest version of PDF24 Creator right now from this page. The program is free and used by millions of users. PDF24 Creator is a utility that solves the problems of creating PDF files.
Install PDF24 Compress
The PDF24 Compress utility is part of the PDF24 Creator. Download the free PDF24 Creator from this page, download and install the application. After downloading, simply double click on the downloaded file. The installer will launch and guide you through the installation process. Once installed, you will be able to launch the PDF24 compression program on your desktop. Click on the PDF24 icon.
Compress PDF files with PDF24 and reduce PDF file size
Launch PDF24 Compress. Open your PDF file that you need to shrink. To do this, use the corresponding icon or simply drag it to the list of files. Your PDF files will appear in this list.
This utility downloads the file and shows the current size and the size after compression. Using the basic options, you can control compression. Customize the settings according to your preferences. Information about each parameter is built into the utility. After setting the parameters, click on the “Recalculate Size” icon to calculate the new file size. If the file size is within the range you expect, you can see the result and compare the quality with the original. If the compression result and quality are satisfactory, you can save your compressed PDF file. Otherwise, you simply change the settings and then try again.
With PDF24 Compress you can reduce the file size significantly in some cases. Depending on the original file and the parameters used, a reduction of more than half the original size is common.
Compress PDF files online
If you don't want to install any software or need an online tool to reduce the size of PDF files, PDF24 is also suitable for this. PDF24 provides you with various free online PDF utilities that can help you solve PDF problems easily. You can also shorten PDF files with one of these utilities
What You'll Be Creating
PDF format is a common format for creating digital documents and commercial materials of good quality, ranging from professional tasks to an invitation for mom to Christmas dinner.
While design elements make your document attractive, they also inflate it like a balloon, making it difficult to transfer and download. Moreover, conventional compression tools create copies with blurry images, which reduces the quality of your pdf document.
In this tutorial, I'll show you how to reduce the size of a large PDF file on any computer without compromising image quality, so you can send high-quality documents without worrying about people receiving a file with blurry images.
For Mac: Using Quartz Filters
The Preview app built into OS X is designed to perform basic operations with PDF files, from viewing, annotation, to compression. To compress PDF, just click File > Export...>Quartz Filter (File → Export… → Quartz Filter) and select Reduce size (Reduce file size).
Although Preview can shrink your PDF, it will not preserve the quality of your images.The problem with Preview's built-in compressor is that your images lose a lot of quality, causing them to appear blurry and sometimes unreadable in your PDF file.
The solution is to use custom quartz filters, which provide a balanced option by reducing file size while maintaining image quality throughout the document.
In this tutorial we will install and use Apple quartz filters from Jerome Colas to reduce a 25 MB PDF file to a more manageable size. You can also download the filter from this Github page.
Step 1: Place the quartz filters in the ~/Library directory.
The first step is to install Apple quartz filters on your computer, in the Filters folder in the system Library folder.
To do this, download quartz filters to your desktop and unpack the archive. Launch Finder and use keyboard shortcuts CMD+SHIFT+G to bring up the drop-down menu Go to folder. Press enter to go to the Library directory.
Thanks to Jerome Colas for creating these amazing filters for everyone.Once you are in the Filters folder, paste the quartz filters into it. If you don't have a Filters folder, create a new directory and name it "Filters".
Clue: Some people prefer to have these filters only available for their account. To do this, you need to create a Filters folder inside the user's Library folder. To do this, click CMD+SHIFT+G, and type the following:
/Users/
and press Enter. If the Filters folder is not in this directory, create it.
Step 2: Launch Automator and Create an Automator Application
The next step is to create an Automator application that will compress any PDF file using the filters we just installed.
Launch Automator and create a new document. Click on Application and then on the blue button Choose to create a process.
You can simplify the process of compressing PDF files using Automator.On the left side is the Automator library. Use the search field to find Apply Quartz Filter to PDF Documents, which you will need to drag to the right side of the window to create a process.
I also recommend adding Copy Finder Items to your Automator processes. I'll show you now.A message will appear in a drop-down window asking you if you would like to add to processes Copy Finder Items(Copy Finder). I strongly recommend that you do this because it will save you from the problem of finding the source file in case the compression result does not suit you.
You can choose either standard compression settings - 150 dpi or 300 dpi.The final step is to select the quartz filter that you will use to compress the PDF file. If you installed the quartz filter I recommended in Step 1, you should see it listed when you click the Filter drop-down menu. Once you select a filter, give the application a name and save it to your desktop.
Step 3: Upload your PDF file to the Automator Created Application
From now on, file compression becomes a very simple task. To use the Automator app, simply drag the icon of your PDF file and drop it onto the app icon. It will generate a compressed copy of your file. The size will depend on the quartz filter you selected when creating the application in Automator.
For my 25 MB PDF file, I chose the 150 dpi filter, which comes as a standard option for almost all files. The compressed file was about 3 MB, and the image quality was quite acceptable, including small pictures.
Since the images in the compressed file are blurred just a little, overall the quality can be considered acceptable.You can change the quartz filter to get higher or lower quality, depending on your preferences. Just save your changes in Automator and compress the original file for testing ( Copy Finder Items This is exactly where it will come in handy for you).
On Windows: Resize Your PDF File with SmallPDF
On Windows, the easiest way to get a compressed PDF file is to create a new Word document or Powerpoint presentation, select "save as PDF", and select the option Minimum size before saving the file to your desktop.
And while this works well for text documents, the quality may suffer significantly if you used any design to make your document more interesting. You can also then export them to a compressed format, but again, the quality of the document will suffer.
Windows users have a very limited set of PDF compression tools at their disposal.A common method for optimizing and compressing your PDFs is to use commercial products such as Adobe Acrobat Pro and InDesign, both of which provide high-quality results and a range of options if you have access to them as part of a Creative Cloud subscription. There are free computer applications such as PrimoPDF, but when using them I noticed that either the quality suffers or the program significantly changes the file compared to the original.
Instead, you can use an online tool called SmallPDF, an online application with a set of tools for working with PDF files that you can use wherever you are, whenever you need it (and since it's an online application, you can use it is also available on Mac, Linux, or Chromebook computers). One of these tools is Compress PDF, with which you can significantly reduce the size of your file by dropping it into an application or selecting a file on your hard drive.
Besides its great design, SmallPDF can do a great job for a free tool.I tested the app using my 25MB PDF file and it was compressed to 2MB, which is great for online publishing and mailing. The quality suffered a little, but it was quite acceptable, especially compared to how other Windows applications designed for a similar task cope with this.
What do you think
What do you use to compress PDF files to maintain image quality? Share your tools and techniques below in the comments.
Sources used: Document Icon - Designer
It’s probably not news to you that the pdf format is widely used in all areas of activity due to its “weight” and its image quality. Why did I focus on “weight”? Because usually this file weighs a lot due to the many colored, bulky and bright graphs and so on. Therefore, today we will look at the question: “how to reduce the size of a pdf file,” since most people have questions about this very issue. Some people even prefer using other programs because of this problem. Compressing PDF files is a process that requires the use of special software. To reduce the file size, you can use the following programs: Adobe Acrobat, using standard Windows compression. Adobe Acrobat can be downloaded from the developer's website.
How to compress a pdf file?
Method using Adobe Acrobat
In order to reduce a pdf file, open Adobe Acrobat, then click on the “File” - “Open” tab in the main menu - these actions give us the opportunity to open the file required for compression. Then repeat the steps “File” – “Open” – “Save as another” – “ Reduced PDF file size" In the window that appears, select the version compatibility setting and click “OK”; in order to apply the settings to several files, click “Apply for all”, to save you need to click “Save As”.
Method for reducing file size in Adobe Acrobat using PDF optimizer
As you noticed, Adobe Acrobat makes it possible to reduce the file size in a convenient way for us. First, you need to select the documents that need to be reduced in size. To do this, we need to click on the “File” – “Open” tab in the main menu. Then we repeat the same steps, then click on “Save as another” - “ Optimized PDF file" Then you need to adjust the settings to your taste and save the file by clicking on the “Save As” button.

Method for reducing the weight of a pdf file according to OS Windows standards
In order to achieve the best quality and lightest weight, OS Windows developers strongly recommend using standard file reduction before starting work on it. This can be done by right-clicking on the file you created – “Properties” – “General” – “Other” – then you need to check the box “Compress...”. This procedure takes no more than one minute and is one of the most effective.
If you need to send a document, PDF– an ideal format compatible with multiple operating systems (including Windows, Mac and Linux). PDF files are not only versatile, but they are also quite secure, allowing users to assign passwords for particularly sensitive documents.
However, one notable disadvantage for PDF files is their size. PDF files can often be bulky, making them difficult to send via email. Luckily, there are a number of tools you can use to reduce the size of these files.
Reduce PDF file size
One simple and effective way is to use Adobe Acrobat Reader. Open the program, then open PDF file, which you want to make smaller. Select Document > Reduce file size.PDF Compression Software
It is also worth paying attention to such popular file compression programs as WinZip, WinRAR or 7ZIP. In most cases, they can help you create lighter versions of PDF files.Reduce PDF File Size on Mac
Users Mac can compress PDF files using the features available in the application View (Preview).Open the file PDF by using Preview and go to menu File > Export.
Select filter Quartz and then select Reduce file size (Reduce file size). Click Save (Save) to finish compressing the file.
Compress PDF file online
You can also find many free tools on the Internet that can compress your PDF files.Smallpdf
Smallpdf, a free PDF editing site, helps you easily reduce the size of your PDF files online. The site includes an automatic compression feature, which makes the process very fast. Then you can download the new compressed file.The file compression process itself consists of two stages. Go to Smallpdf and drag your file into the box using your mouse or click Choose file (Select file) to find and download the PDF file from your computer:

Wait for the automatic compression process to begin, then download the finished file for yourself.
PDF Creator
PDF Creator is a program with several interesting features that can help you create PDF files easily. During installation PDF Creator creates a virtual printer that allows you to save documents (Word, Excel, etc.) in the format PDF.After installation installation PDF Creator, open the file with Acrobat Reader. Click Seal and select PDF Creator virtual printer (PDF Creator virtual printer).
Then open Properties > Paper/Quality and press Additionally.
Select Print quality and reduce DPI(permission) of the file. After starting the print job, a new lighter version will be created PDF file.
Image: © Oleksandr Yuhlchek - Shutterstock.com